When providing member-specific information on an actual website, it is sometimes necessary to combine a login authentication mechanism to operate the site. Here, we introduce how to use Auth0.
Using Auth0
2024-12-03|2025-07-14
What is Auth0?
Auth0 is a cloud-based service that simplifies the authentication and authorization process.Designed to enable developers to quickly integrate authentication features such as single sign-on (SSO), multi-factor authentication (MFA), and social login into their applications, Auth0 can be used to enhance security and improve the user experience.
The main features of Auth0 are as follows
- Single Sign-On (SSO): Allows users to access multiple applications with a single login.
- Multi-factor authentication (MFA): provides an additional layer of security and prevents unauthorized access.
- Social Login: You can login using your social media accounts such as Google, Facebook, Twitter, etc.
- Customizable Authentication Flow: Customize the authentication flow to meet the needs of your application.
- Scalability: Can be used from small projects to large enterprise applications.
By using Auth0, developers can reduce the time and effort required to implement authentication functionality and focus on the core functionality of their applications.
About Free Plans
Free Auth0 plans are available.This free plan will be extended on September 24, 2024.
The following is the range of services available with the free planThe range of services available with the free plan is as follows.
| Feature | Free |
|---|---|
| MAUs | 25,000 |
| Social Connections | Unlimited |
| Okta Connections | Unlimited |
| Organizations | 5 |
| Actions + Forms | 3 |
| Passwordless | OK |
| Custom Domain | OK |
In this case, we will apply for this free plan and create an account so that we can use it for demos and other purposes.
Sign-up to Free plan
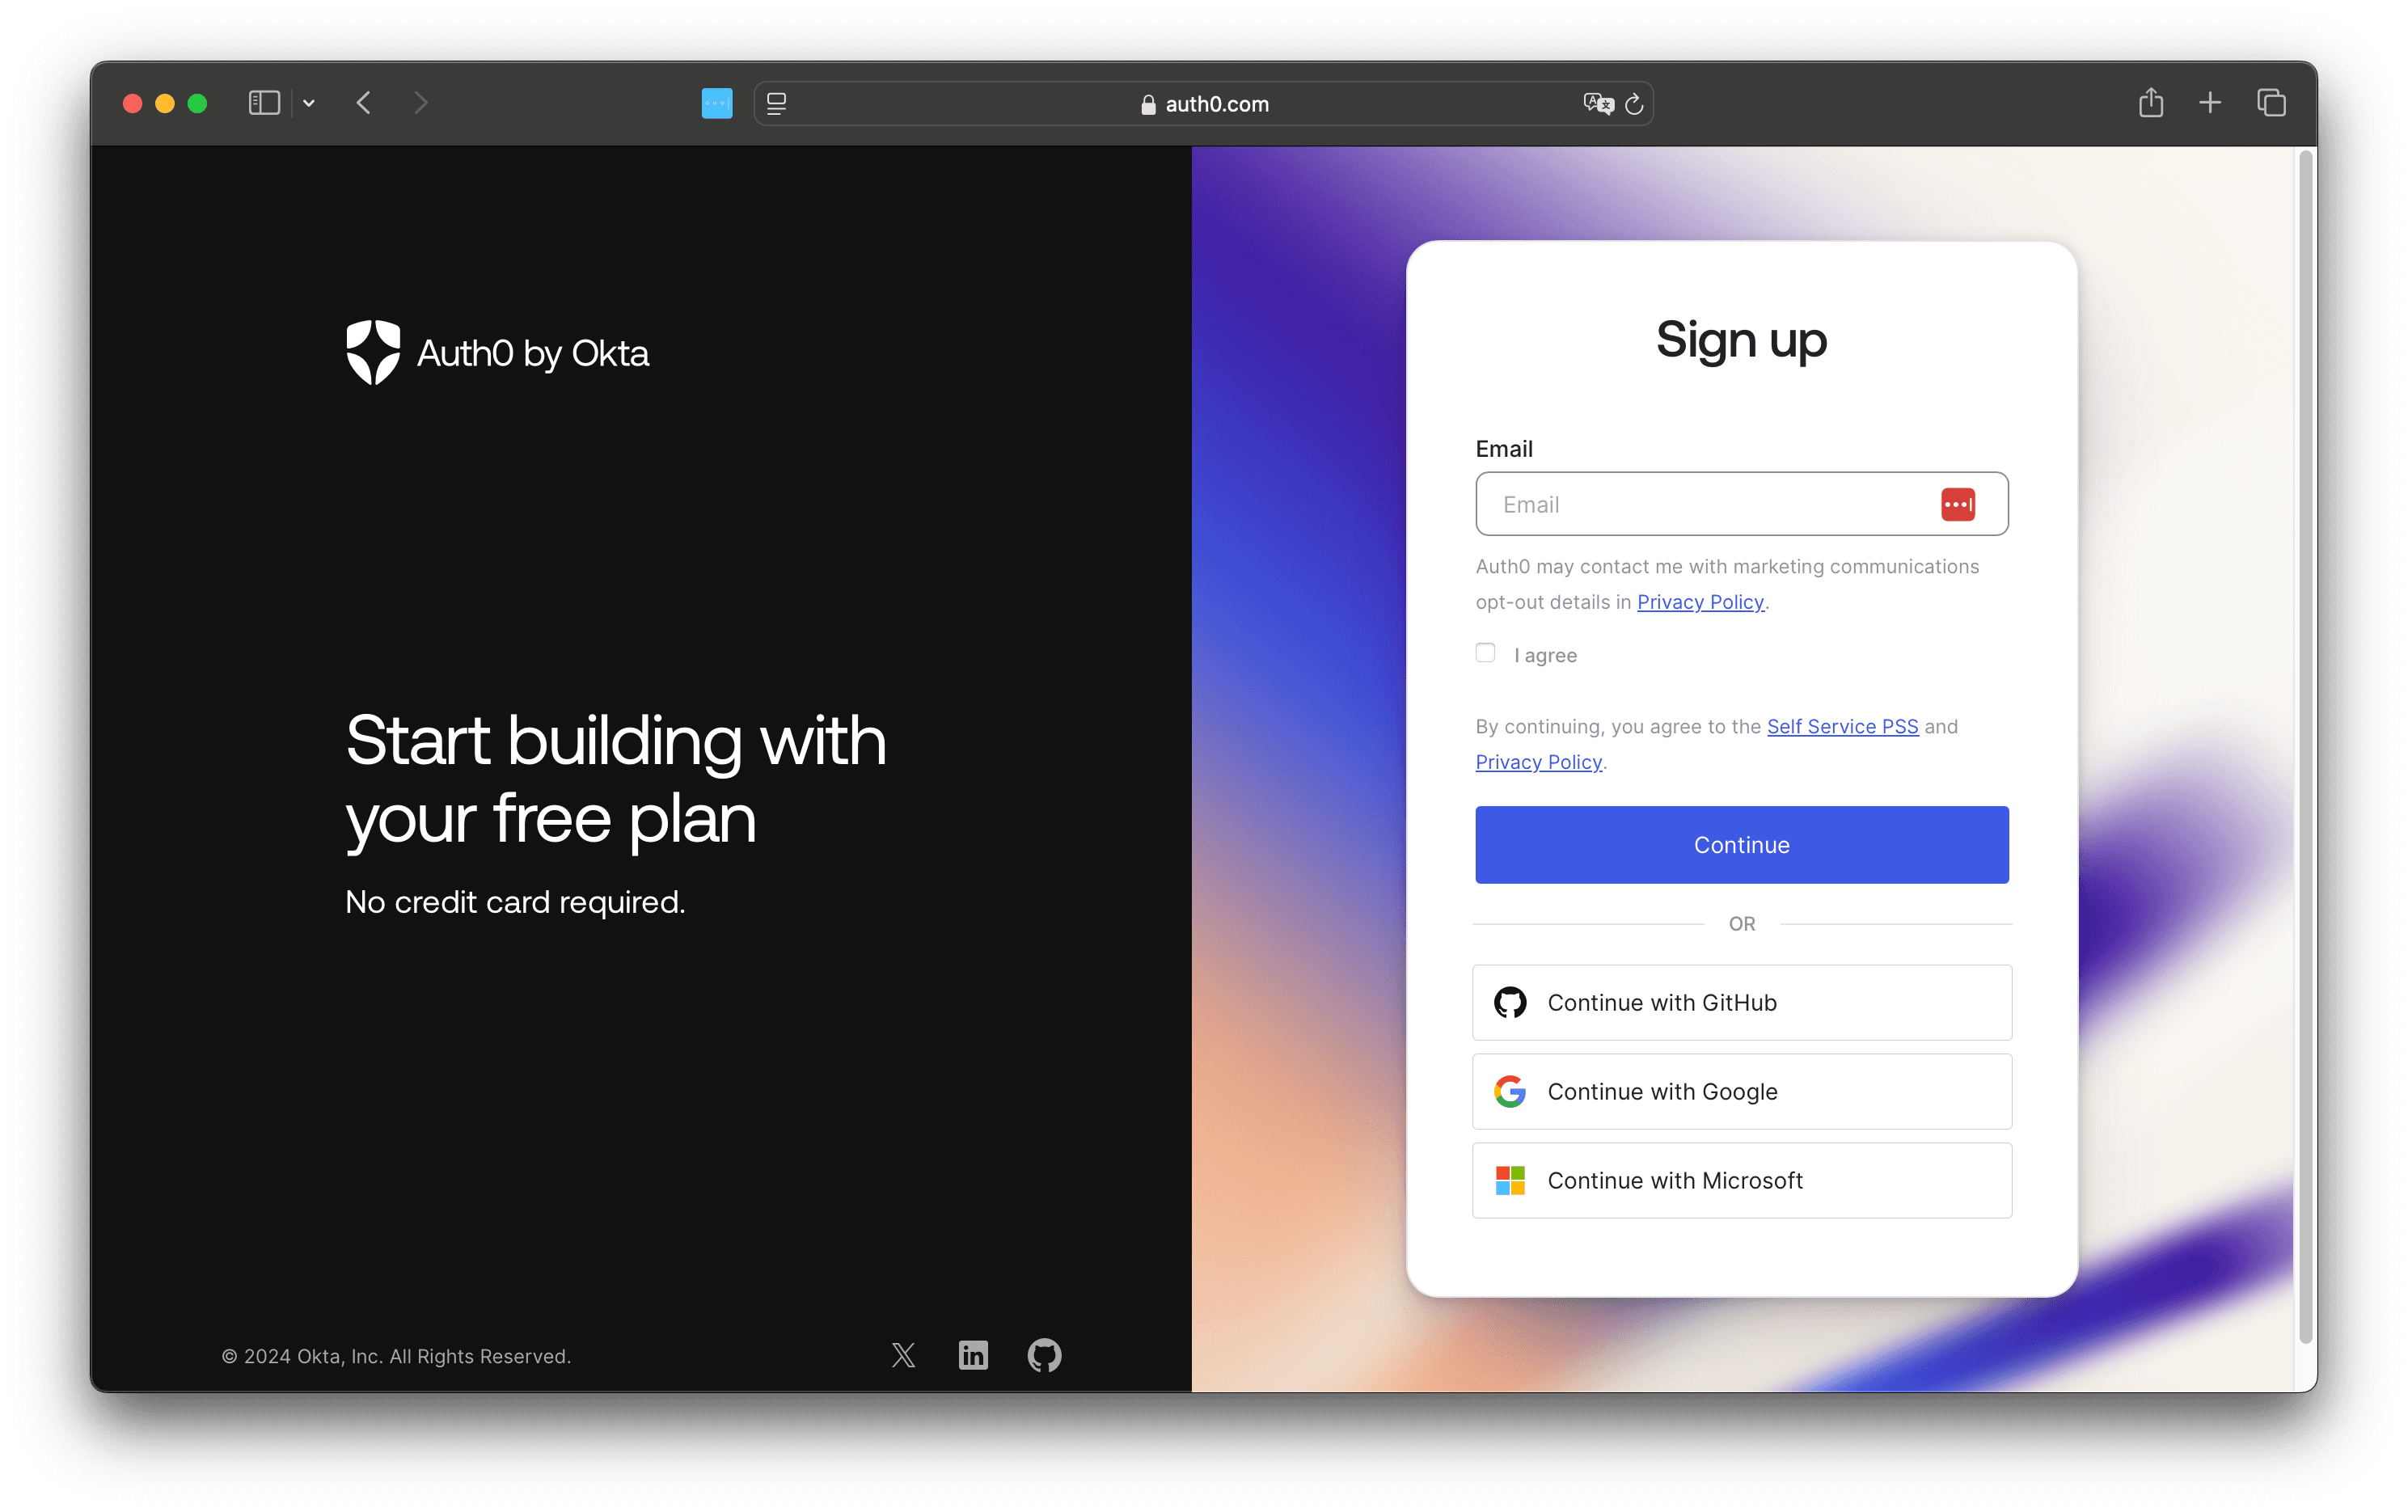
To create an account, go to the Auth0 site's pricing page and click on the Start building for free button to sign up for a free plan.
Clicking the button above will switch to the Sign-up screen.
After entering your e-mail address, the password setting screen will appear.
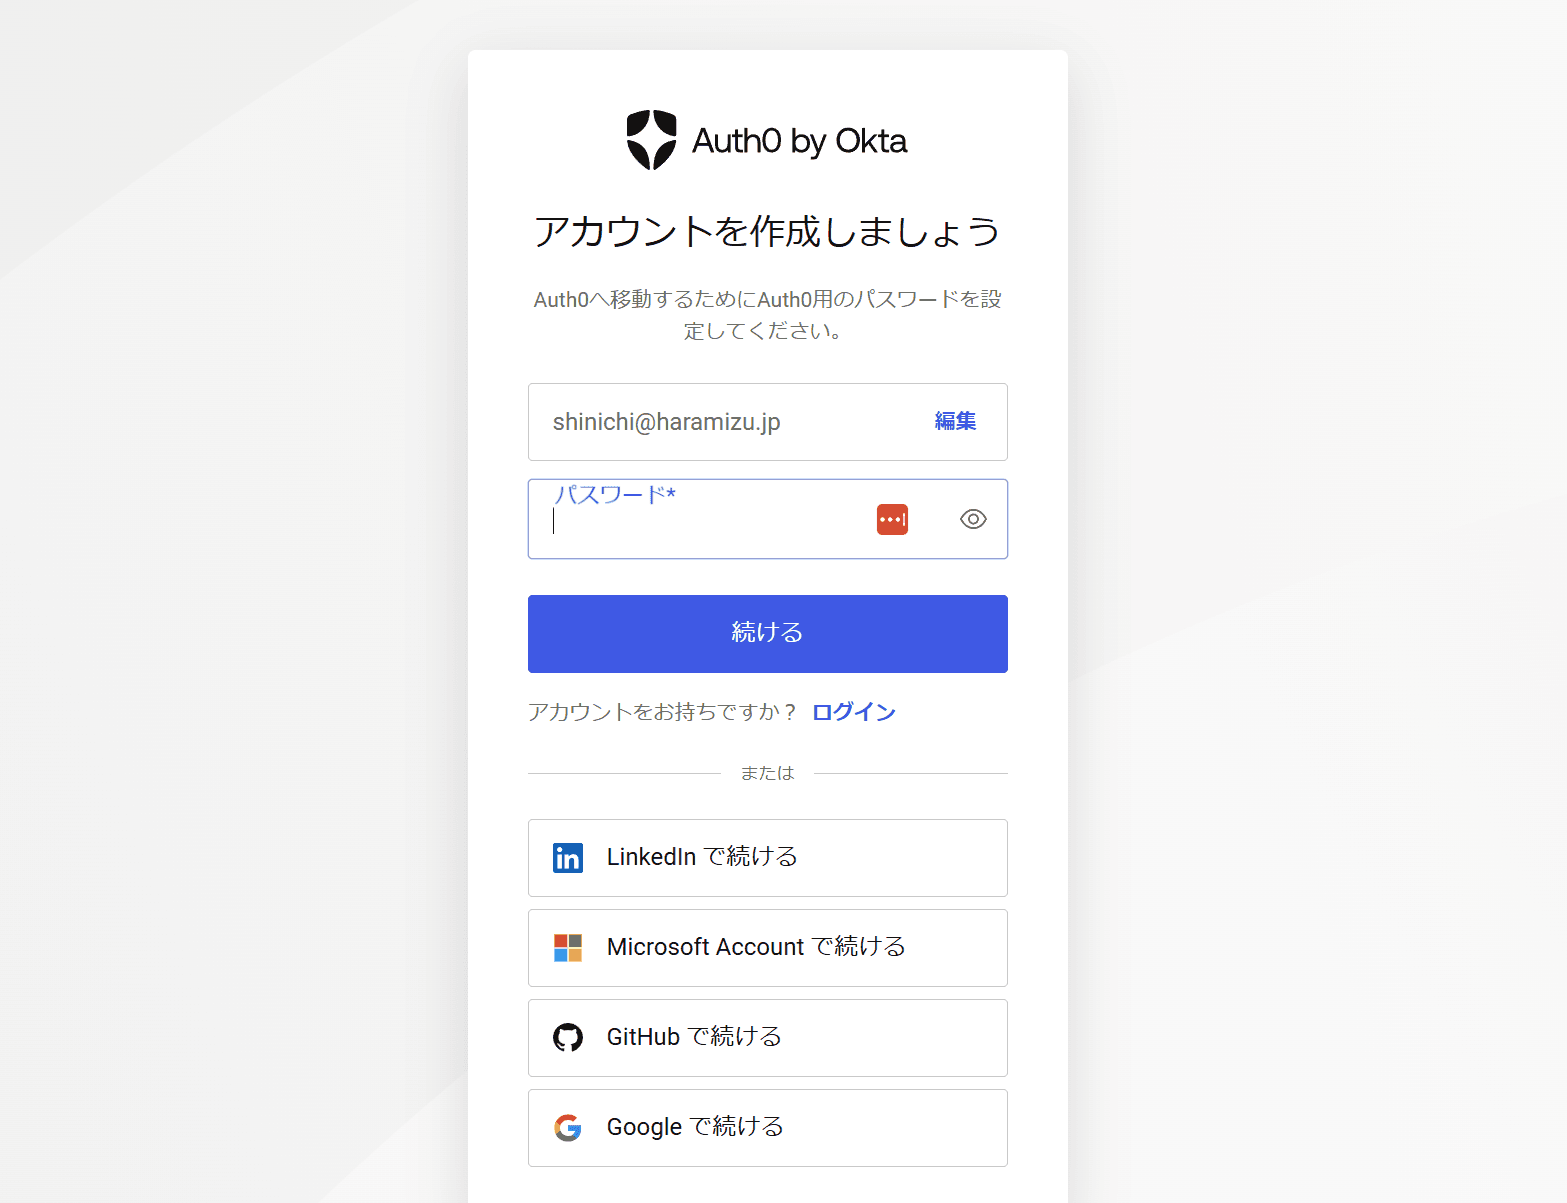
Once you set a password, you will receive confirmation regarding the type of use.
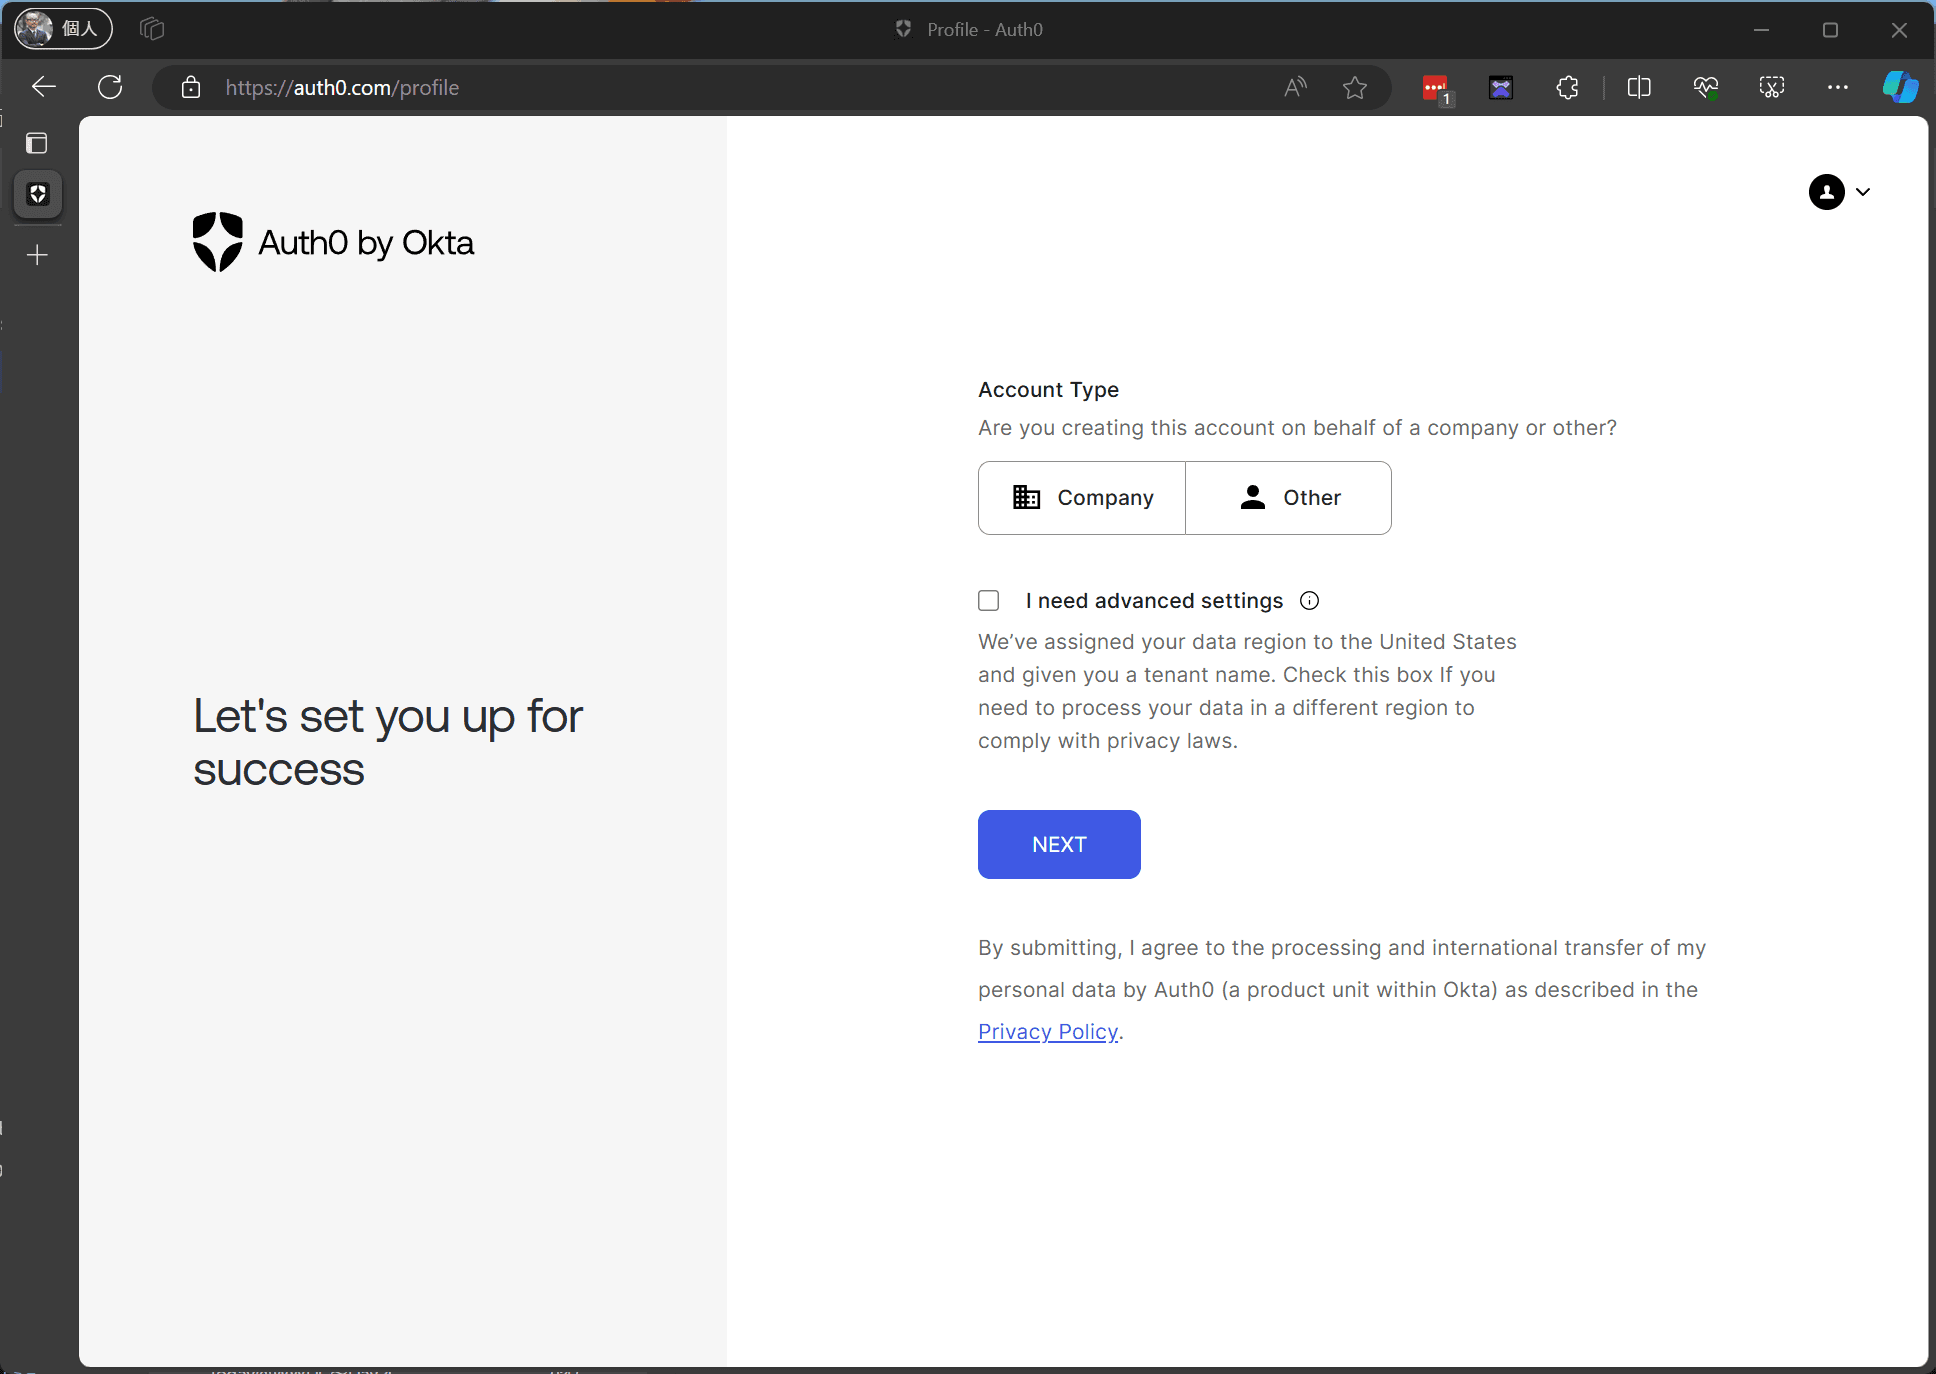
A confirmation item regarding the settings will be displayed.
I need advanced settings
We’ve assigned your data region to the United States and given you a tenant name. Check this box If you need to process your data in a different region to comply with privacy laws.
If you want to use it outside of the U.S., you must check the box to change it.In this case, do nothing in particular and proceed as is.
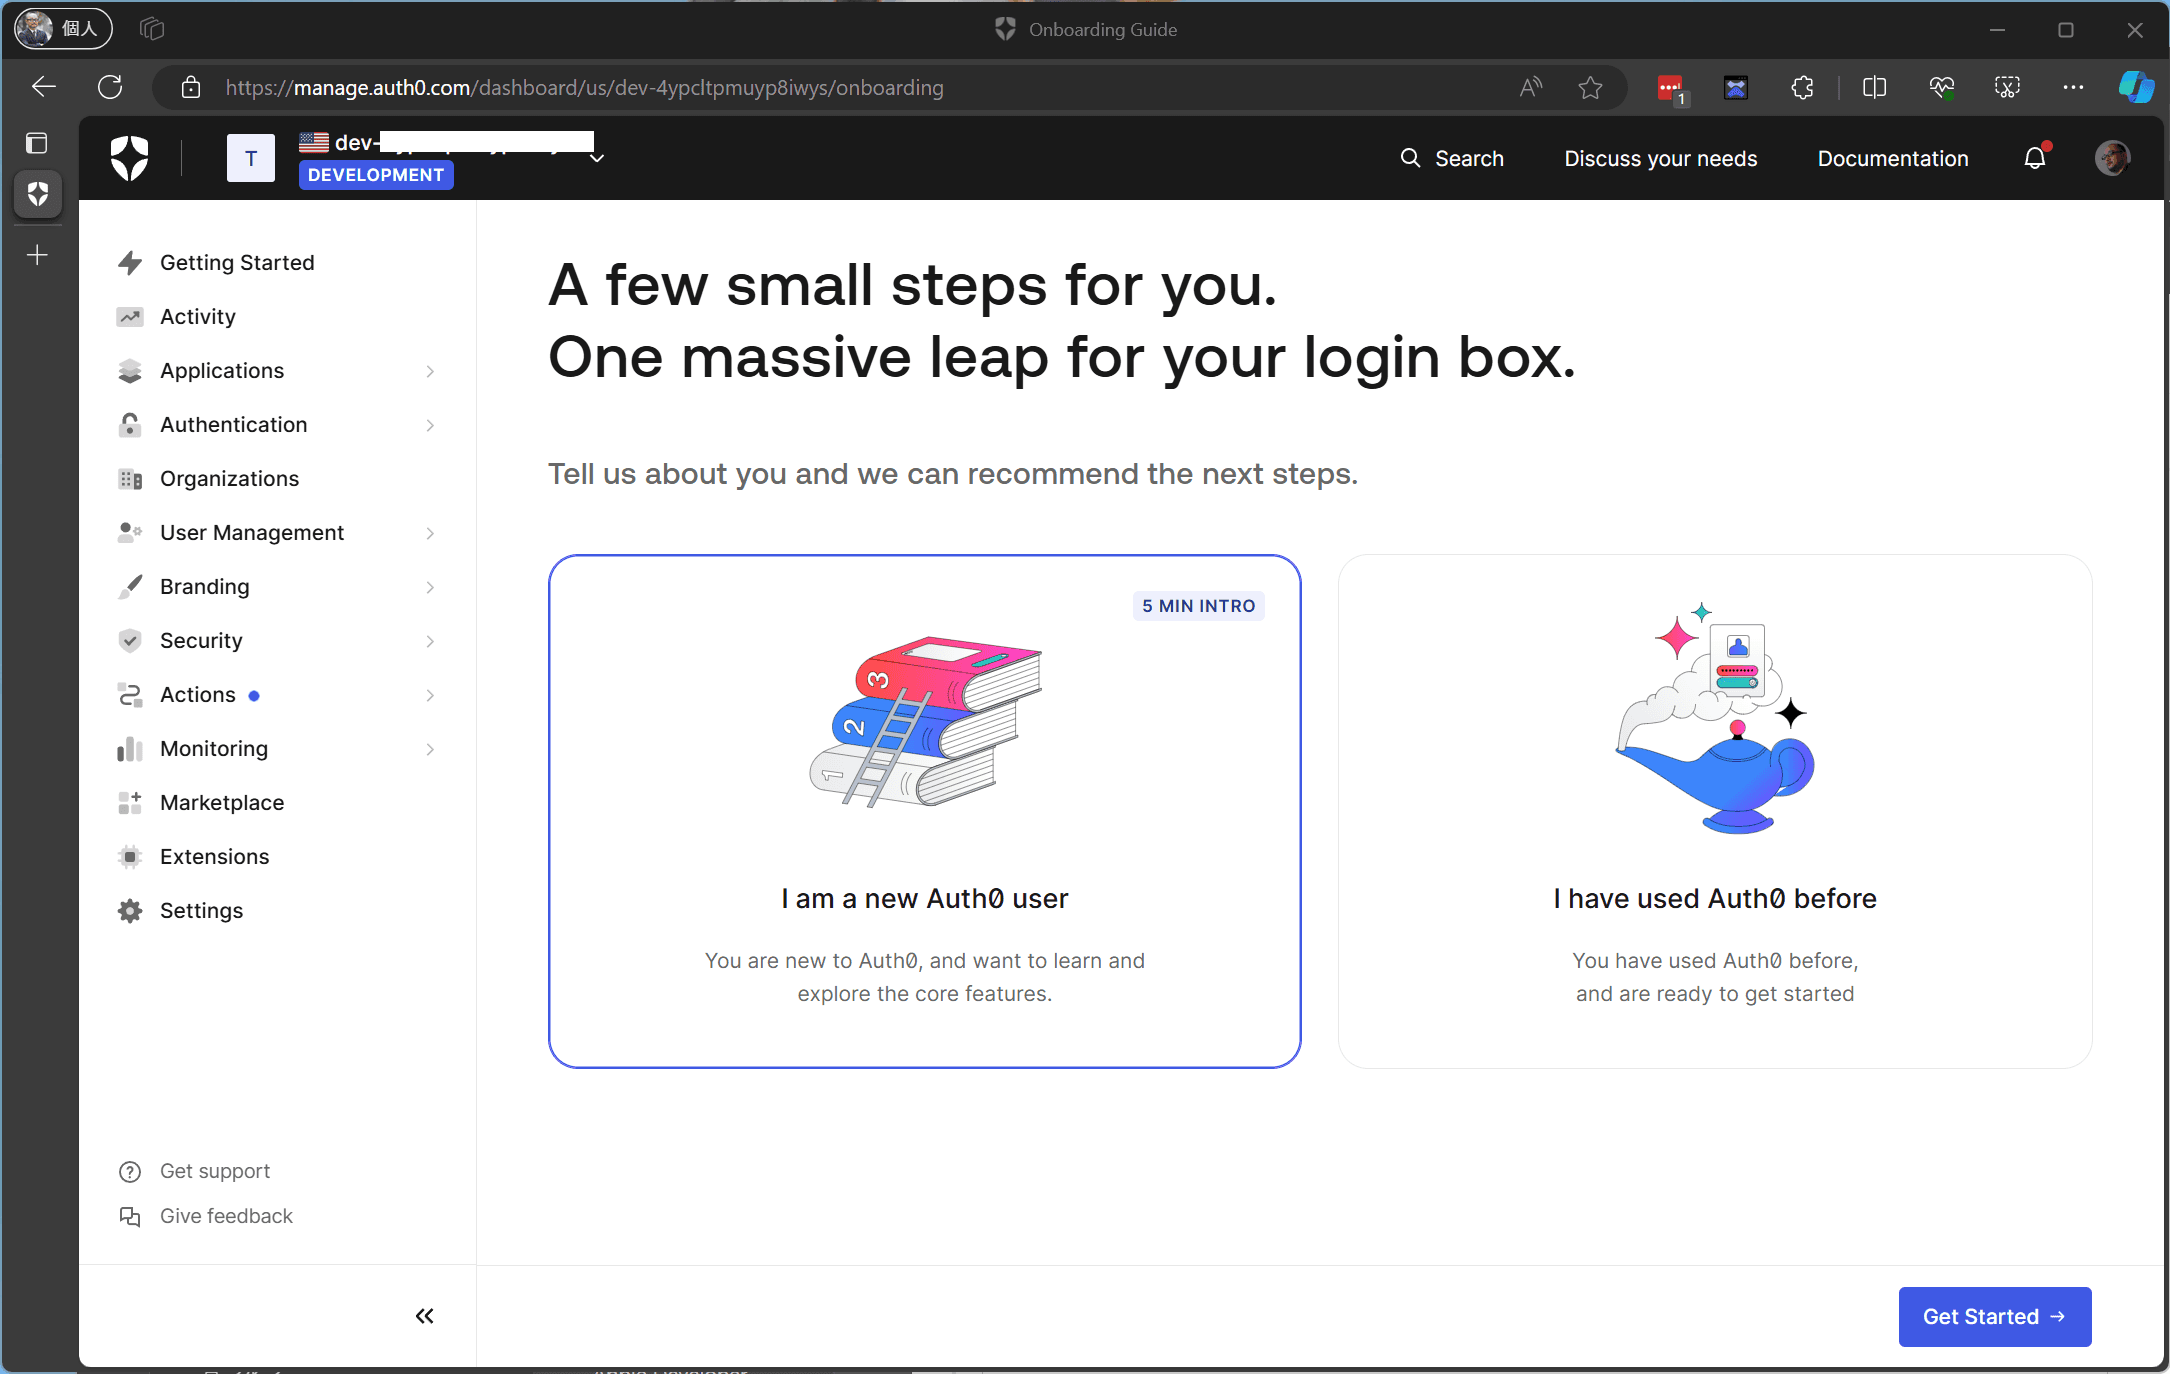
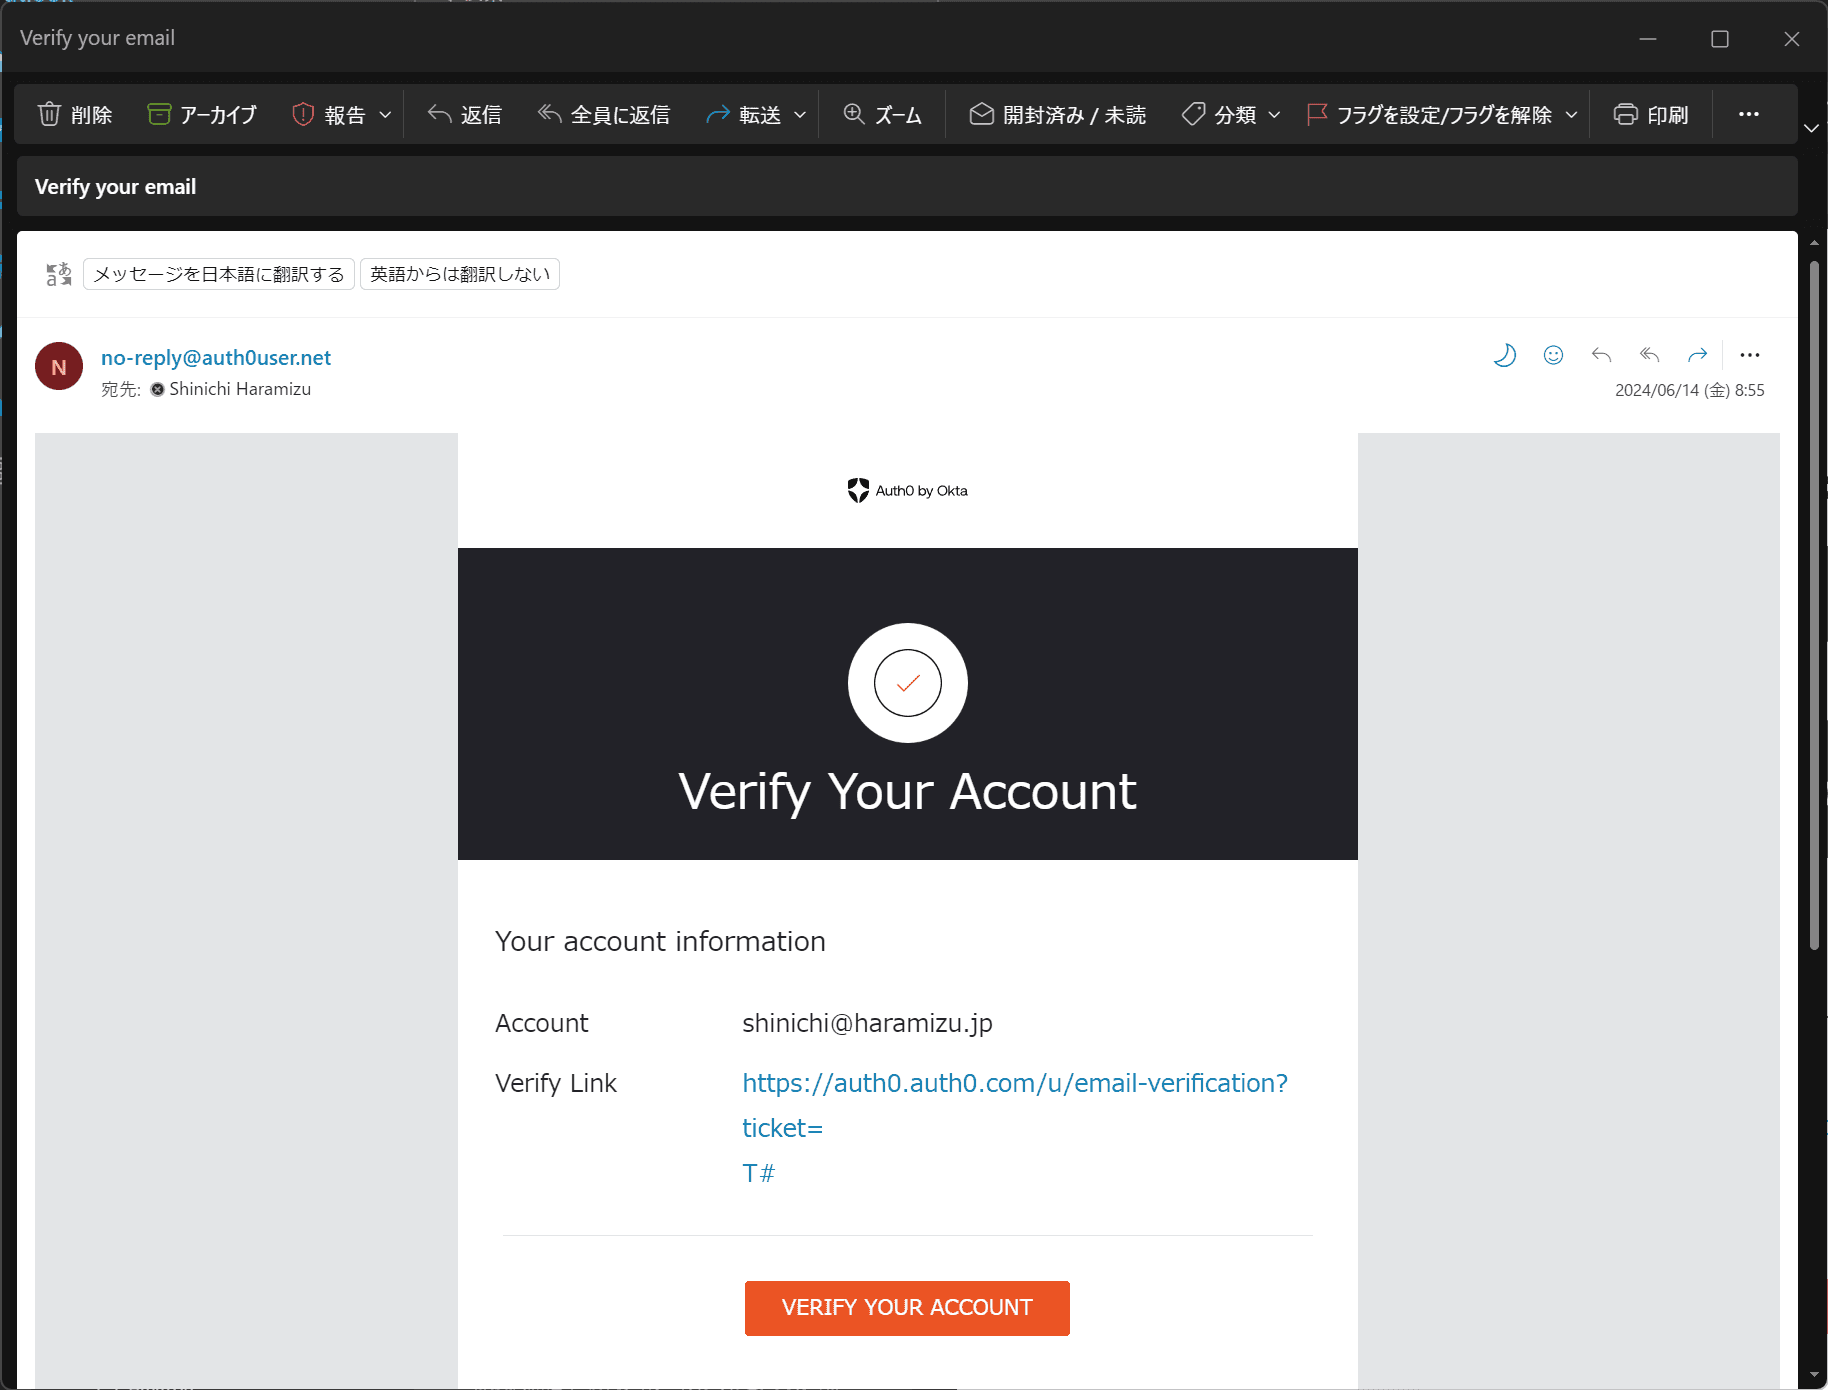
The account is successfully created from the website.
Note that a URL for email address authentication has been sent to the login email address.By completing this process, your account creation will be complete.
Create Application
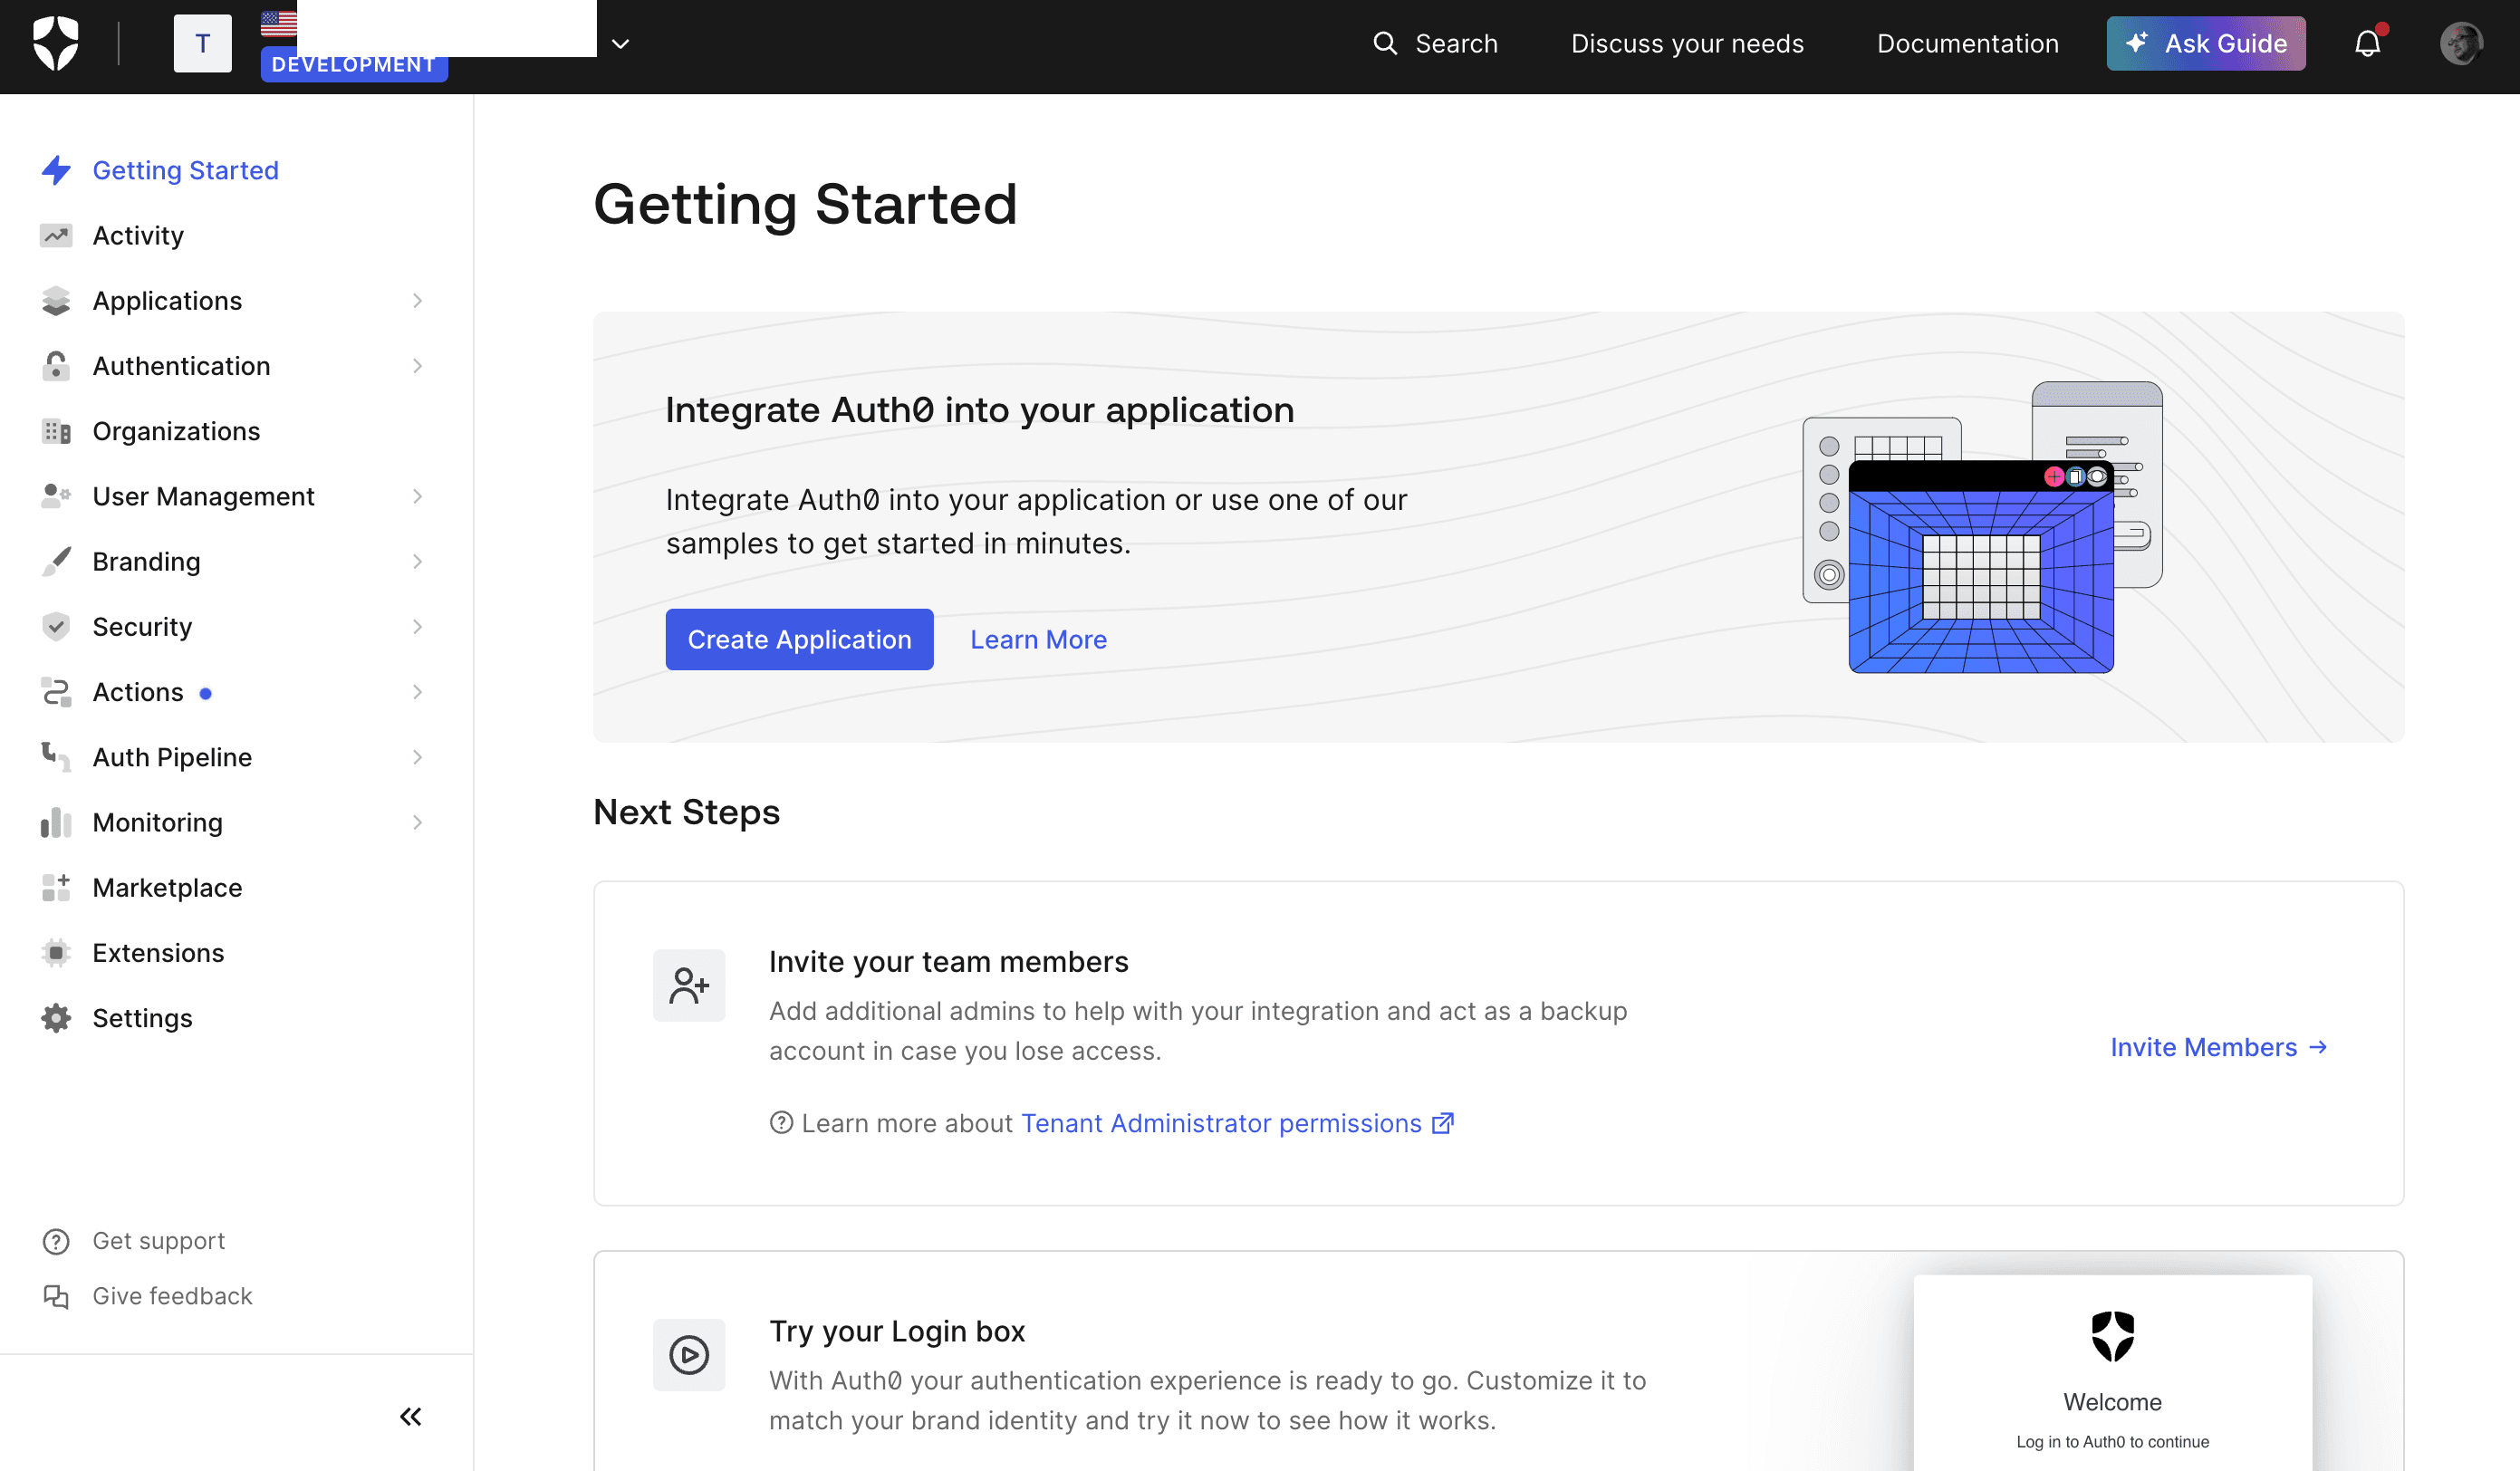
When preparing a website to use Auth0 authentication, it is first necessary to create an application on the Auth0 side.After logging in, you will be taken through the following screens.
- Select the Getting Started item in the top left-hand corner and click on the Create Application button.
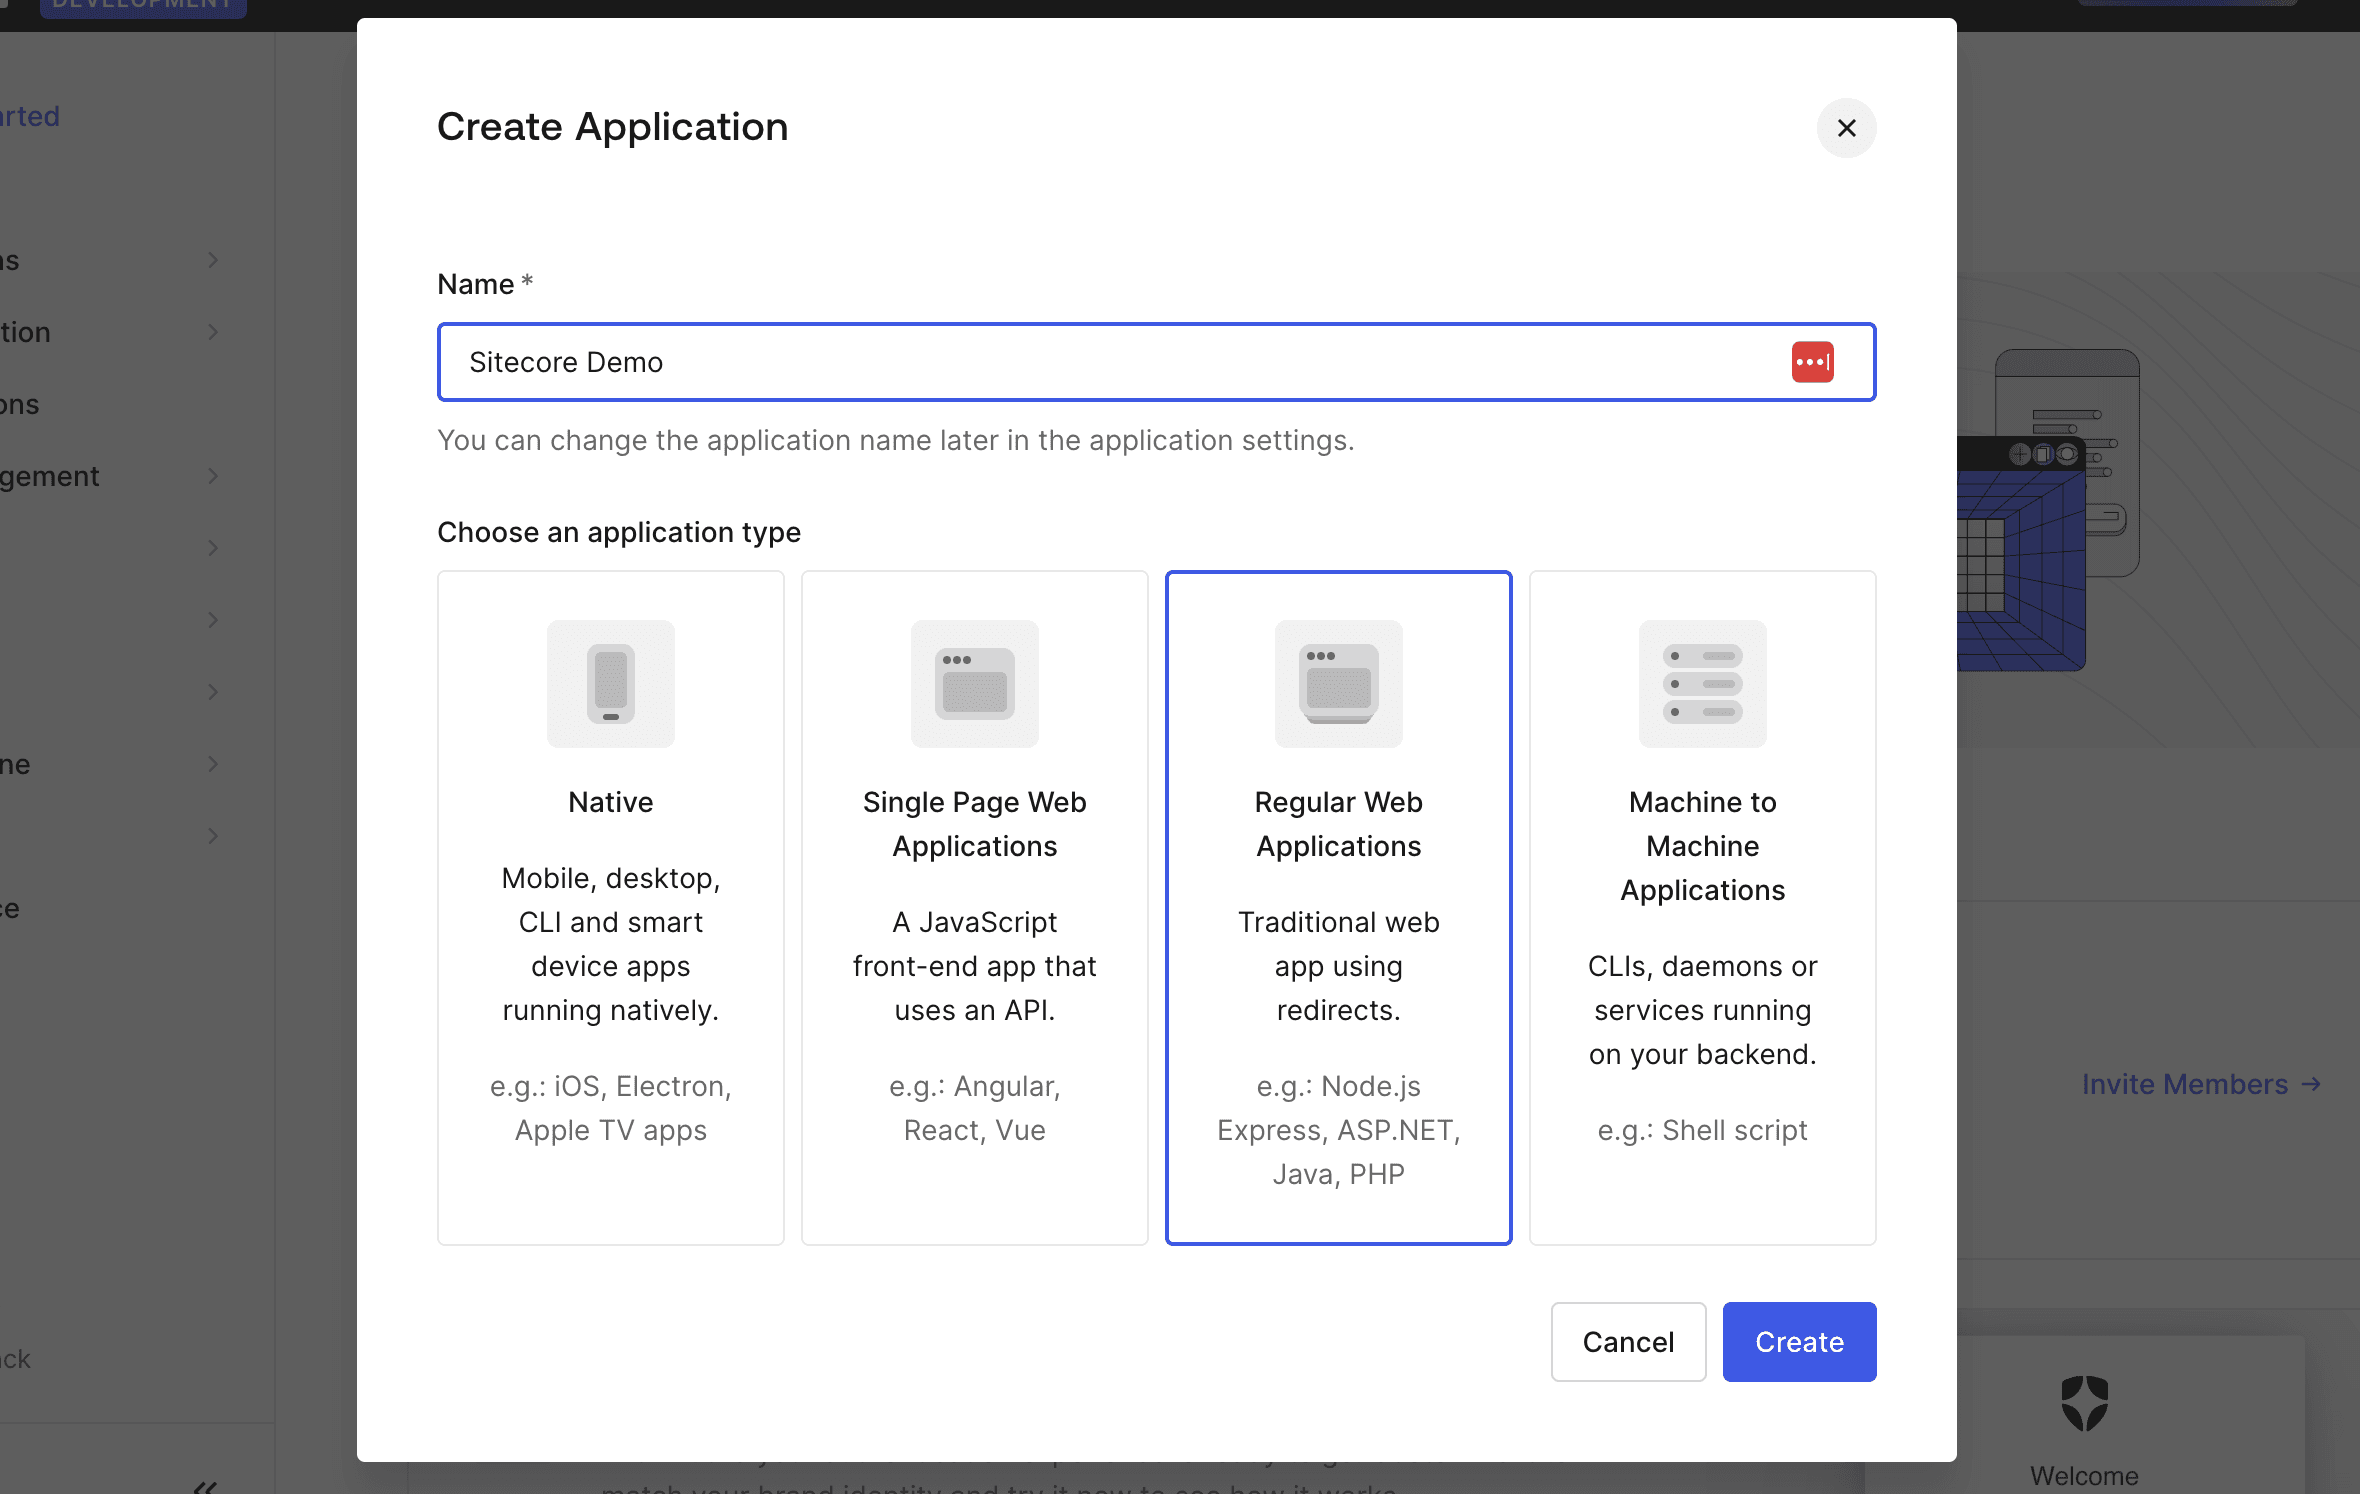
- Name the application Sitecore Demo this time and select Regular Web Application as the application type
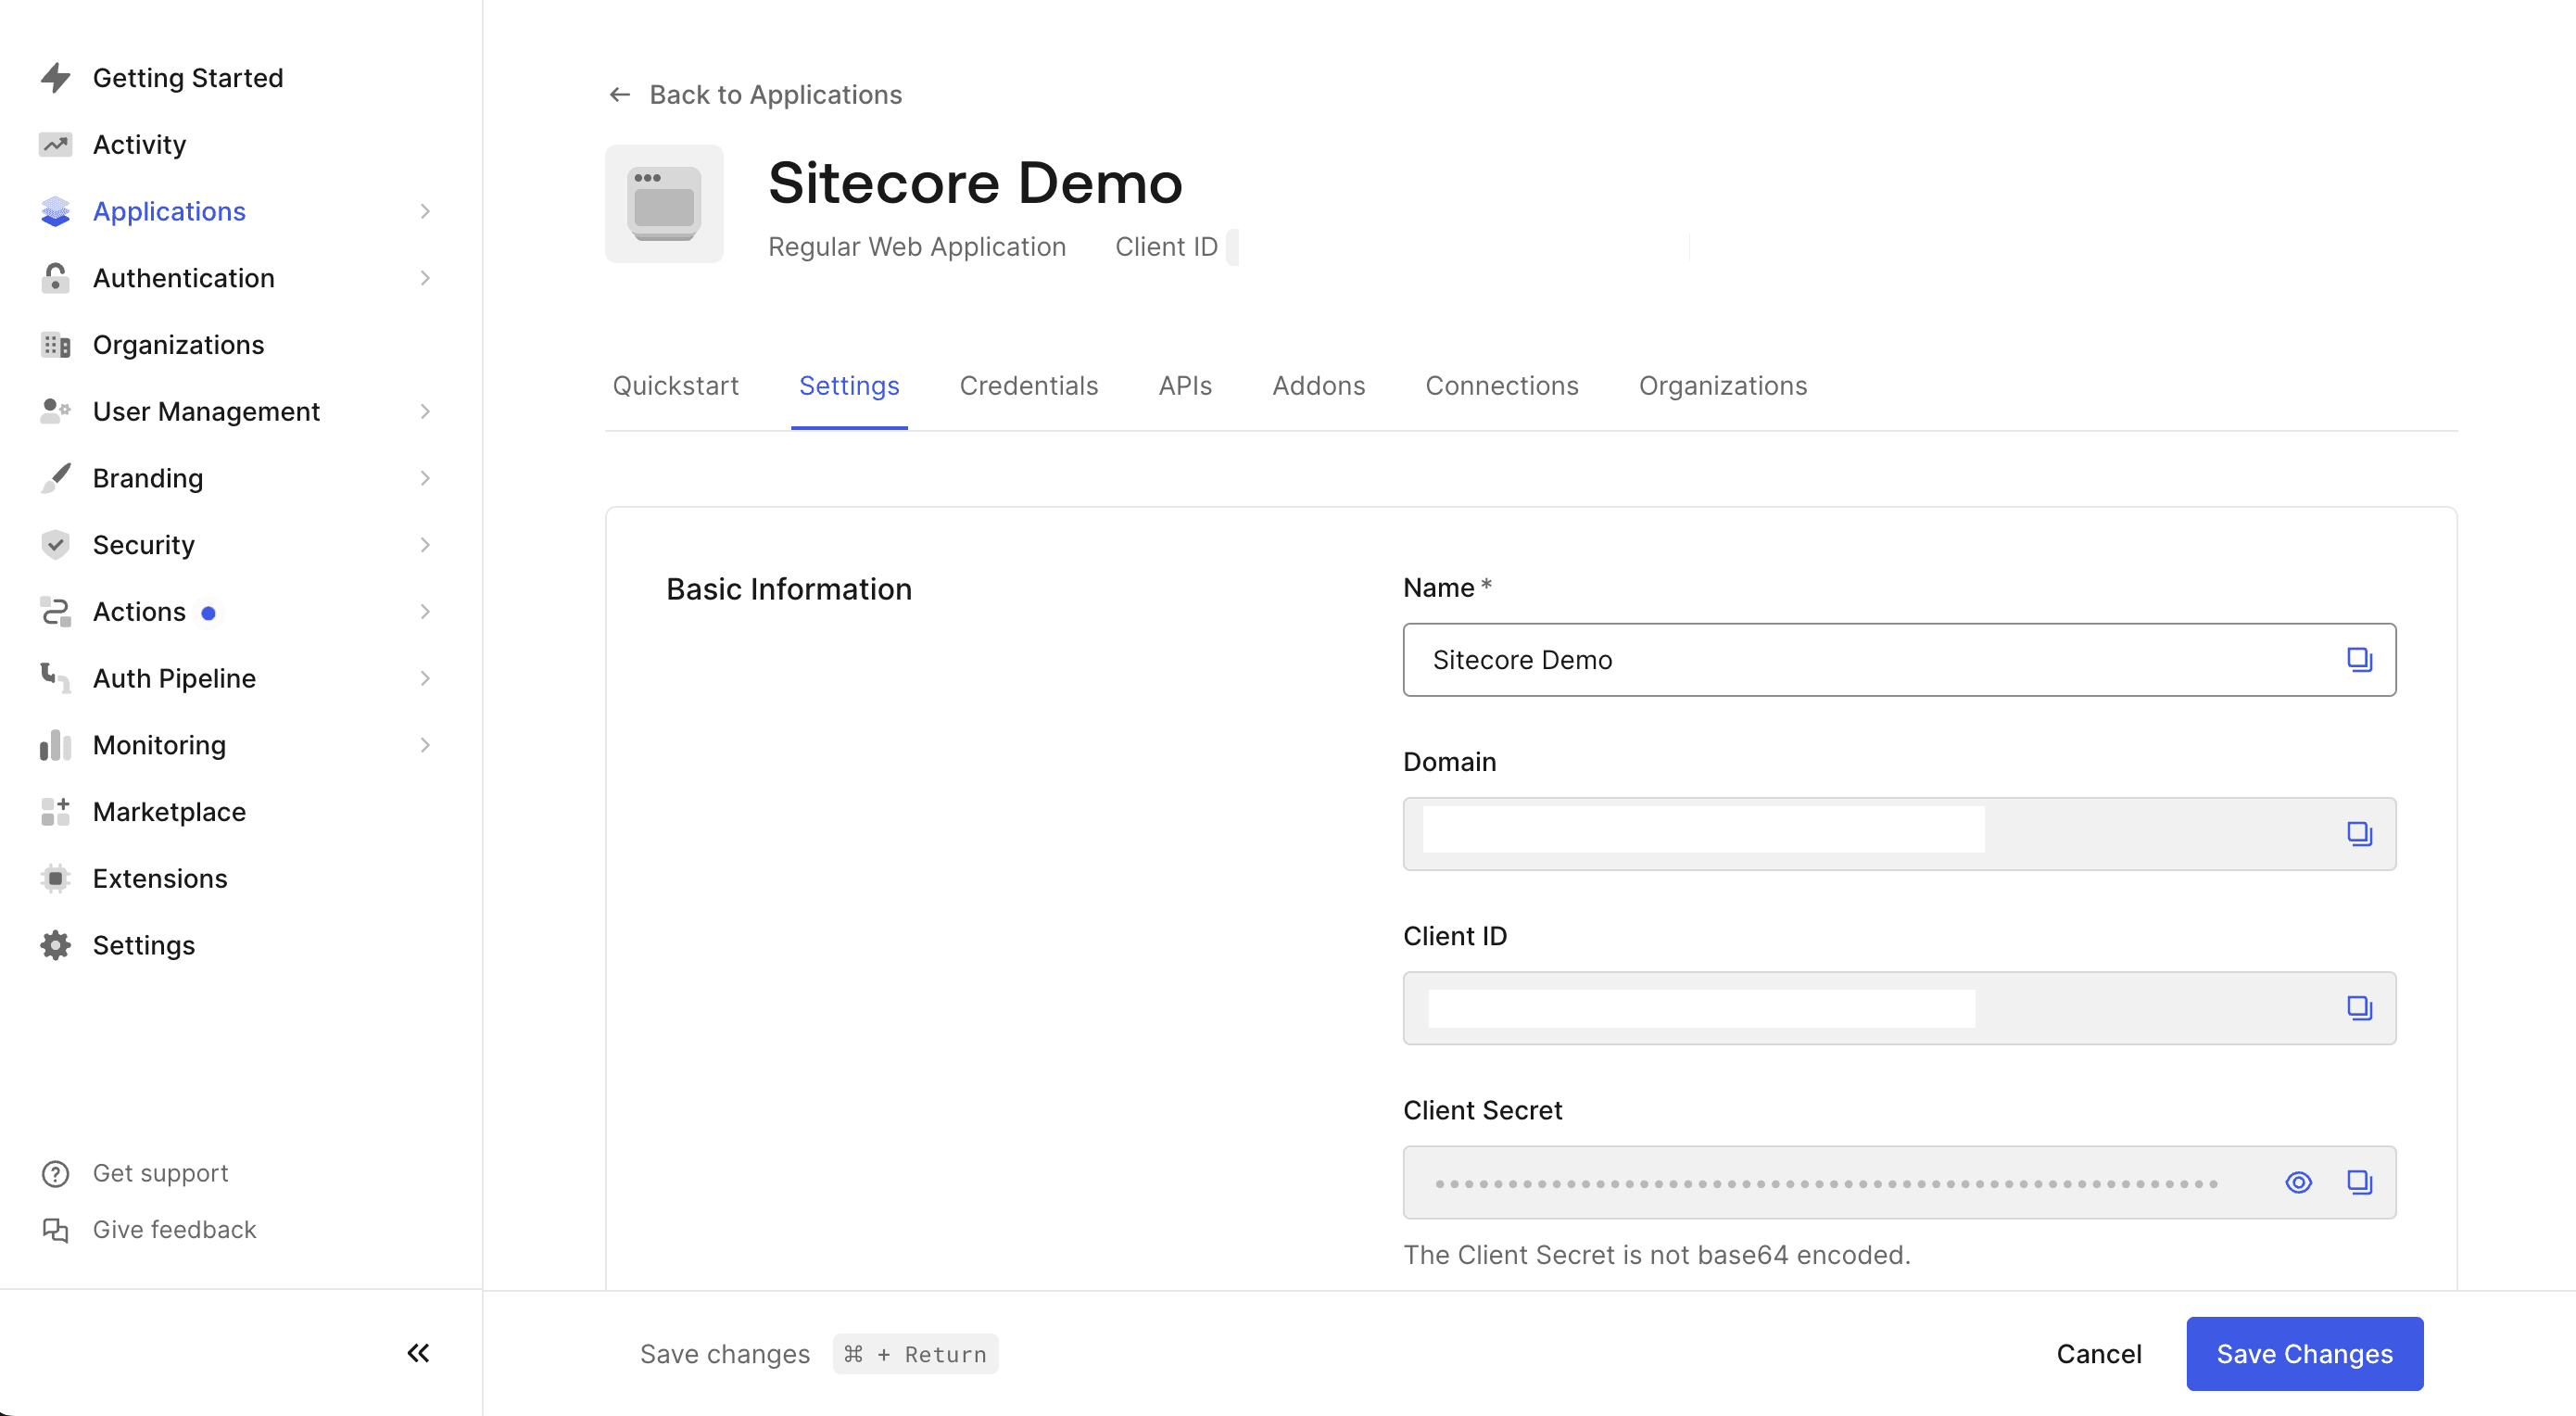
- Open Settings and you will see the application settings as follows.
- Scroll down under Settings to the Application URIs settings section.Set the following two values.
- Allowed Callback URLs: http://localhost:3000/auth/callback
- Allowed Logout URLs: http://localhost:3000
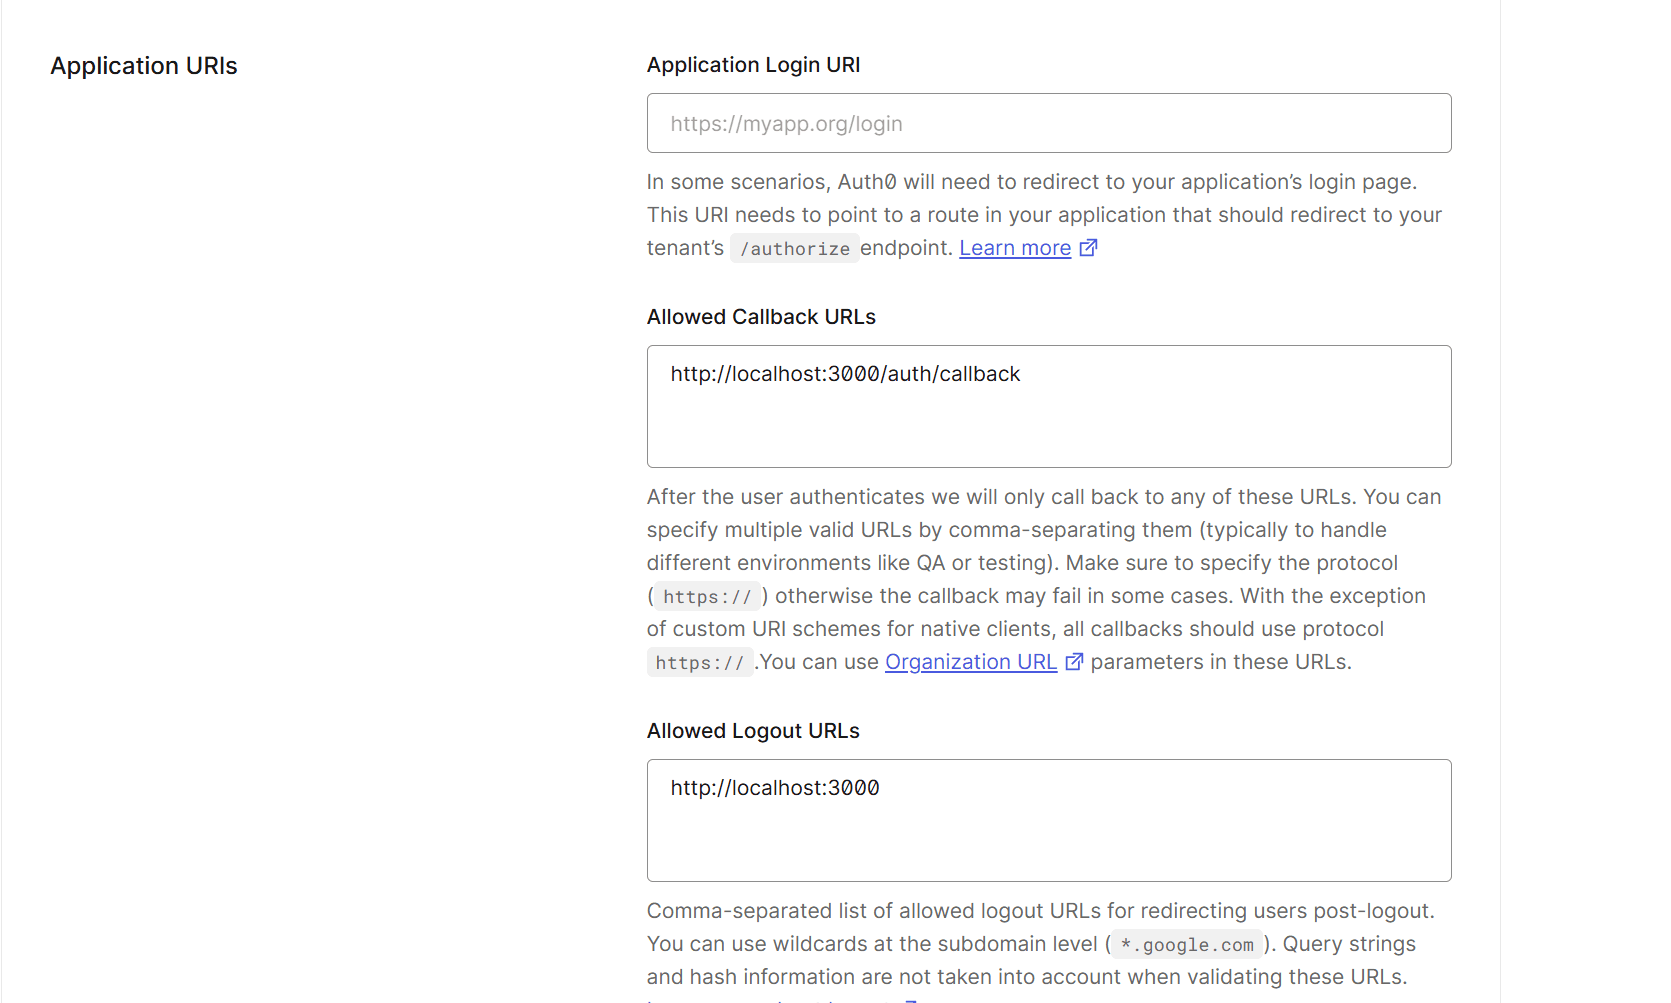
- Click Save to complete the creation of the application.
This means that the environment variables used by Next.js are now ready.Of the items listed below, those listed as Basic Information can be obtained from the Auth0 administration screen.
The sample environment variables will look like this
text
For AUTH0_SECRET, please execute the following command to generate a unique key, instead of getting it from the management screen.
sh
Integration with Next.js
As a framework for using Auth0, this document will use Next.js.With regard to Next.js, there are two patterns of implementation to choose from: Pages Router and App Router, but only the App Router is discussed here.
Prerequisite.
In this case, we will work with the following versions.
- Next.js: 15.3.4
- Typescript: Yes
- App Router: Yes
- @auth0/nextjs-auth0: 4.7.0
Creating the Auth0 SDK Client
We will update the @auth0/nextjs-auth0 package to make it available.
- Installing packages
sh
- .env.local file.Various values are created in the administration and on the command line.
text
- Create src/lib/auth0.js
src/lib/auth0.js
- Add the file src/middleware.ts.
src/middleware.ts
上記の実装により、以下のような連携が可能になります。
- /auth/login: The route to perform login with Auth0
- /auth/logout: The route to log the user out
- /auth/callback: The route Auth0 will redirect the user to after a successful login
- /auth/profile: The route to fetch the user profile
- /auth/access-token: The route to verify the user's session and return an access token (which automatically refreshes if a refresh token is available)
- /auth/backchannel-logout: The route to receive a logout_token when a configured Back-Channel Logout initiator occurs
Add login.
Add a link to log in within the Next.js page.Do not use the Next.js Link tag, but use the A tag instead.
This time, the following line was added directly under Body in Layout.tsx.
src/app/layout.tsx
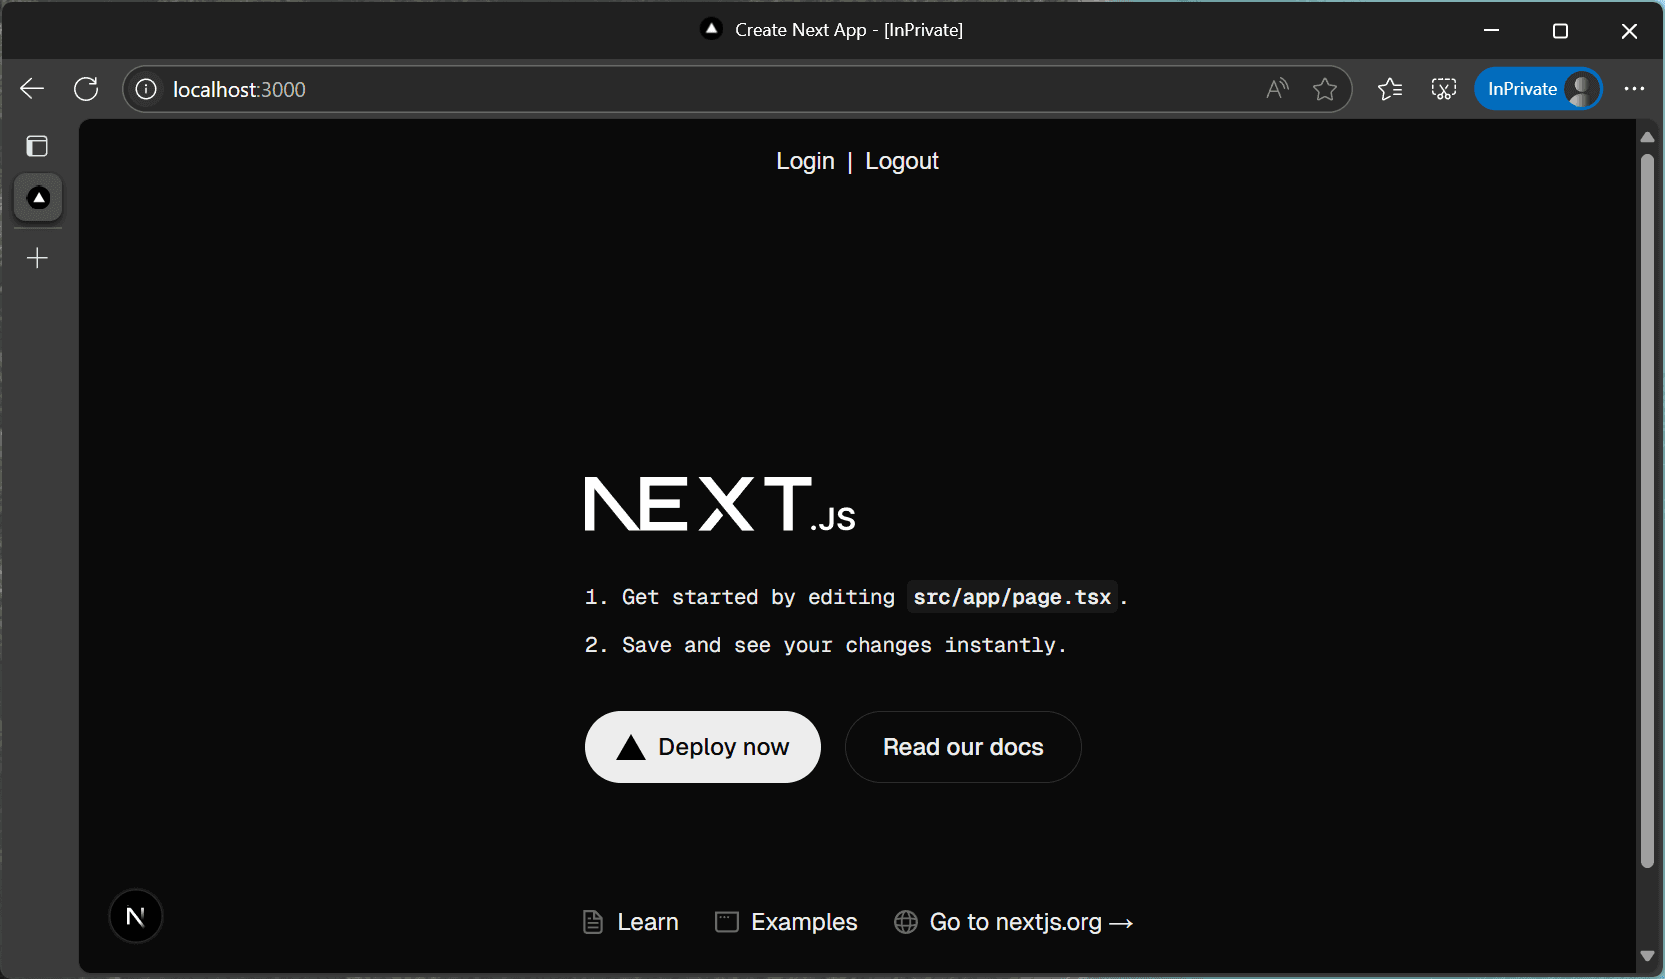
After the above changes, when Next.js is launched, a Login link is added to the top of the page.
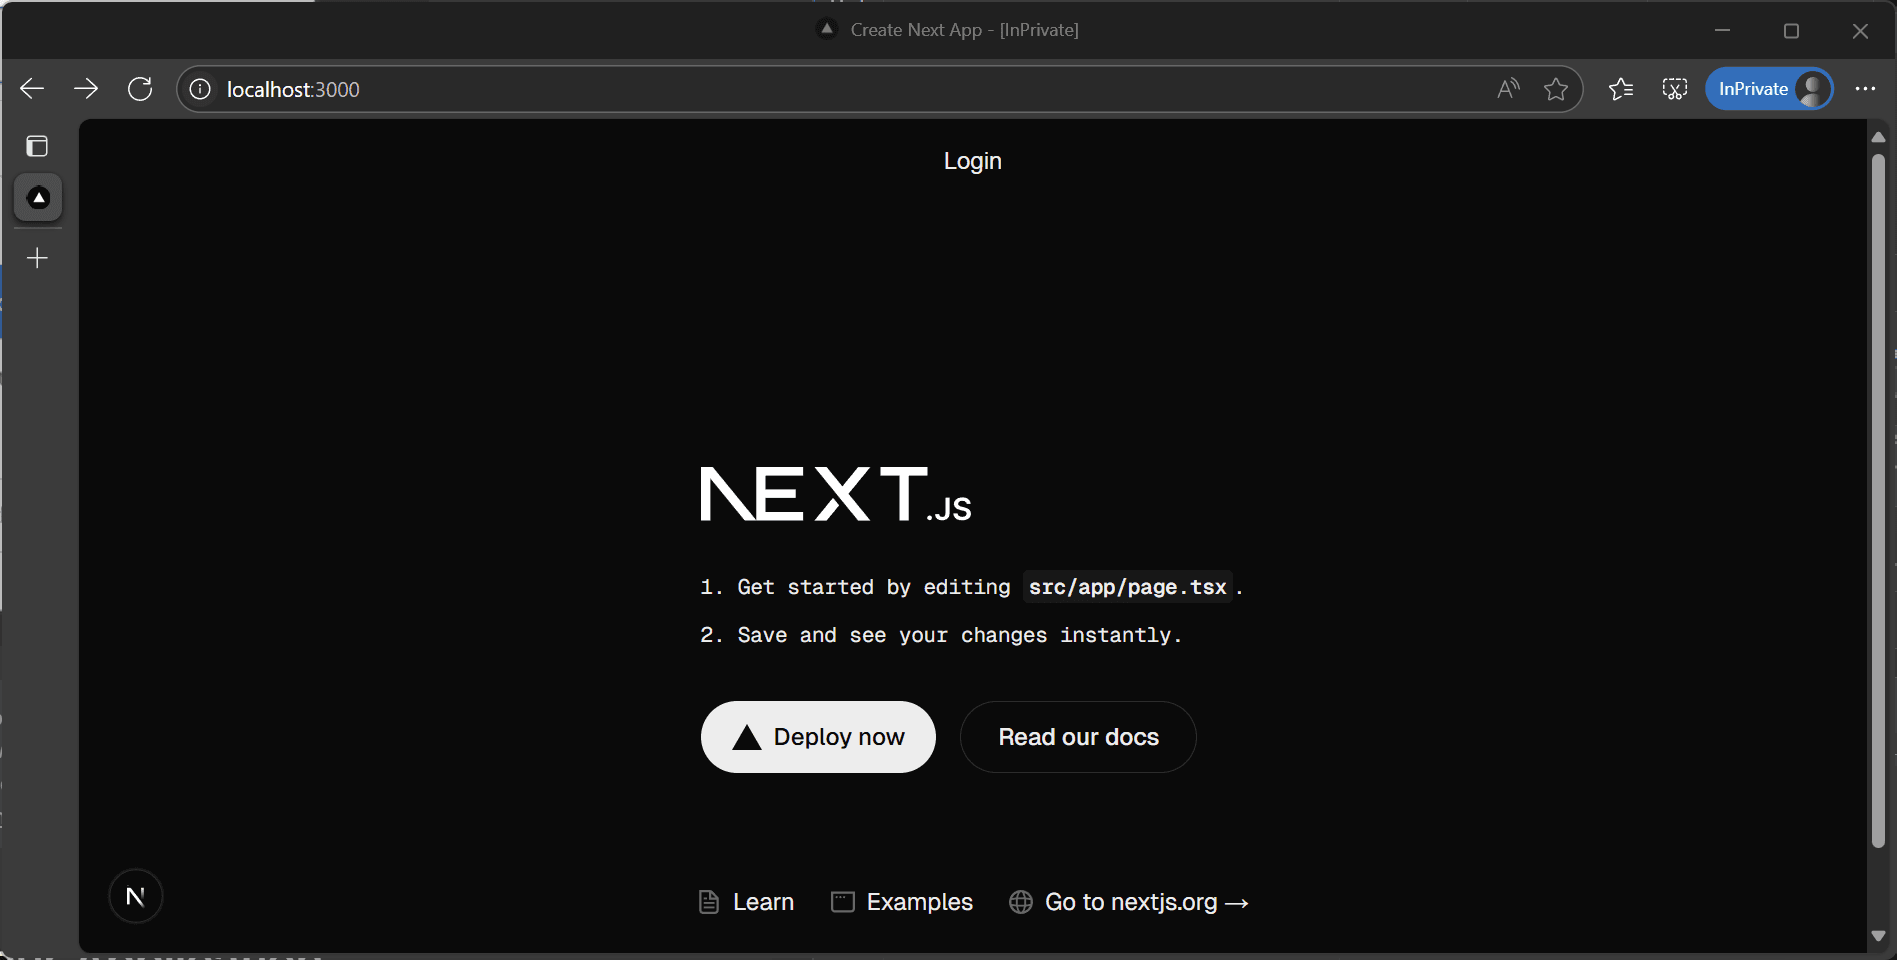
Clicking on the button will display the login screen.
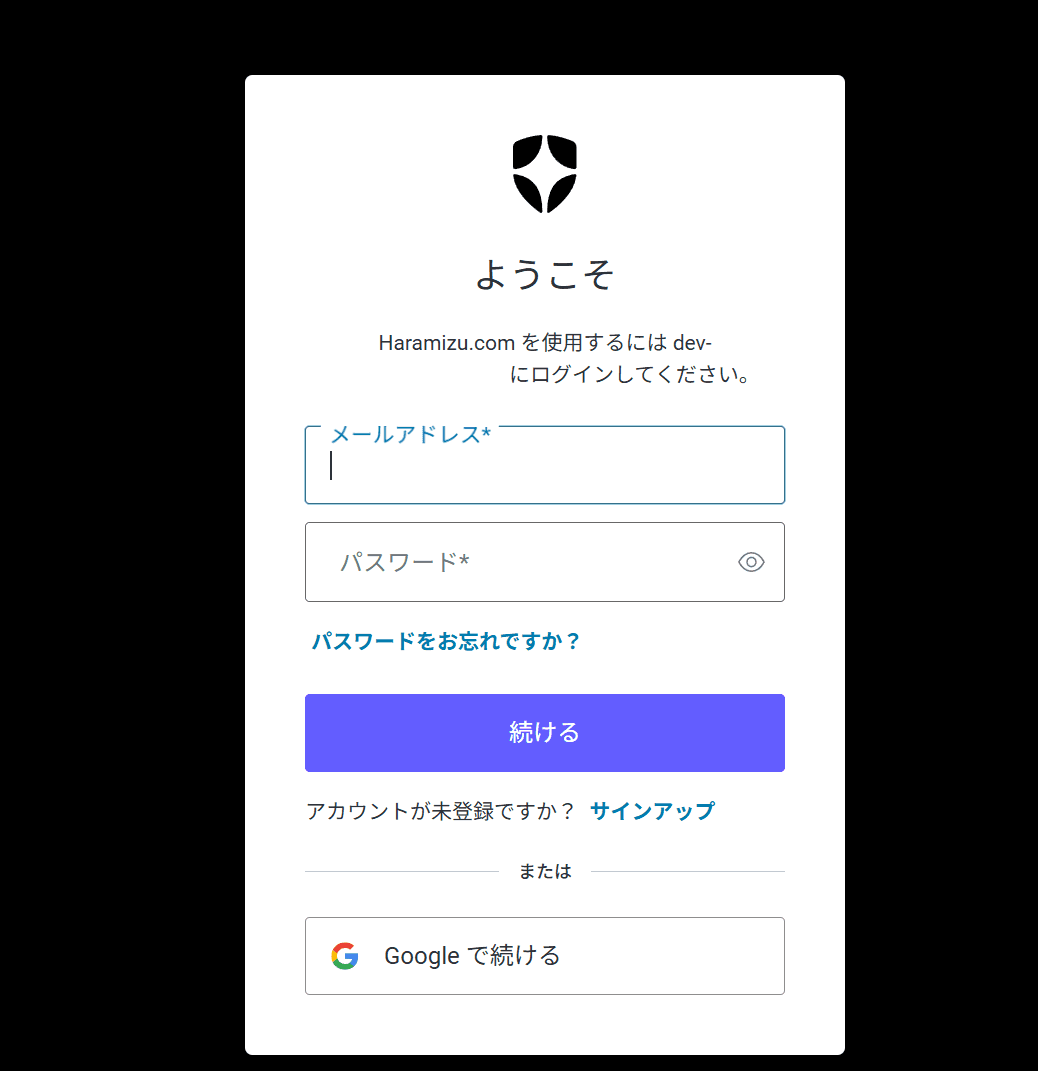
This time, the accounts were available in advance.When you perform the login, the screen will appear in the nucleus as follows.
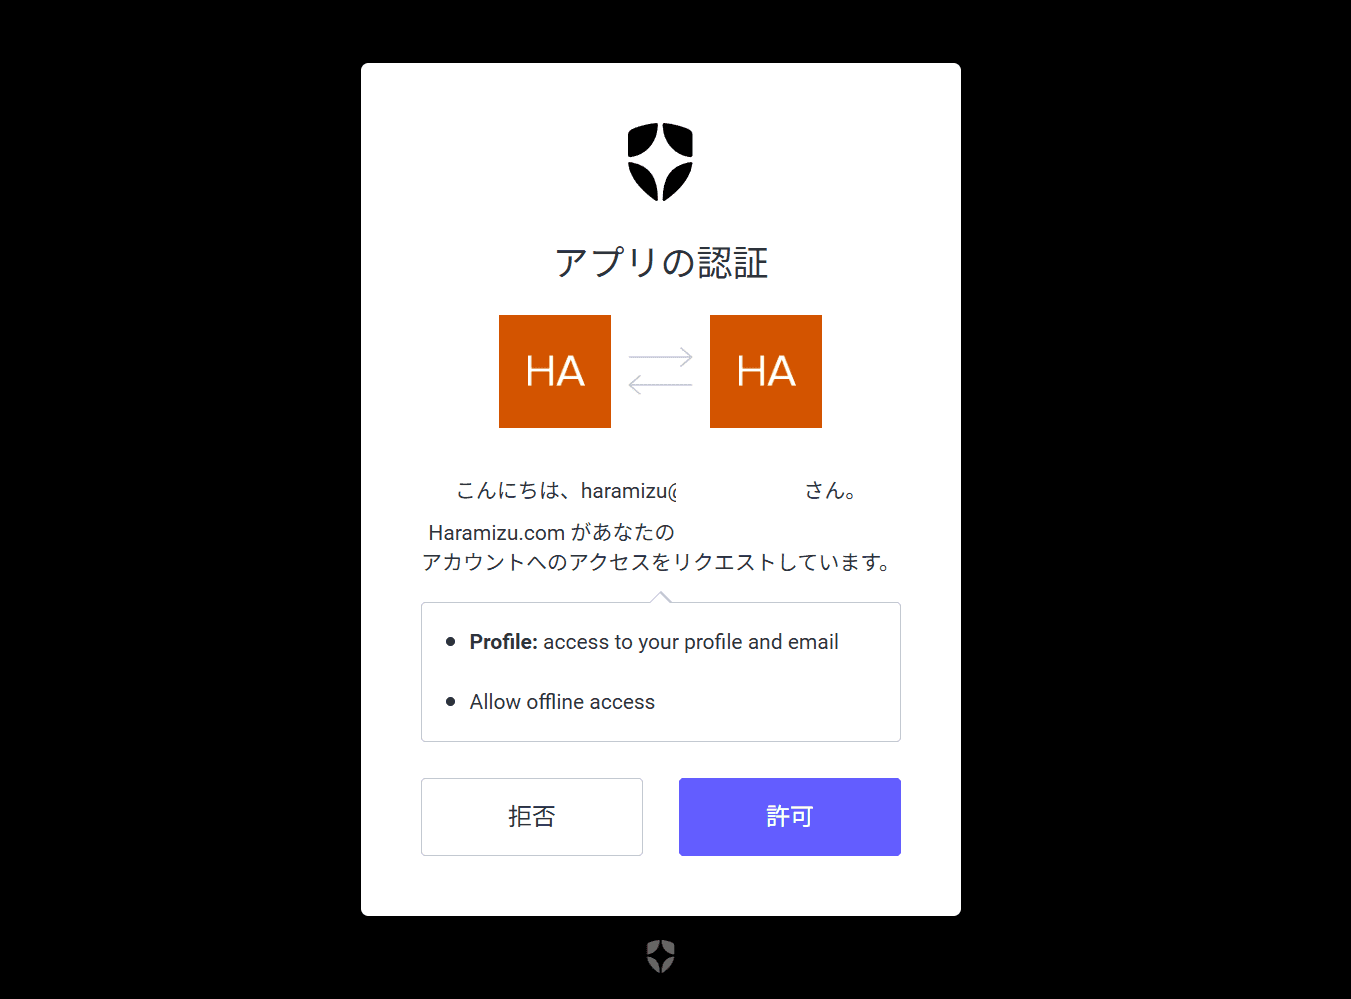
Once the permissions have been executed, you can now log in.
Add Logout
Logout is then implemented.Rewrite the code introduced above as follows.
src/app/layout.tsx
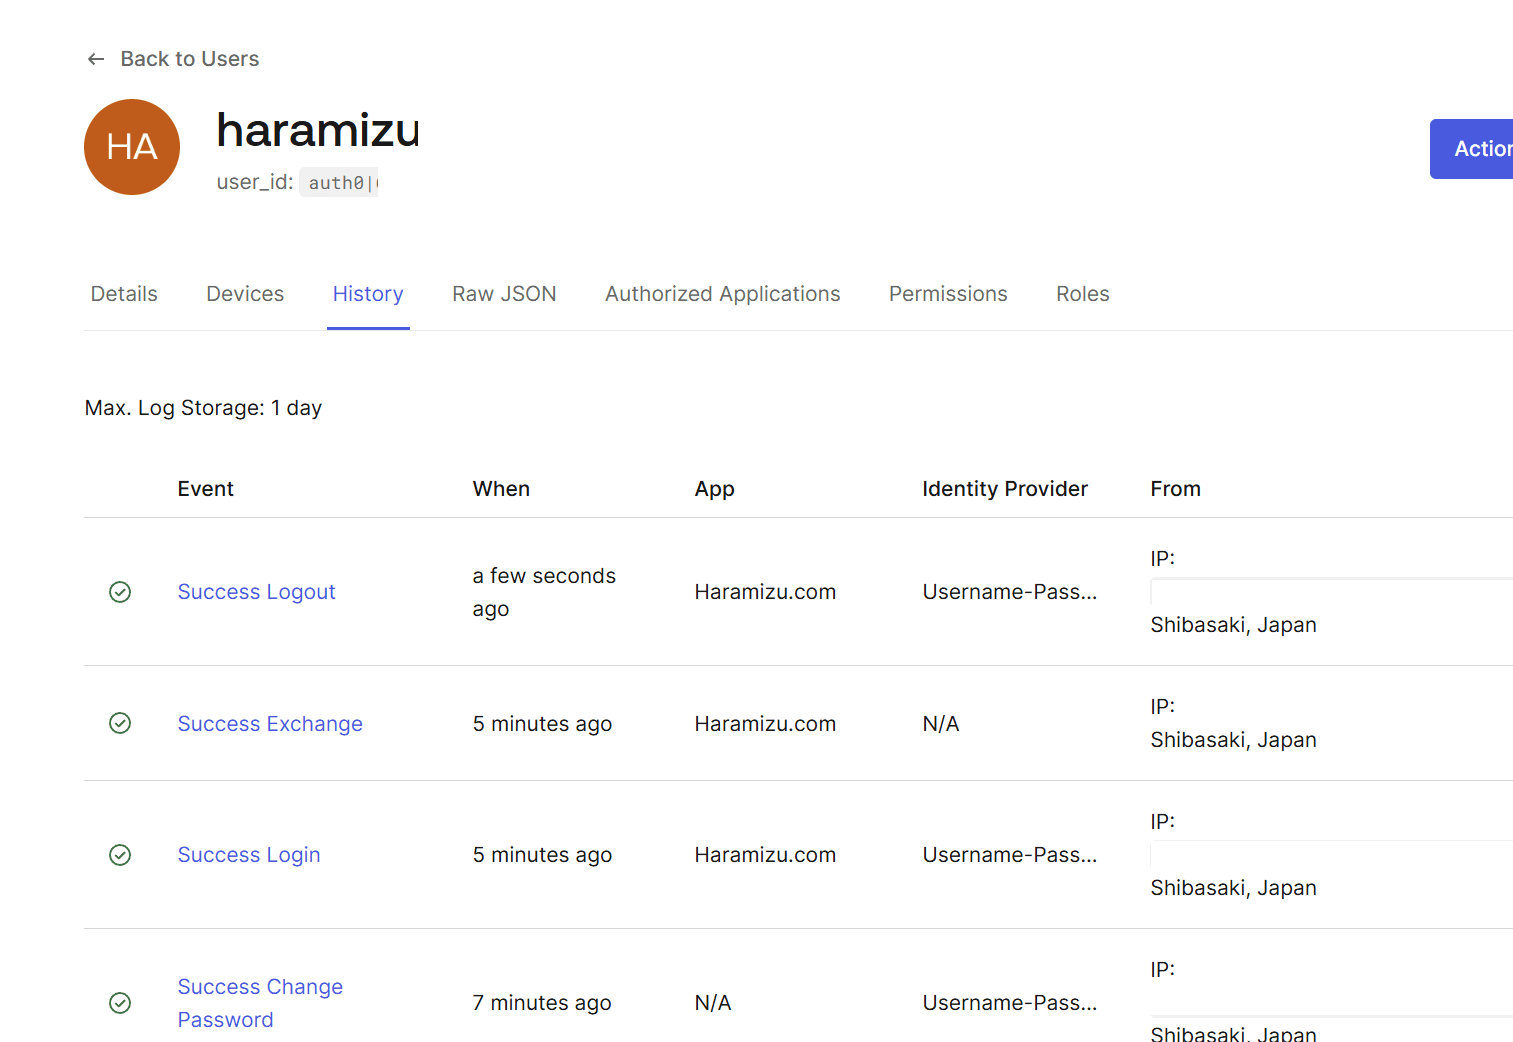
After the changes are made, the login and logout links are lined up as above when activated.
The above screen shows a fixed link display, which makes it difficult to see the login and logout on the screen, but the logs on the Auth0 administration screen confirm that the login and logout have been carried out correctly.
Viewing user profiles
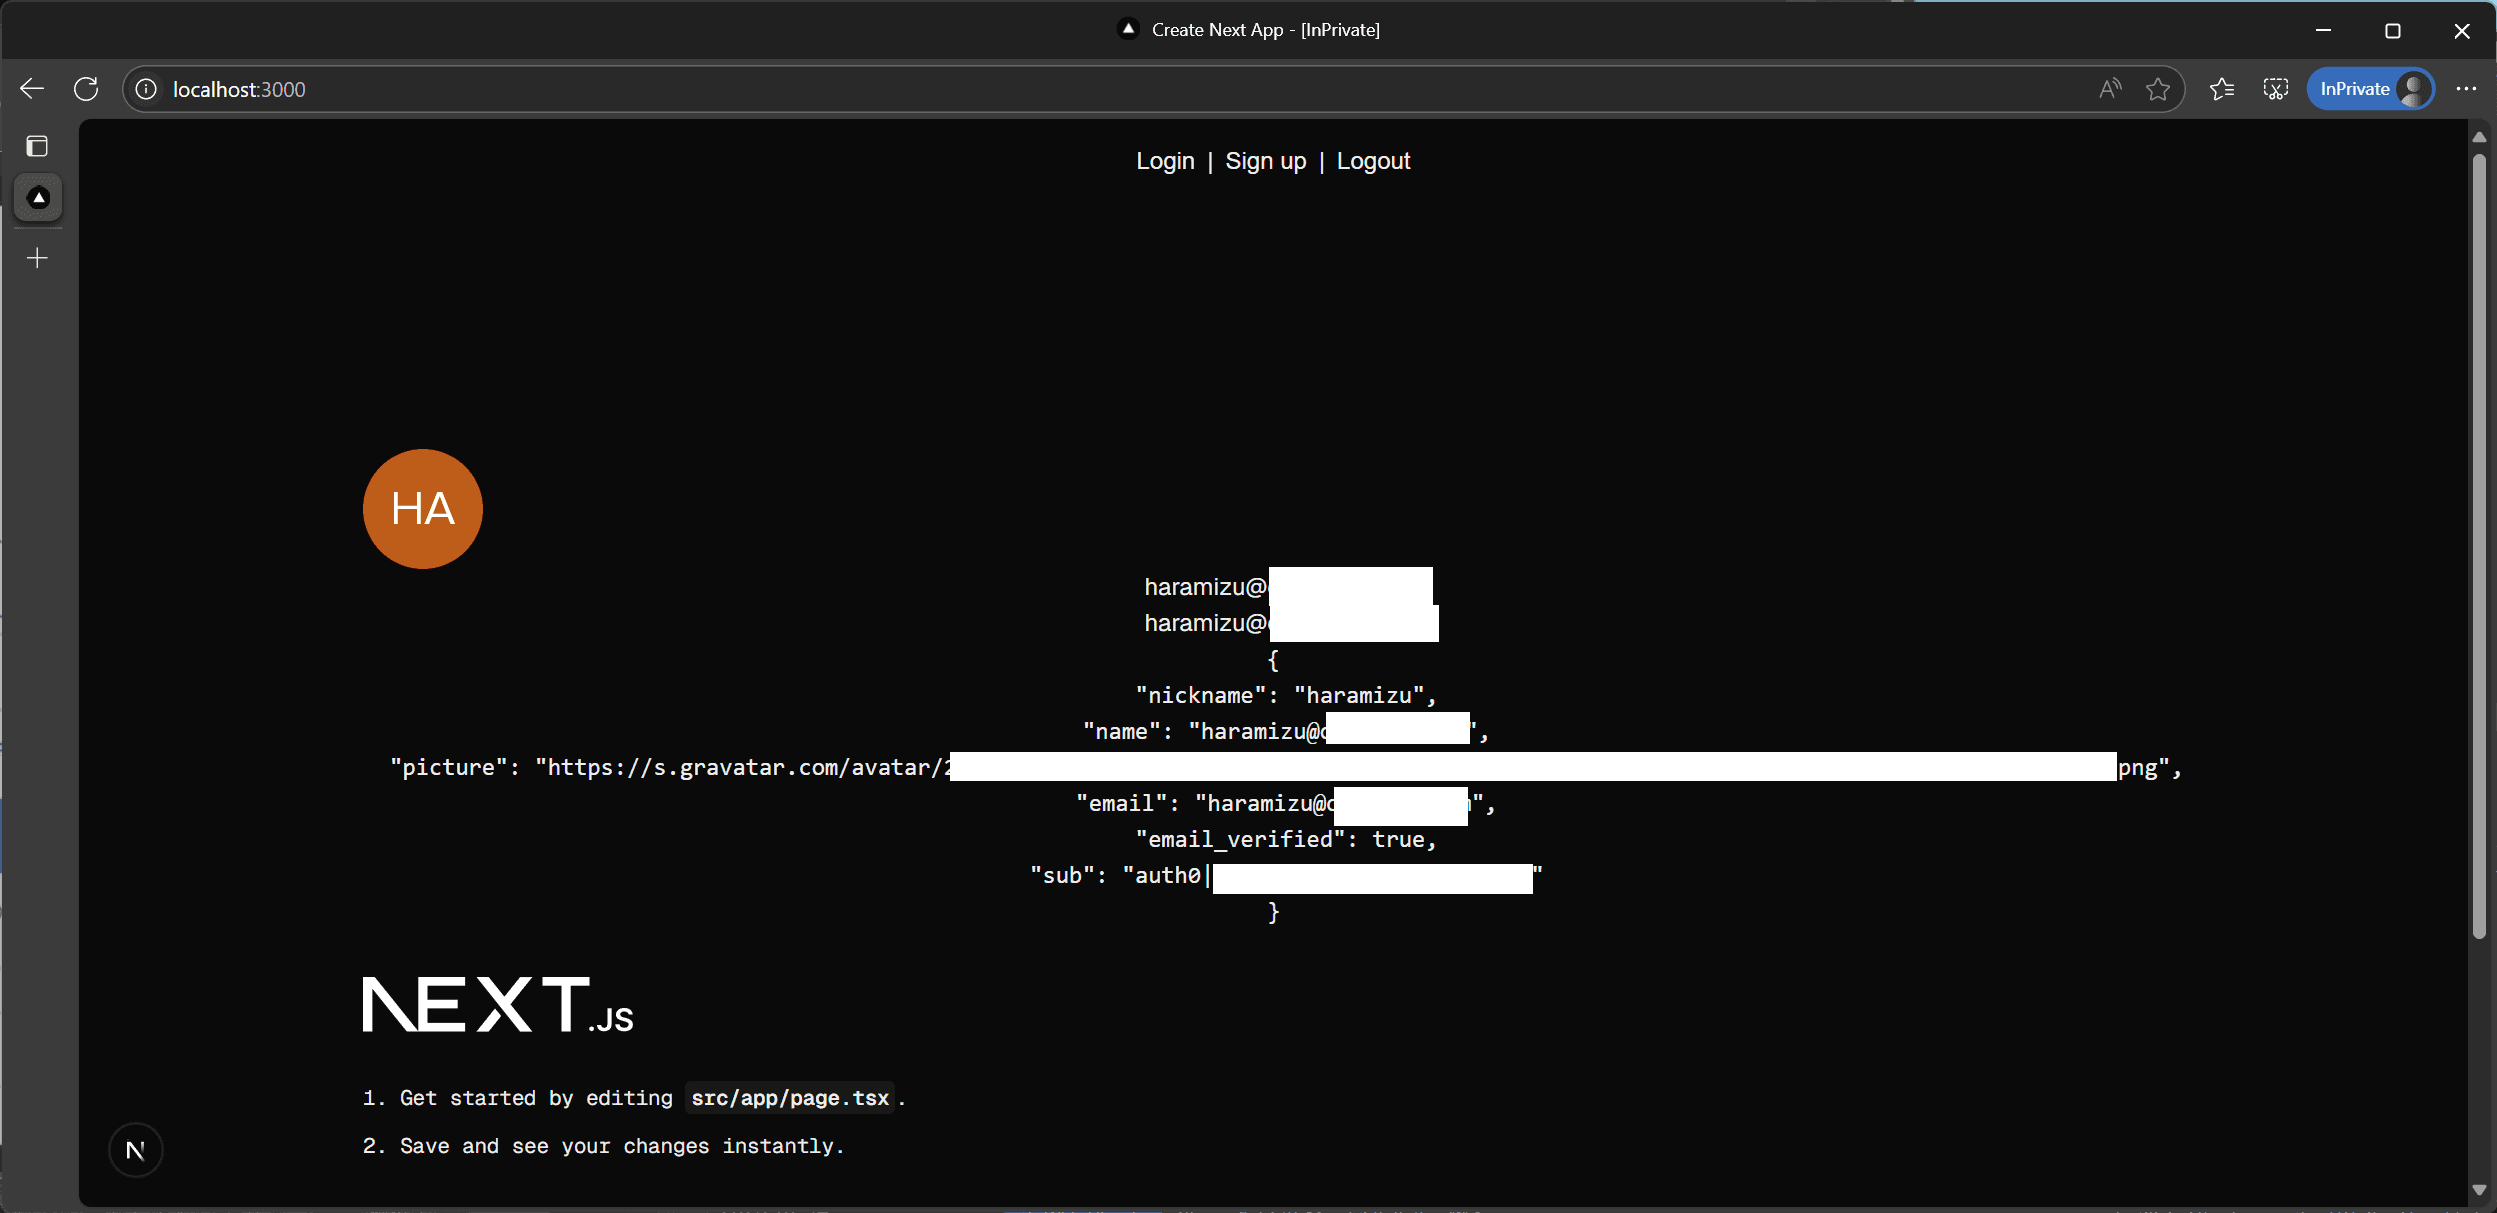
Both client and server components can be chosen to retrieve logged-in user information and reflect it on the screen.The client component is implemented here.
First, create the component that will display the profile, which will be the App Router and therefore must be set to Use client.
src/components/Profile.tsx
Incorporate this component into the page.The following is embedded on the top page this time.
src/app/page.tsx
After implementation, the data could be retrieved and the profile displayed when logging in.
A sample server component is shown below.
Enable sign-up
Add a sign-up facility to allow users to register accounts available on the site.The procedure is as follows.
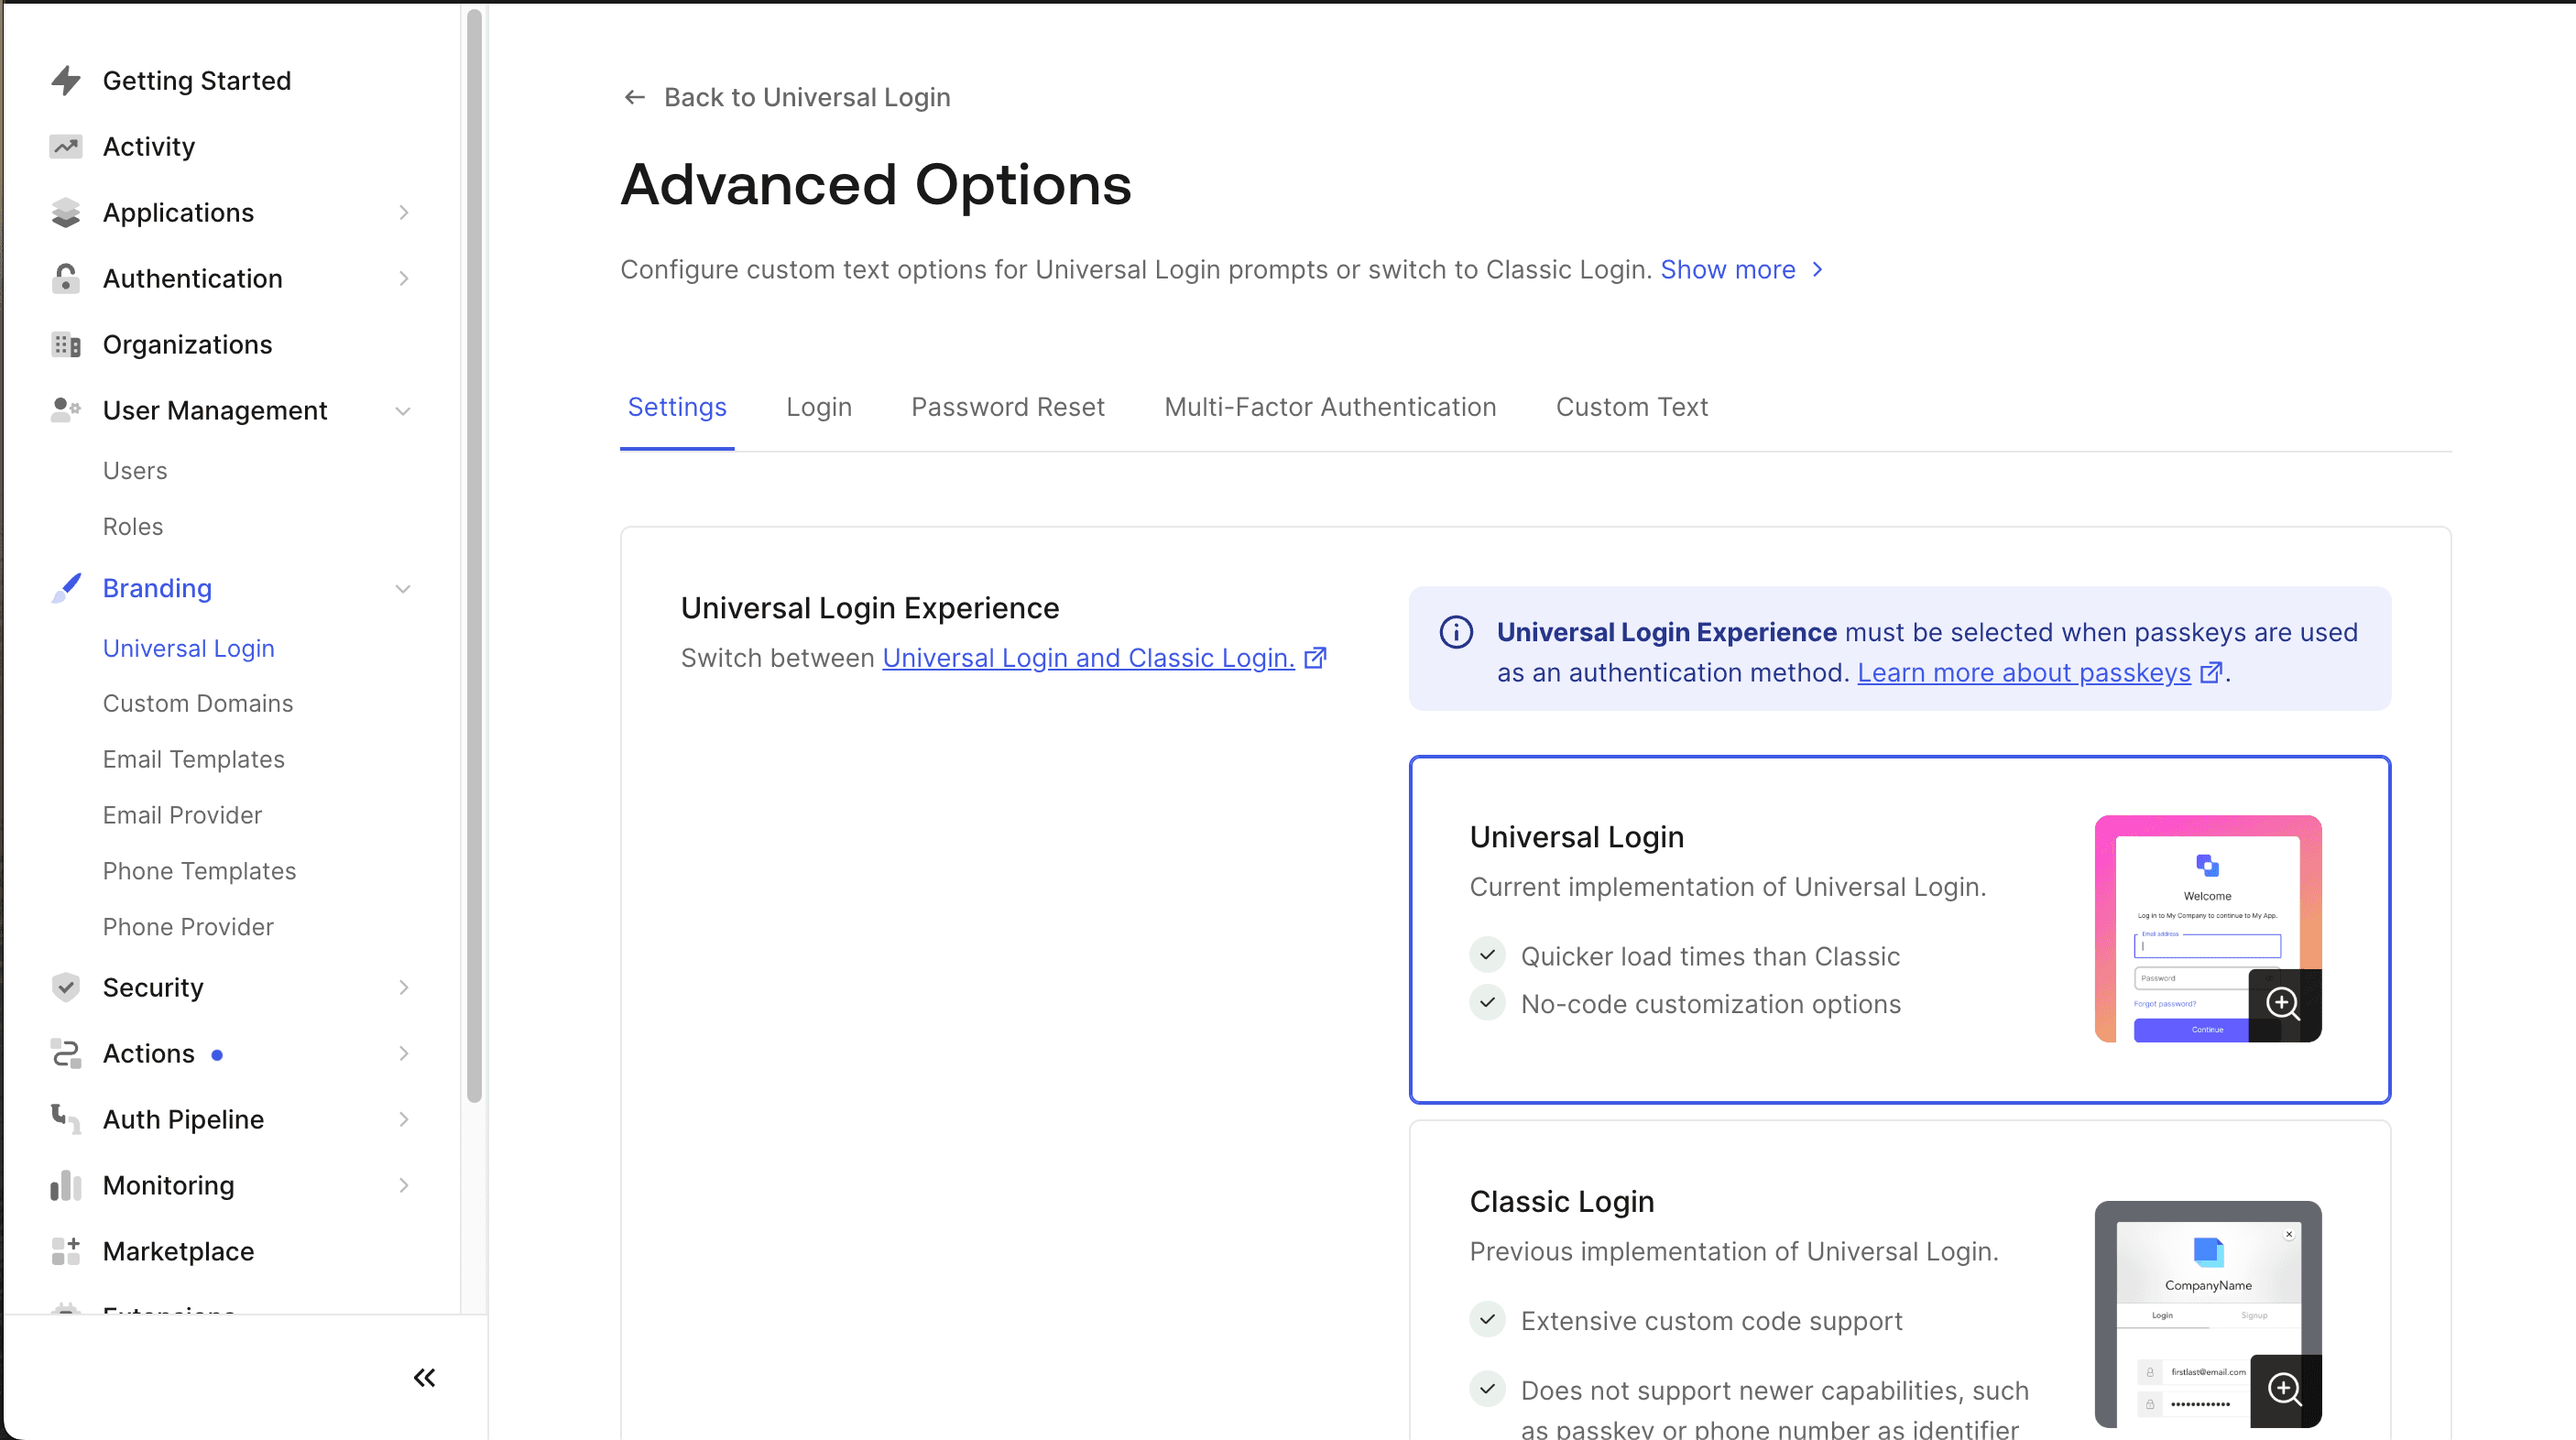
From the Auth0 administration screen, select Branding - Universal Login and ensure that Universal Login is enabled in the Advanced Options section of the settings screen.
From the Auth0 administration screen, select Authentication - Database and ensure that Disable Sign Ups is switched off in the settings for the database you are using.
Finally, the Sign up link is implemented by applying a parameter to login as follows.
src/app/layout.tsx
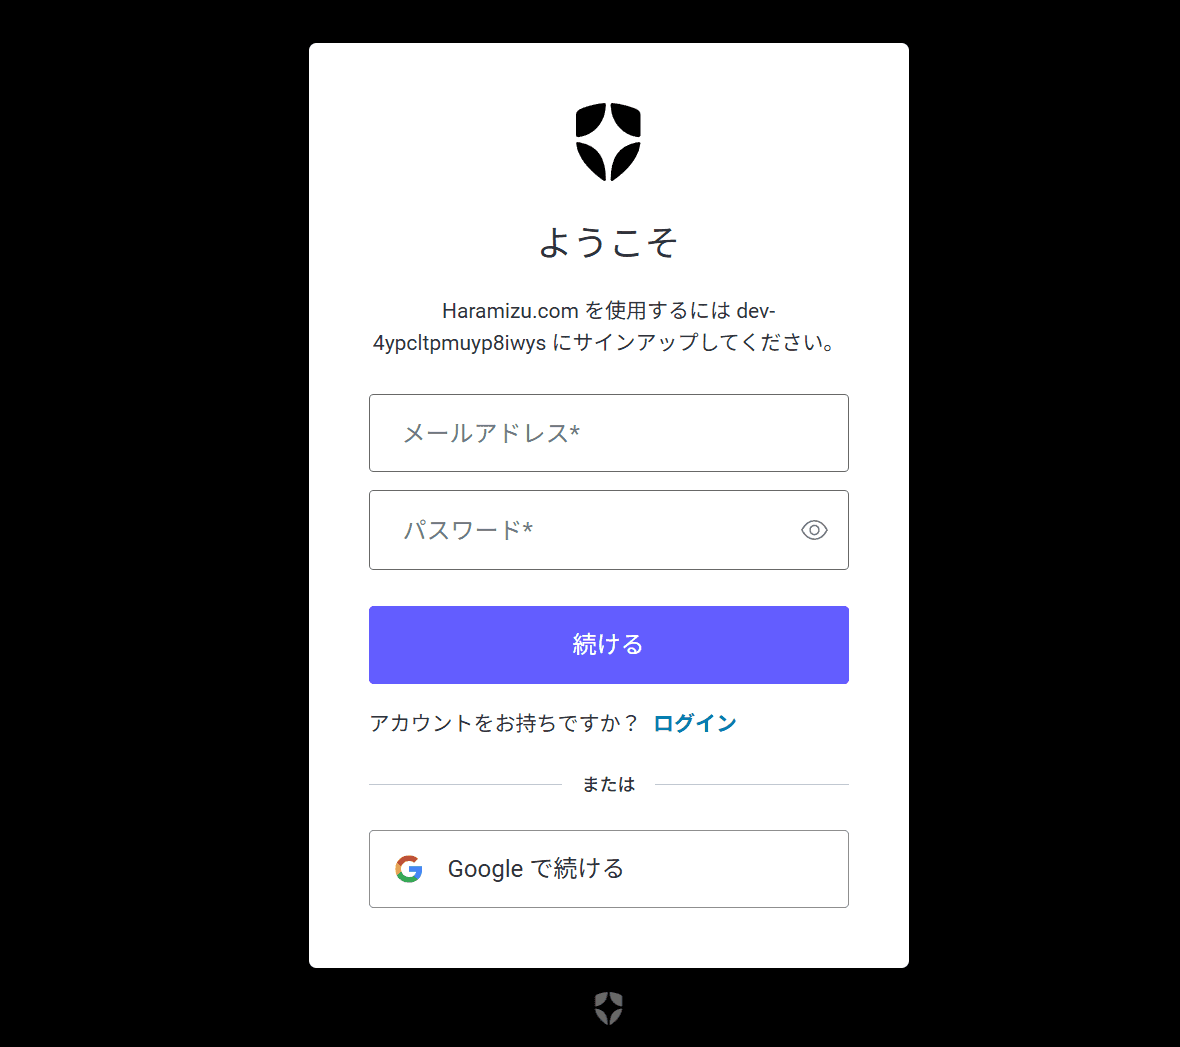
After clicking, you will be taken to the sign-up screen.Of course, it also contains a link to switch to the login screen.
About custom domains
Find out how to set up a custom domain, which has recently been opened up as a free plan.You can configure this setting by opening the Custom Domain tab on the Settings page.
- Initially, the screen is as follows.
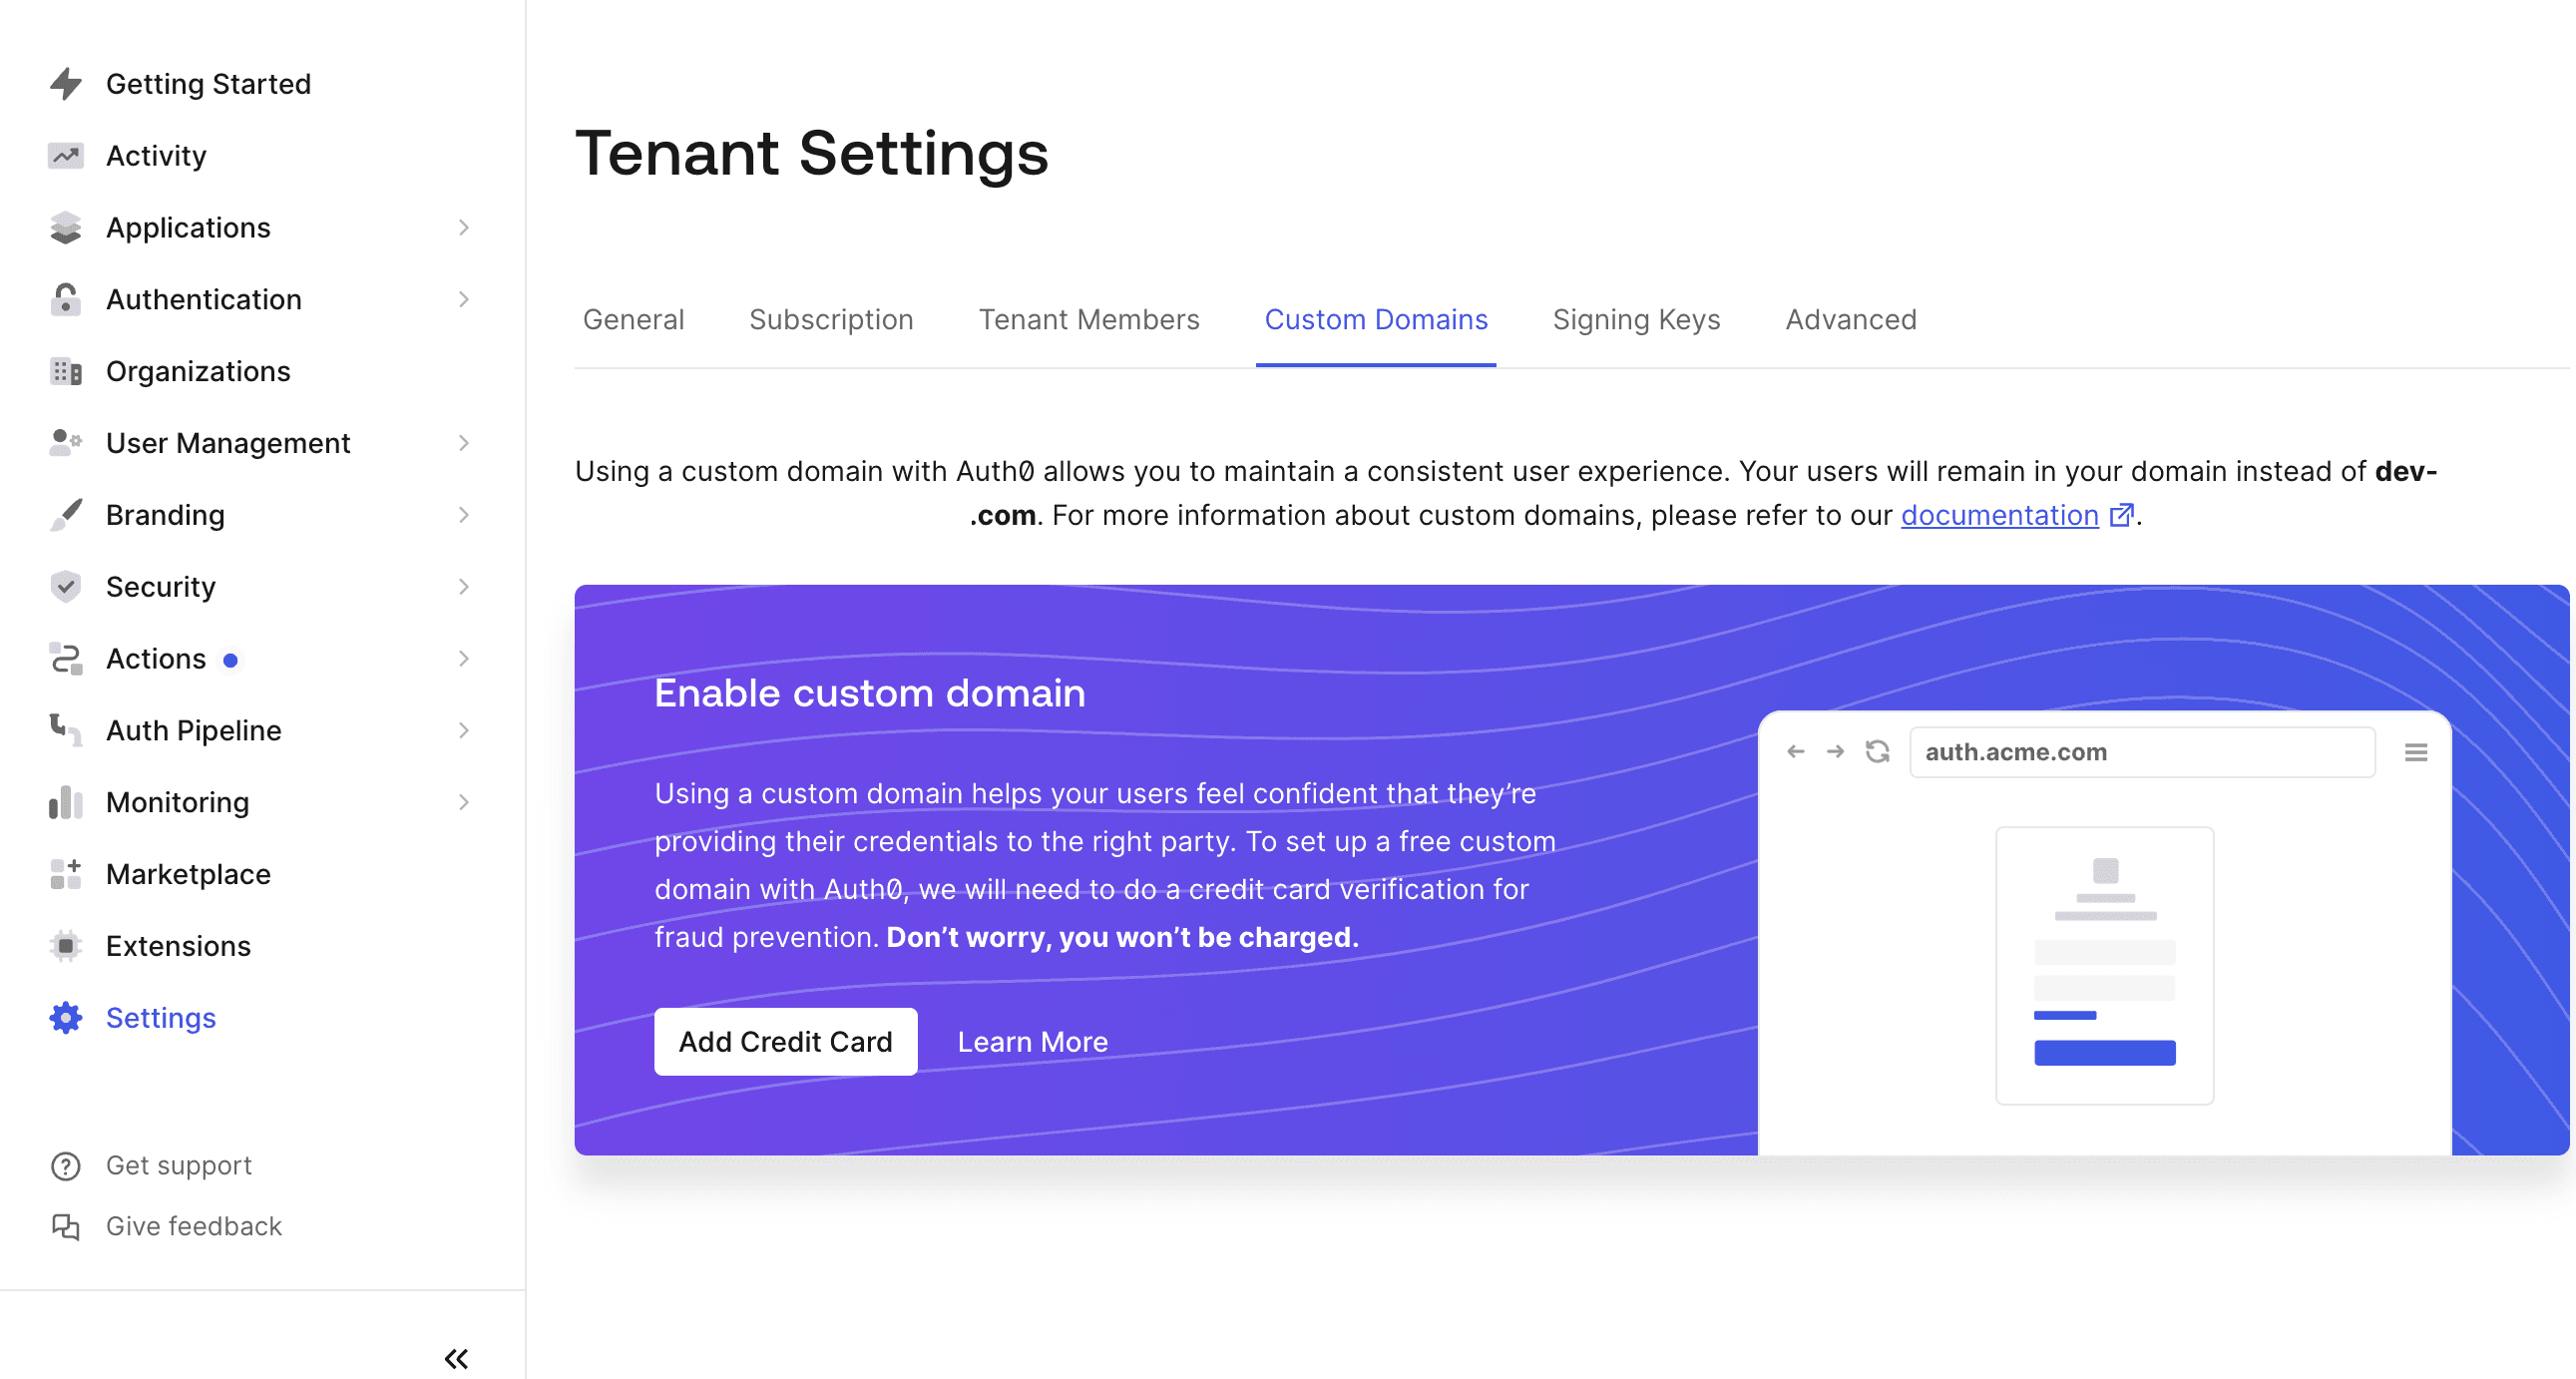
- When using a custom domain, a credit card is required as personal authentication, although this can be set up on the free plan.You will not be charged and will proceed with the credit card authorisation.Once the credit card number has been entered and authorised, the screen will change as follows.
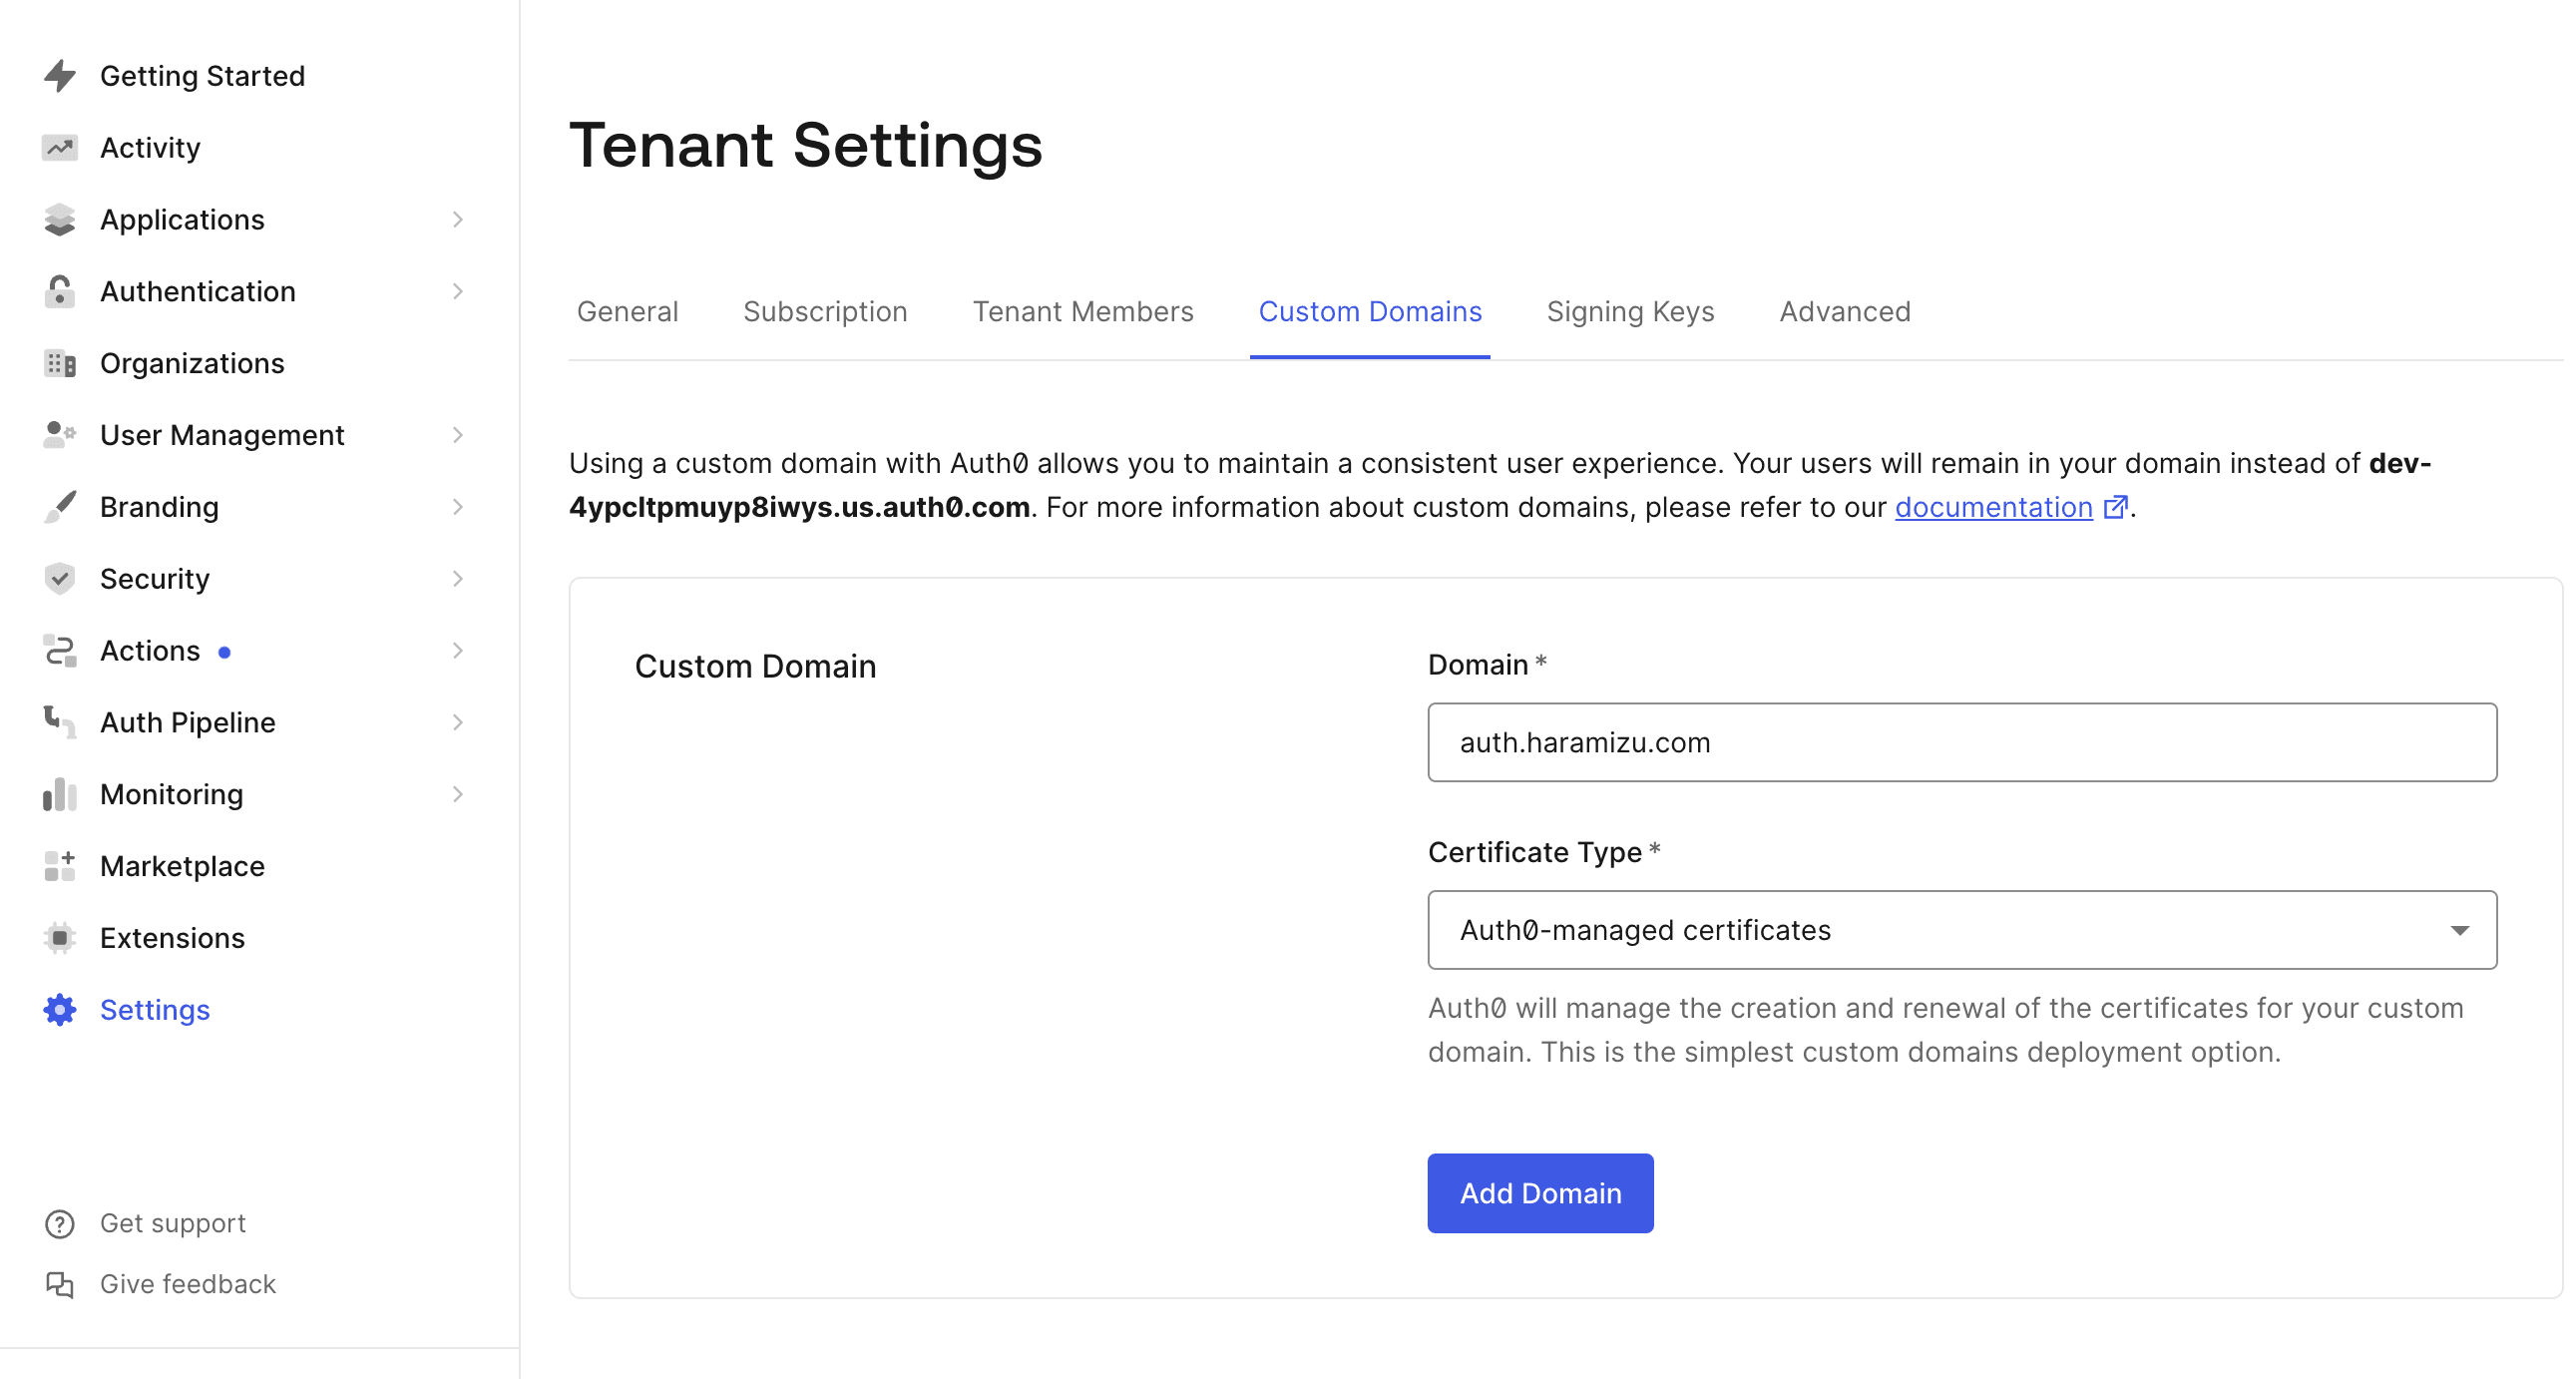
- After entering the domain name, the DNS configuration screen appears as shown below.
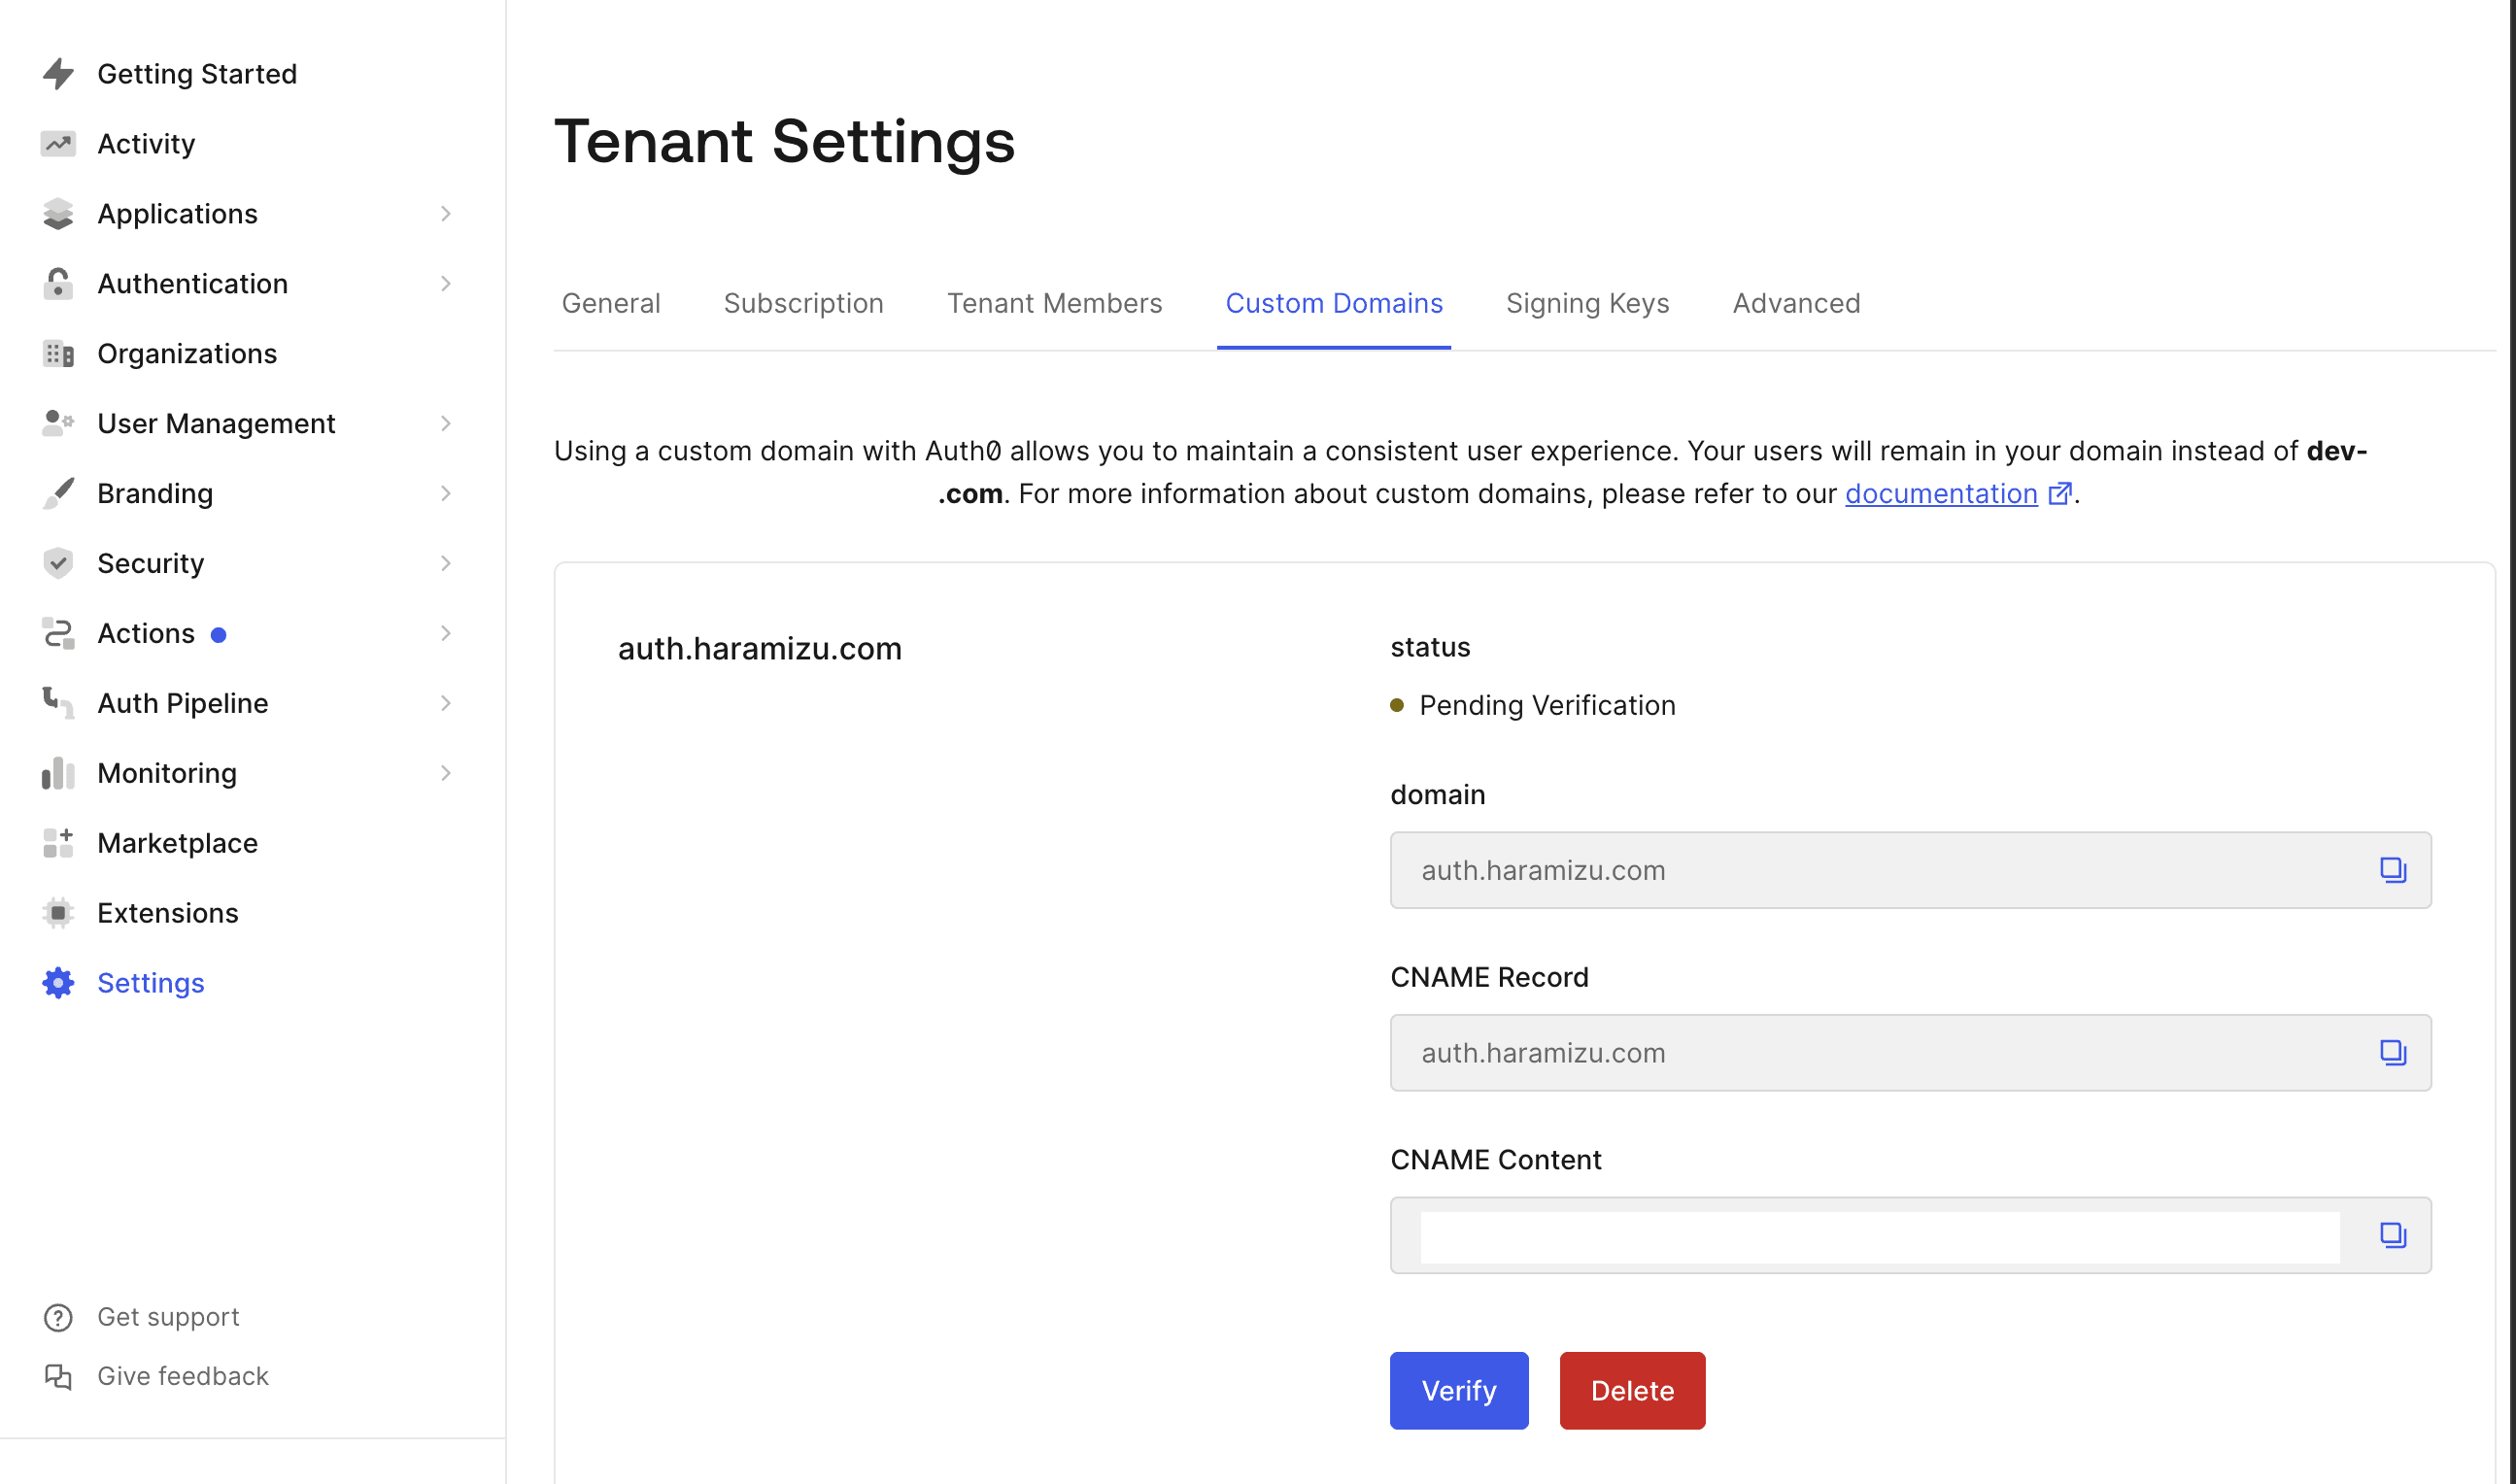
- If you set the provided DNS records and click the Verify button a short time later, a completion dialogue will appear as shown below if the DNS settings are correct.
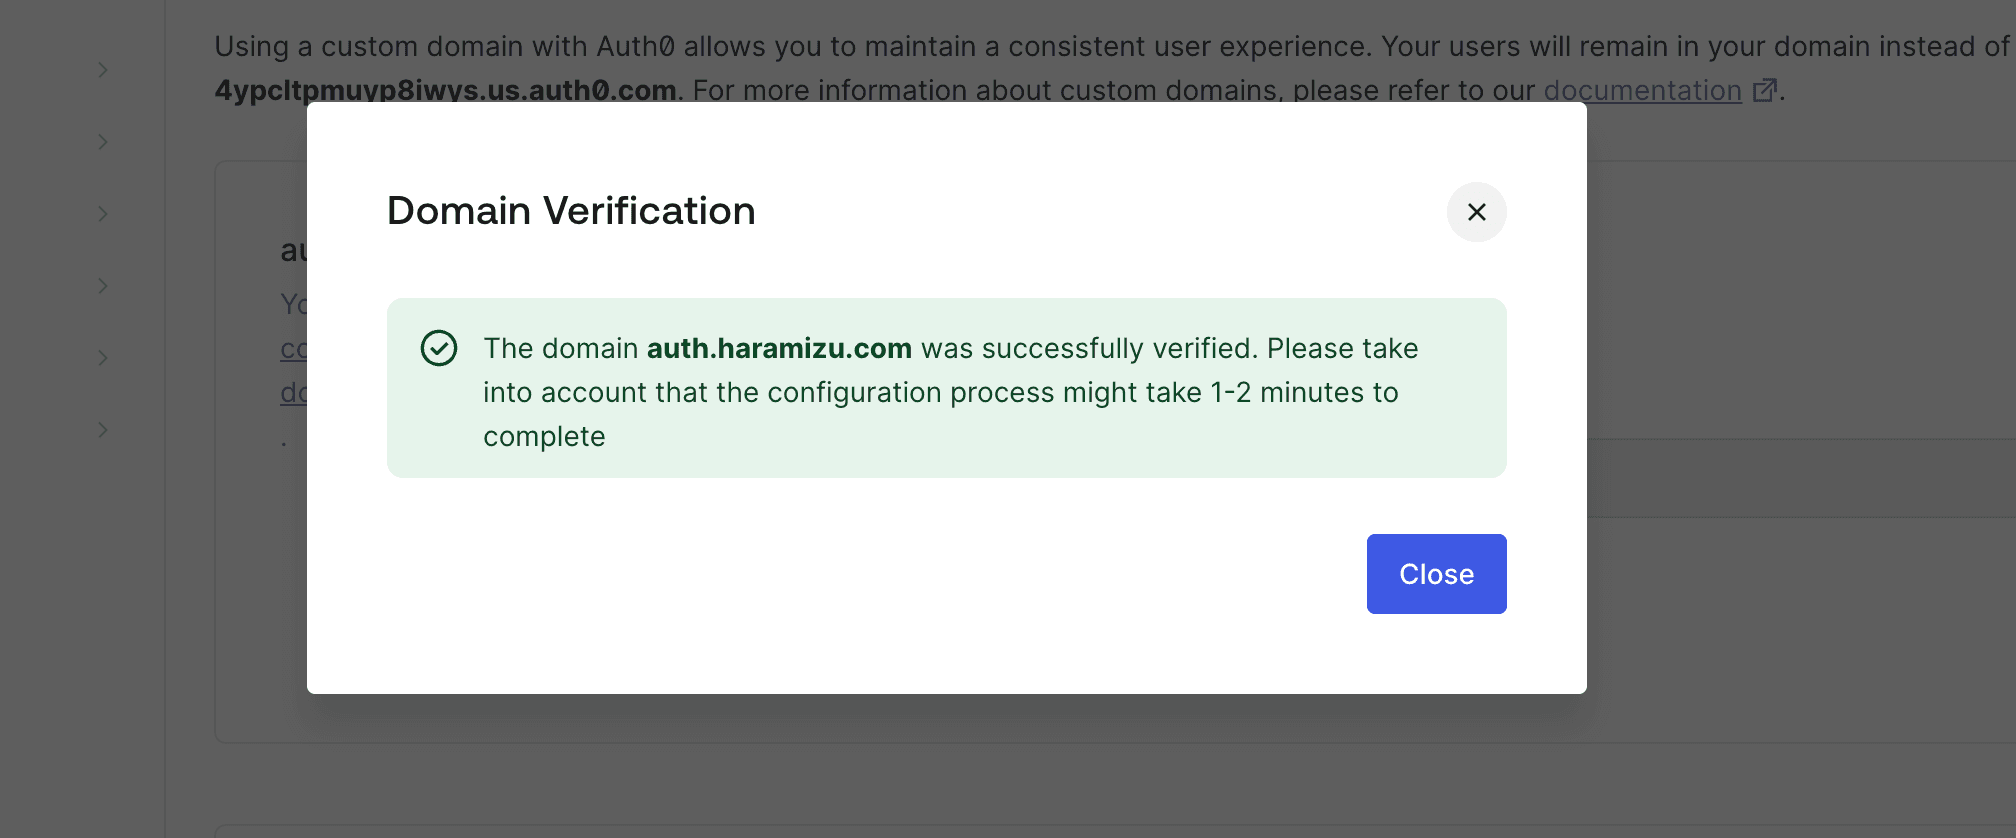
- Custom Domain could be added.
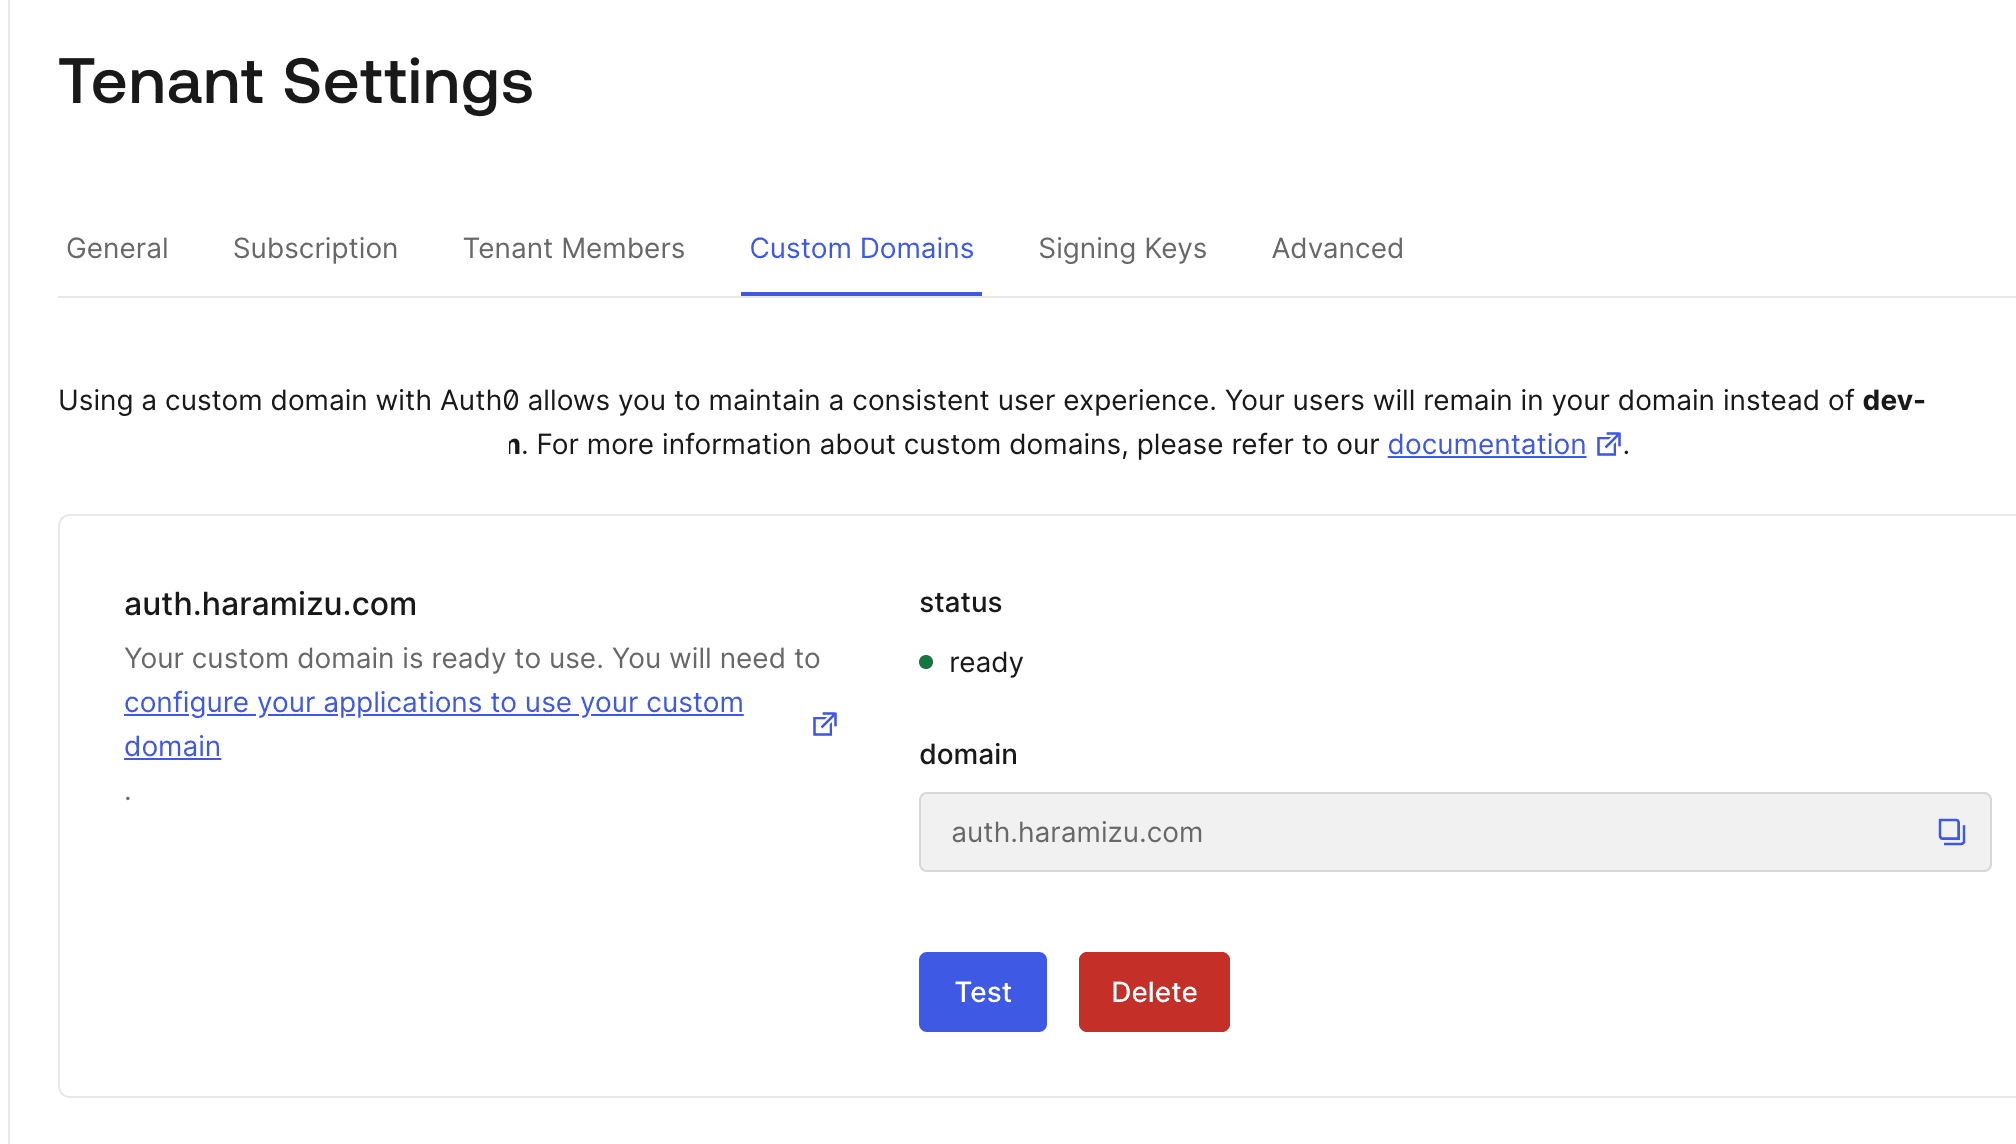
Custom Domain allows you to use the domain used for environment variables etc. as a custom domain.
Samples Repository
For this sample, the code is available as is in the following repository.