Cloudinary allows users to register descriptive information as metadata for uploaded images and videos. This metadata can include titles, captions, tags, custom fields, etc., allowing users to quickly search and identify the desired file from a large number of assets. In long-term operations, searchability becomes more important as the number of assets to be managed increases, so the use of metadata can contribute greatly to improving work efficiency.
Setting up structured metadata fields
2025-07-08
About Metadata Settings
Select Structured Metadata from the menu on the left to display a list of metadata.
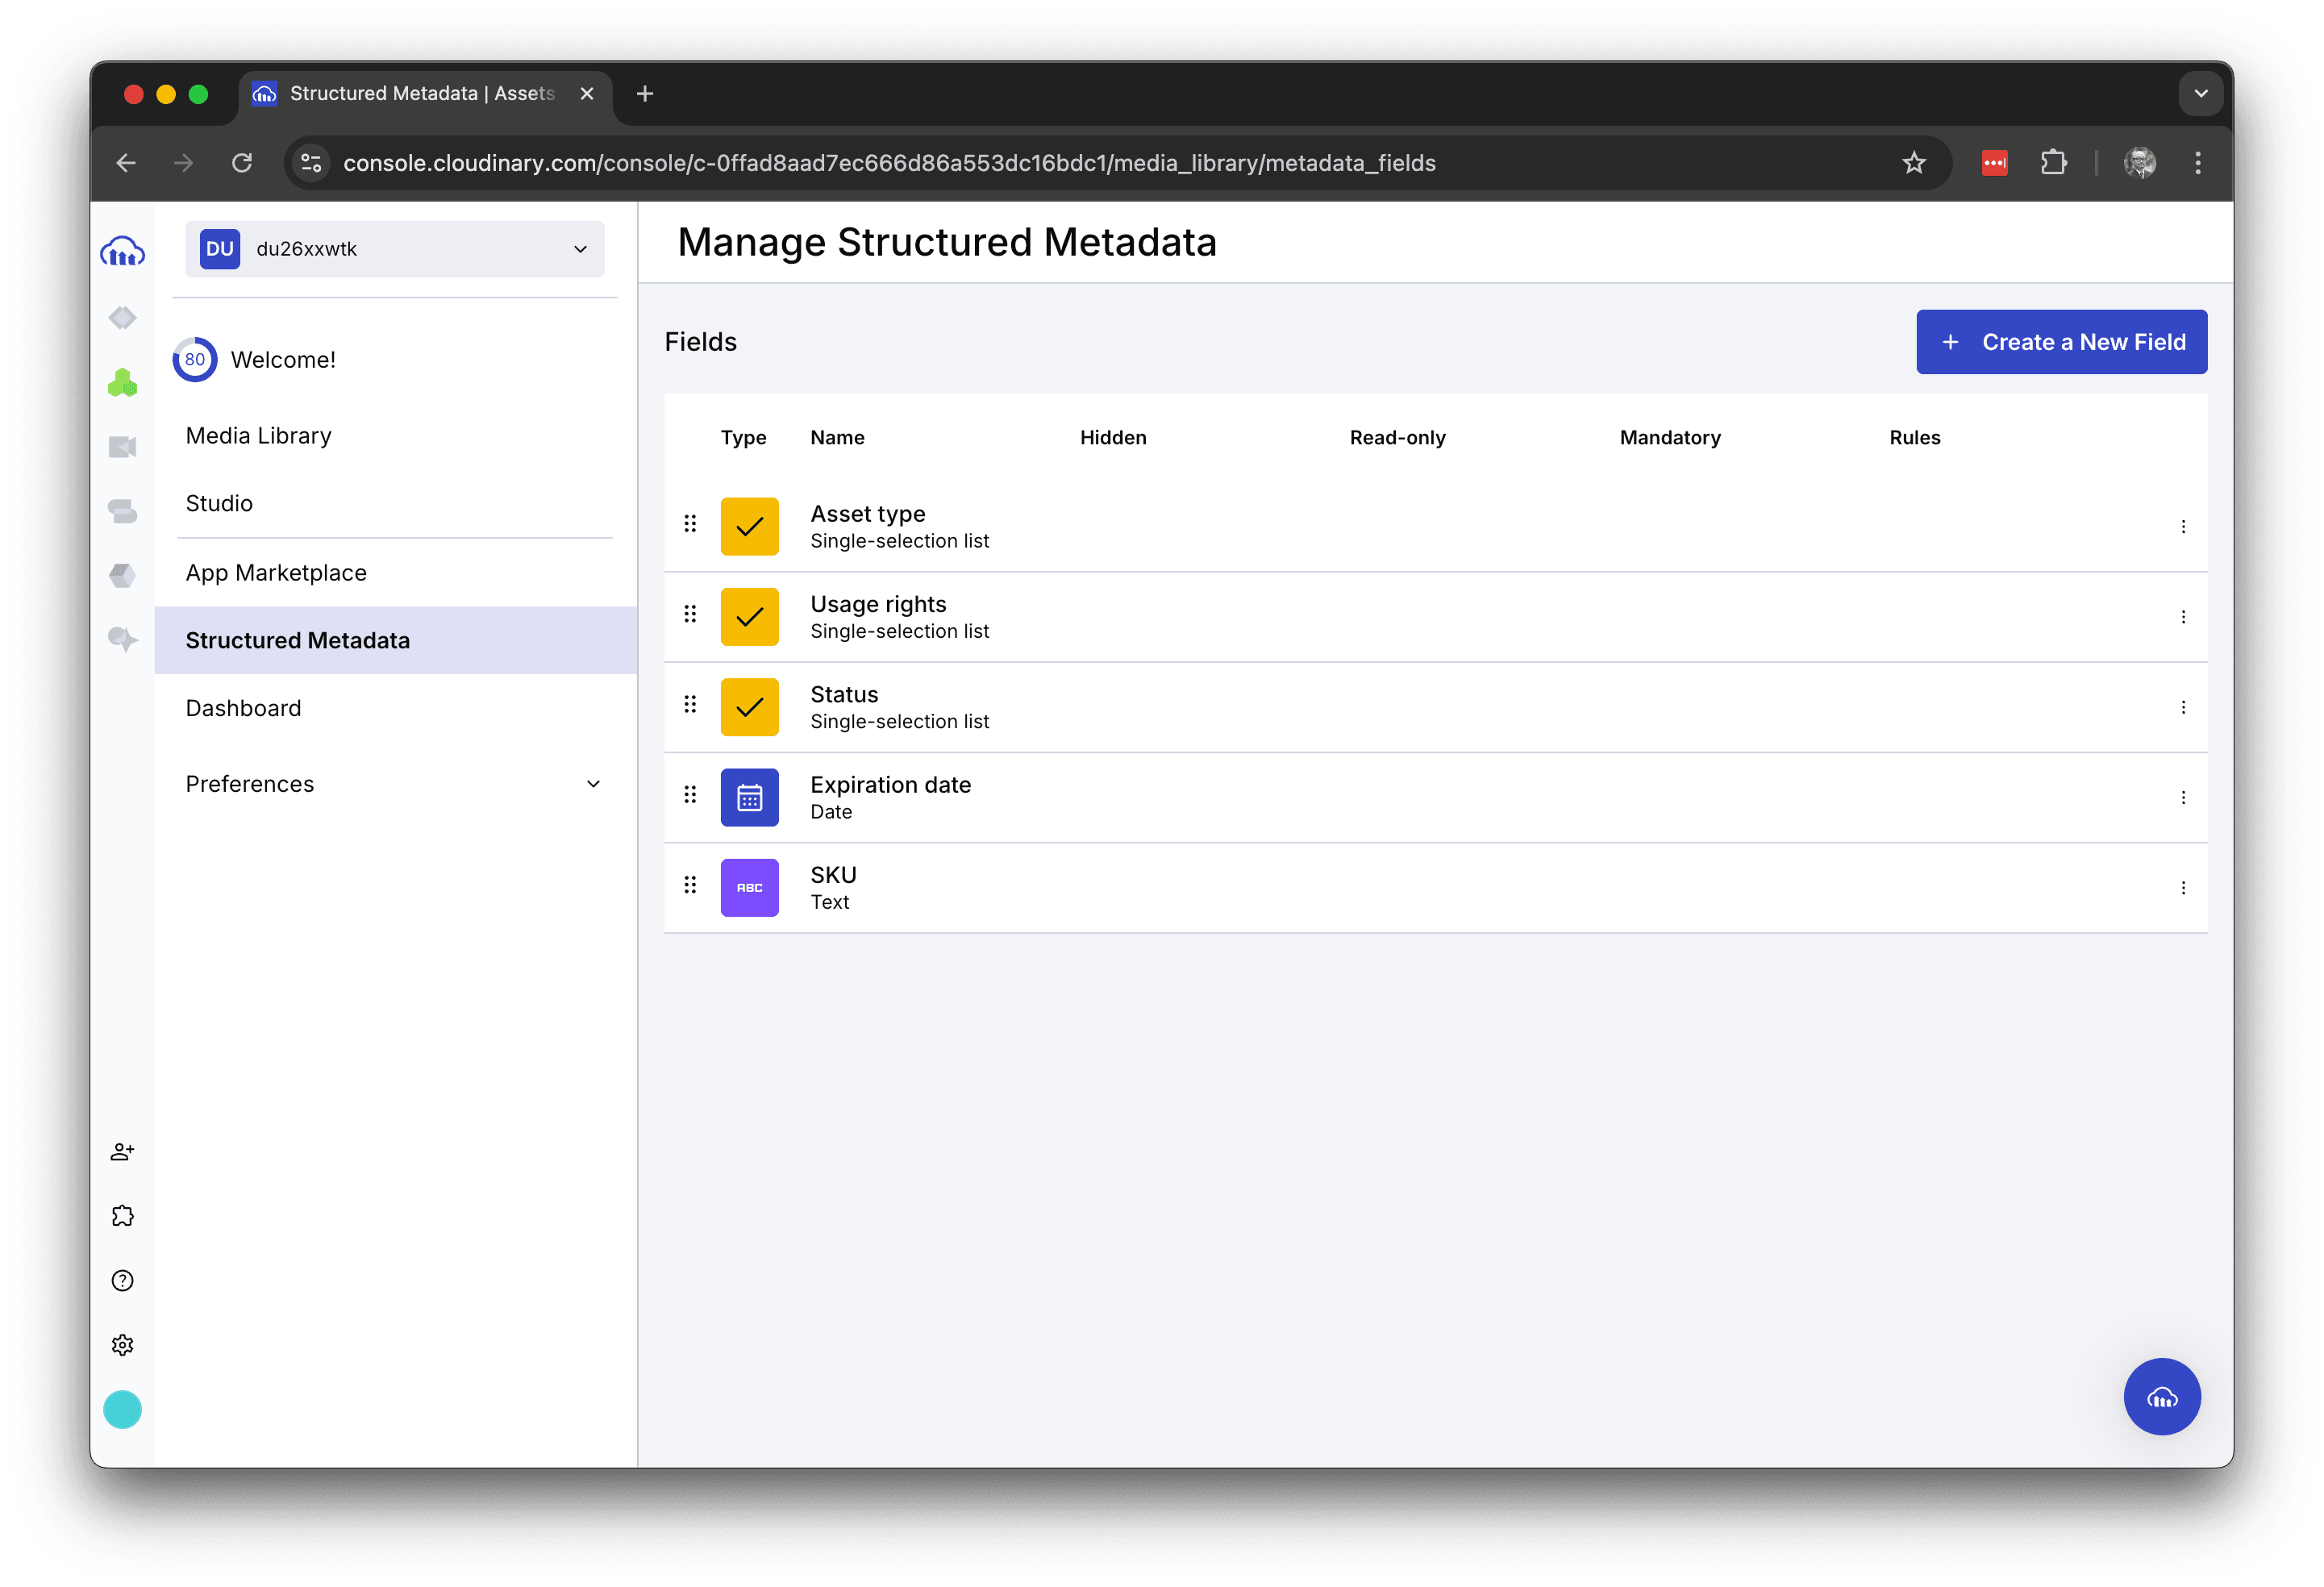
The standard Metadata provided are the following five
Asset type
Metadata can be set to indicate what type of data format the registered assets are in. This metadata is set from a list of target values.
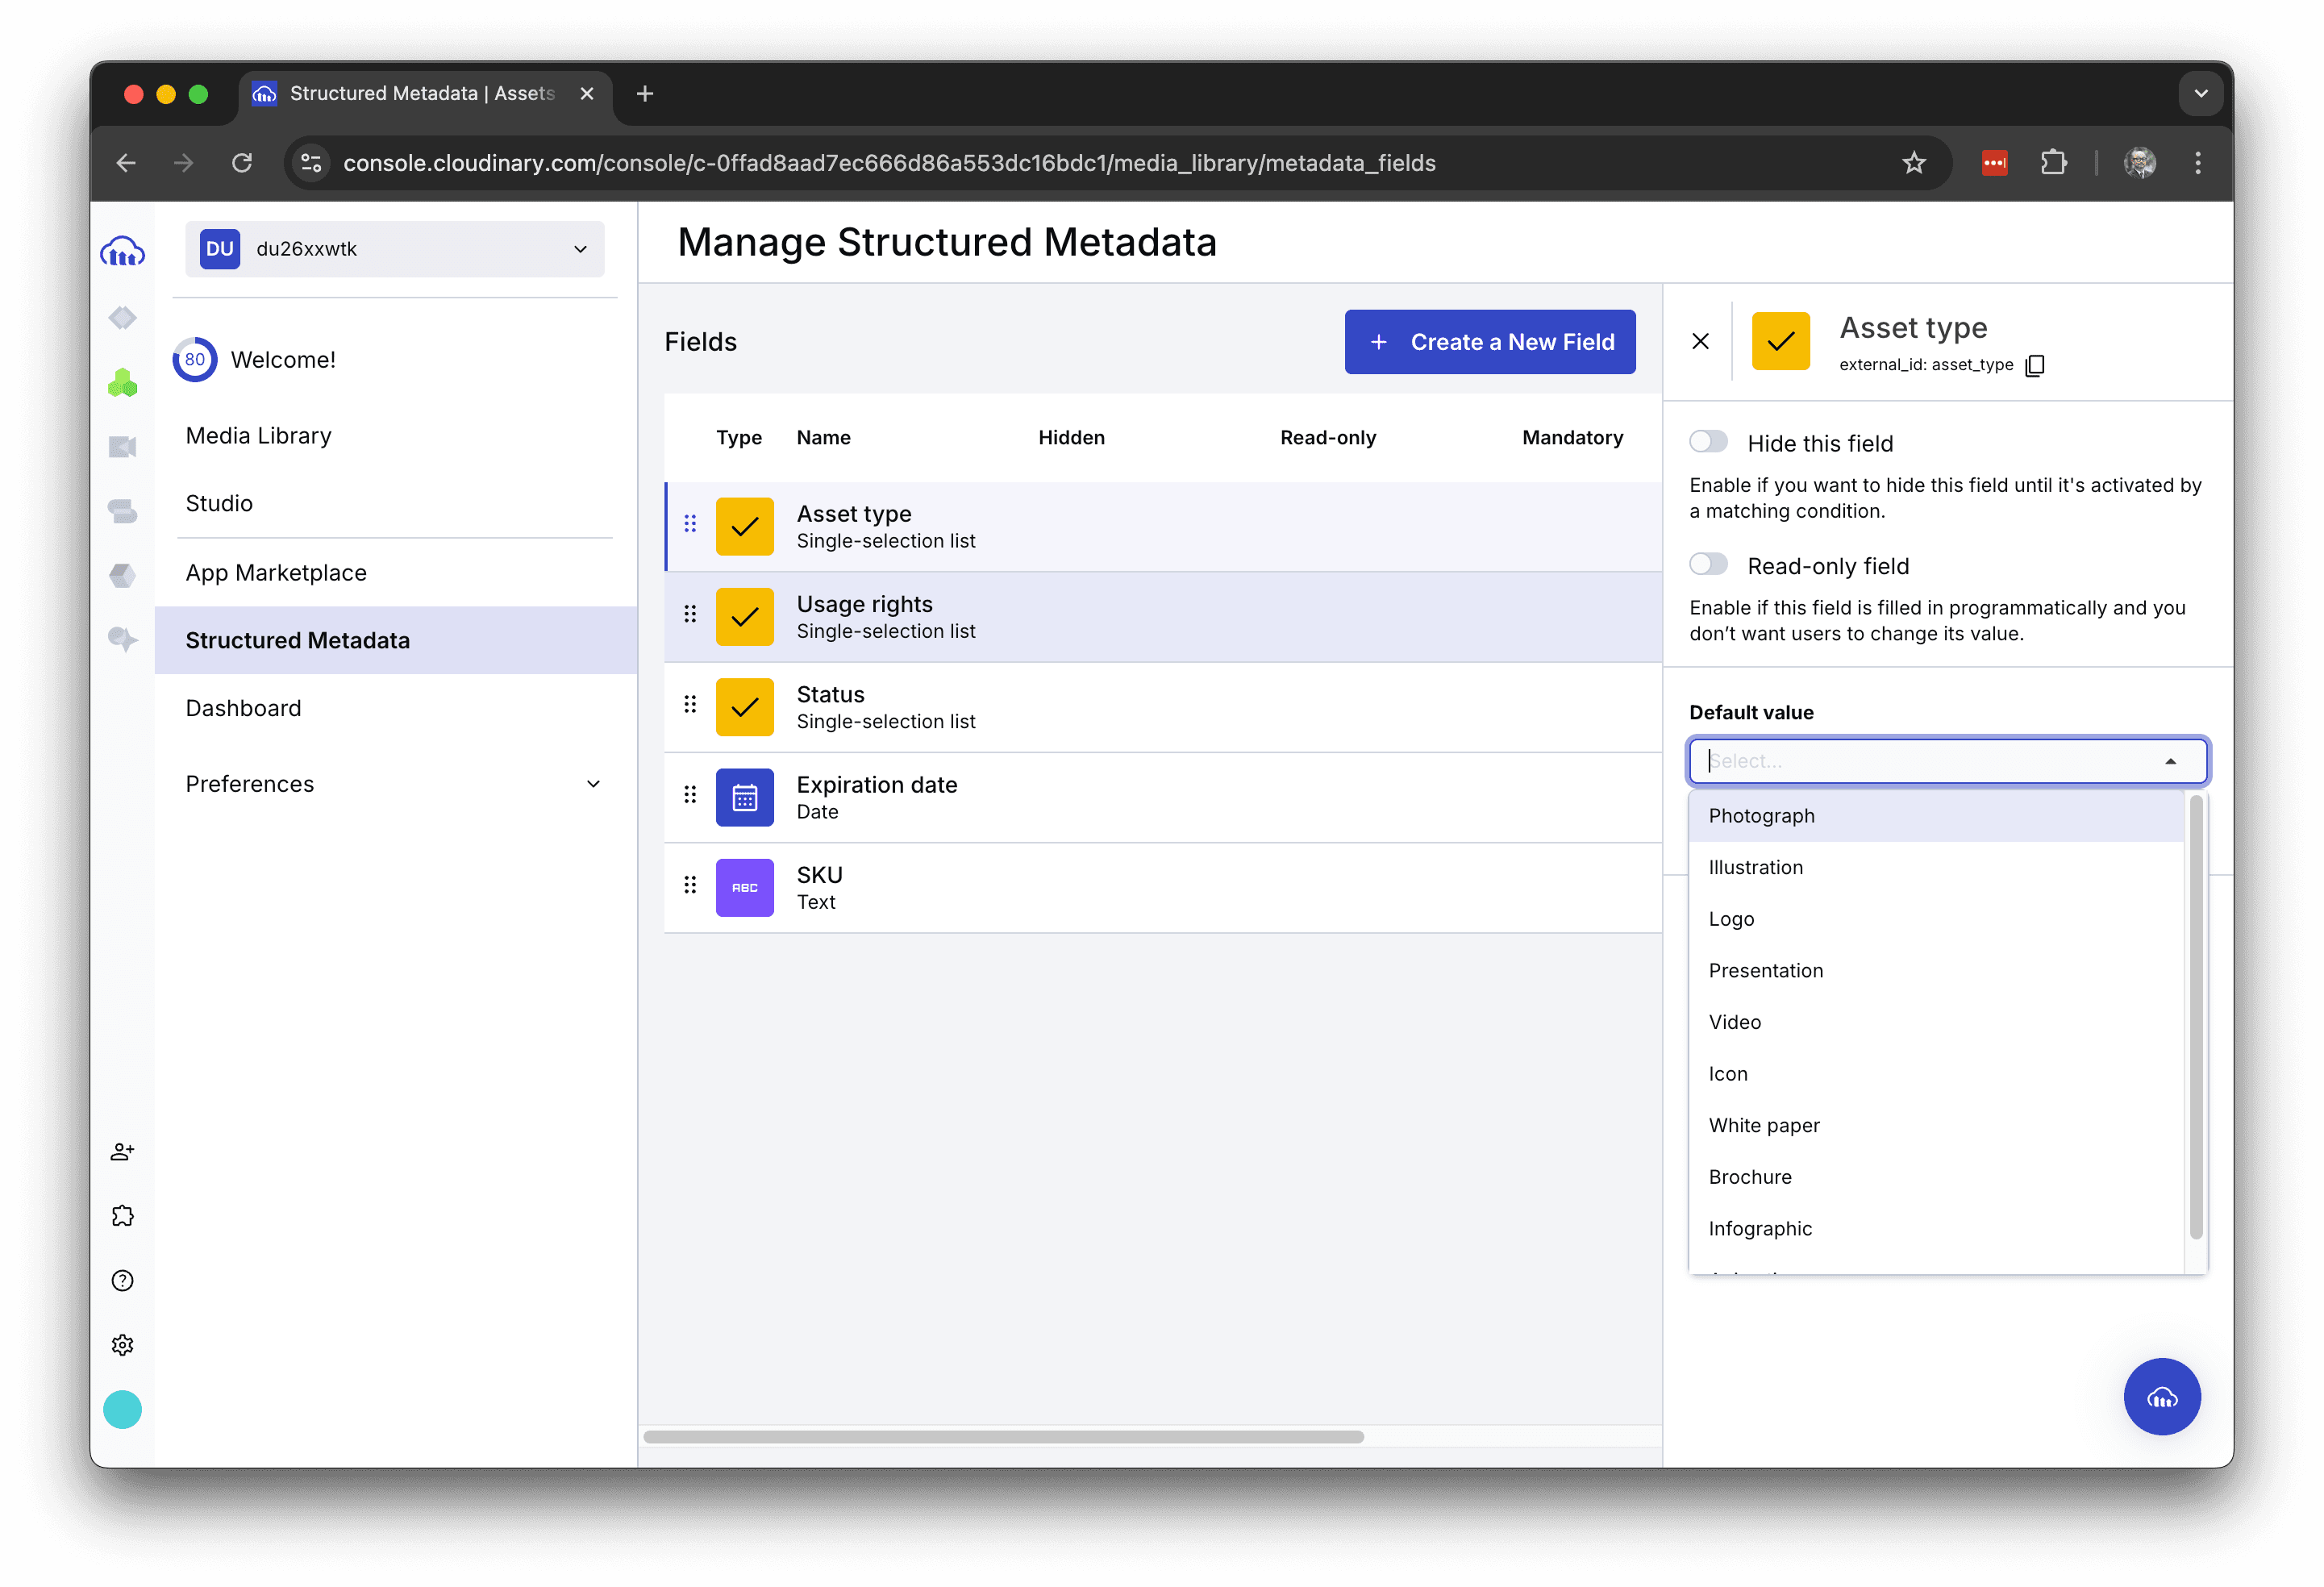
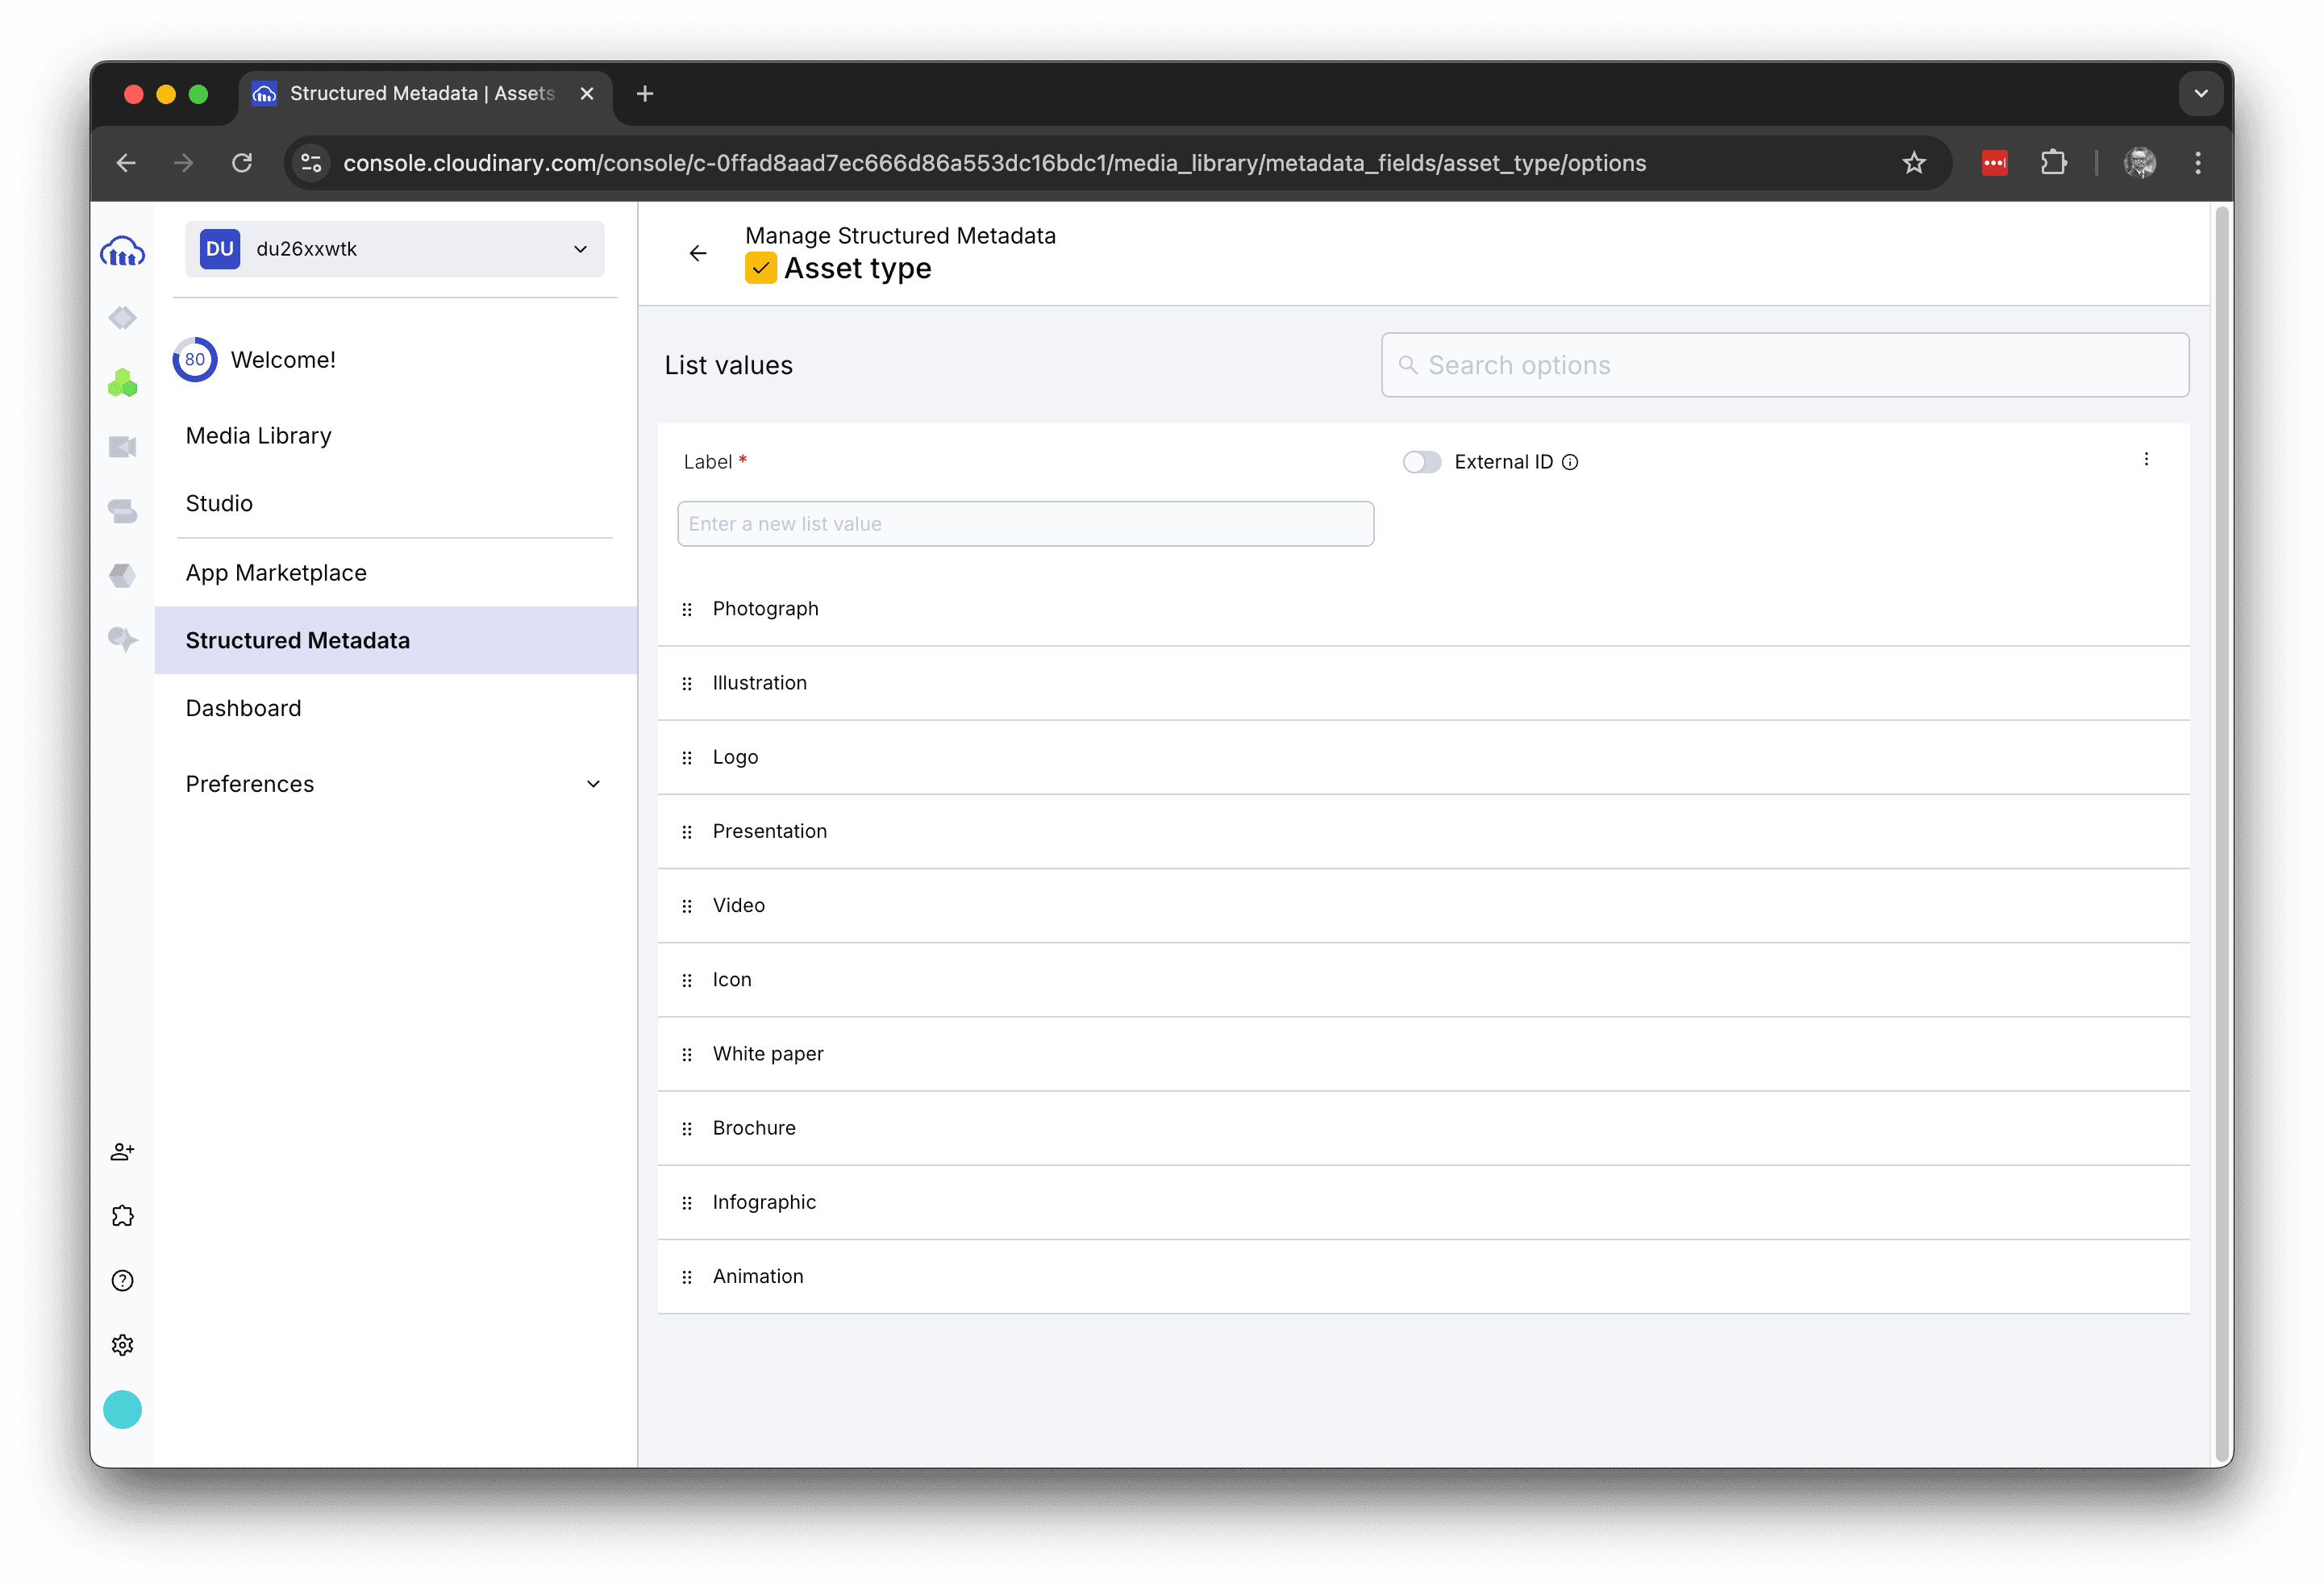
Click on the item for which you want to set standard values, and you will see the list as shown above; you can also click on Manage list values to edit the list.
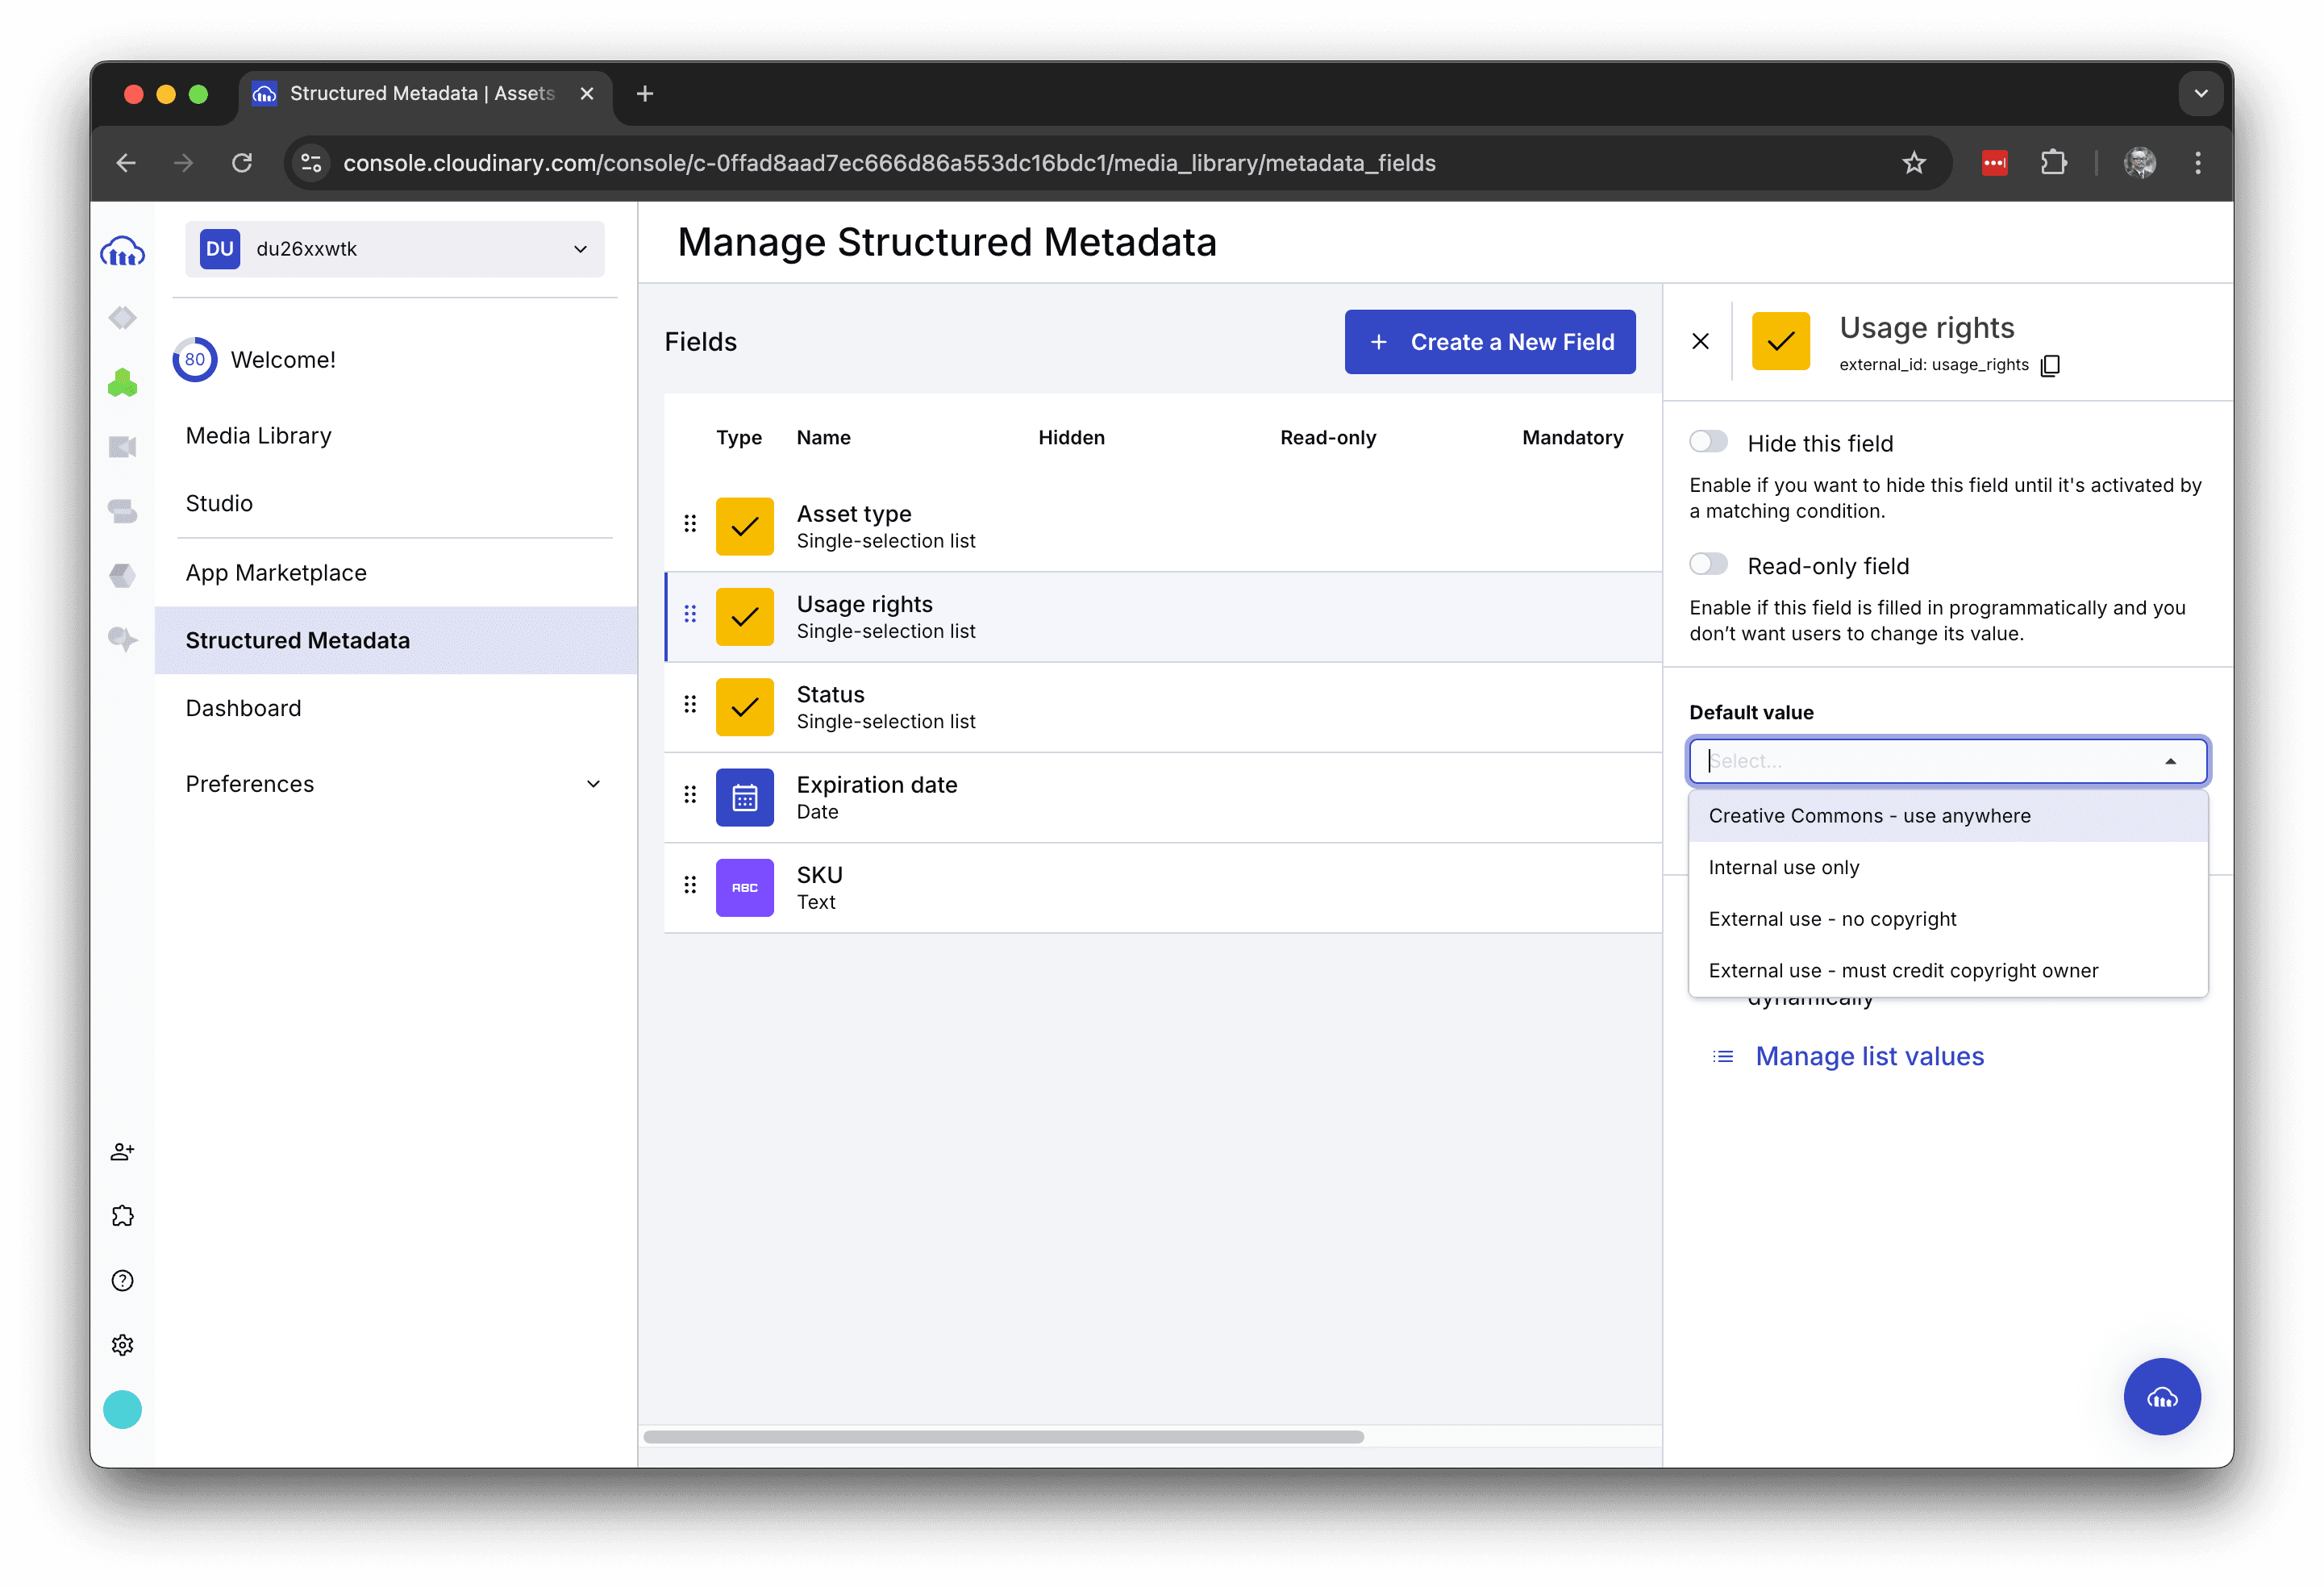
Rights
The default value can be set for the rights to use the asset.
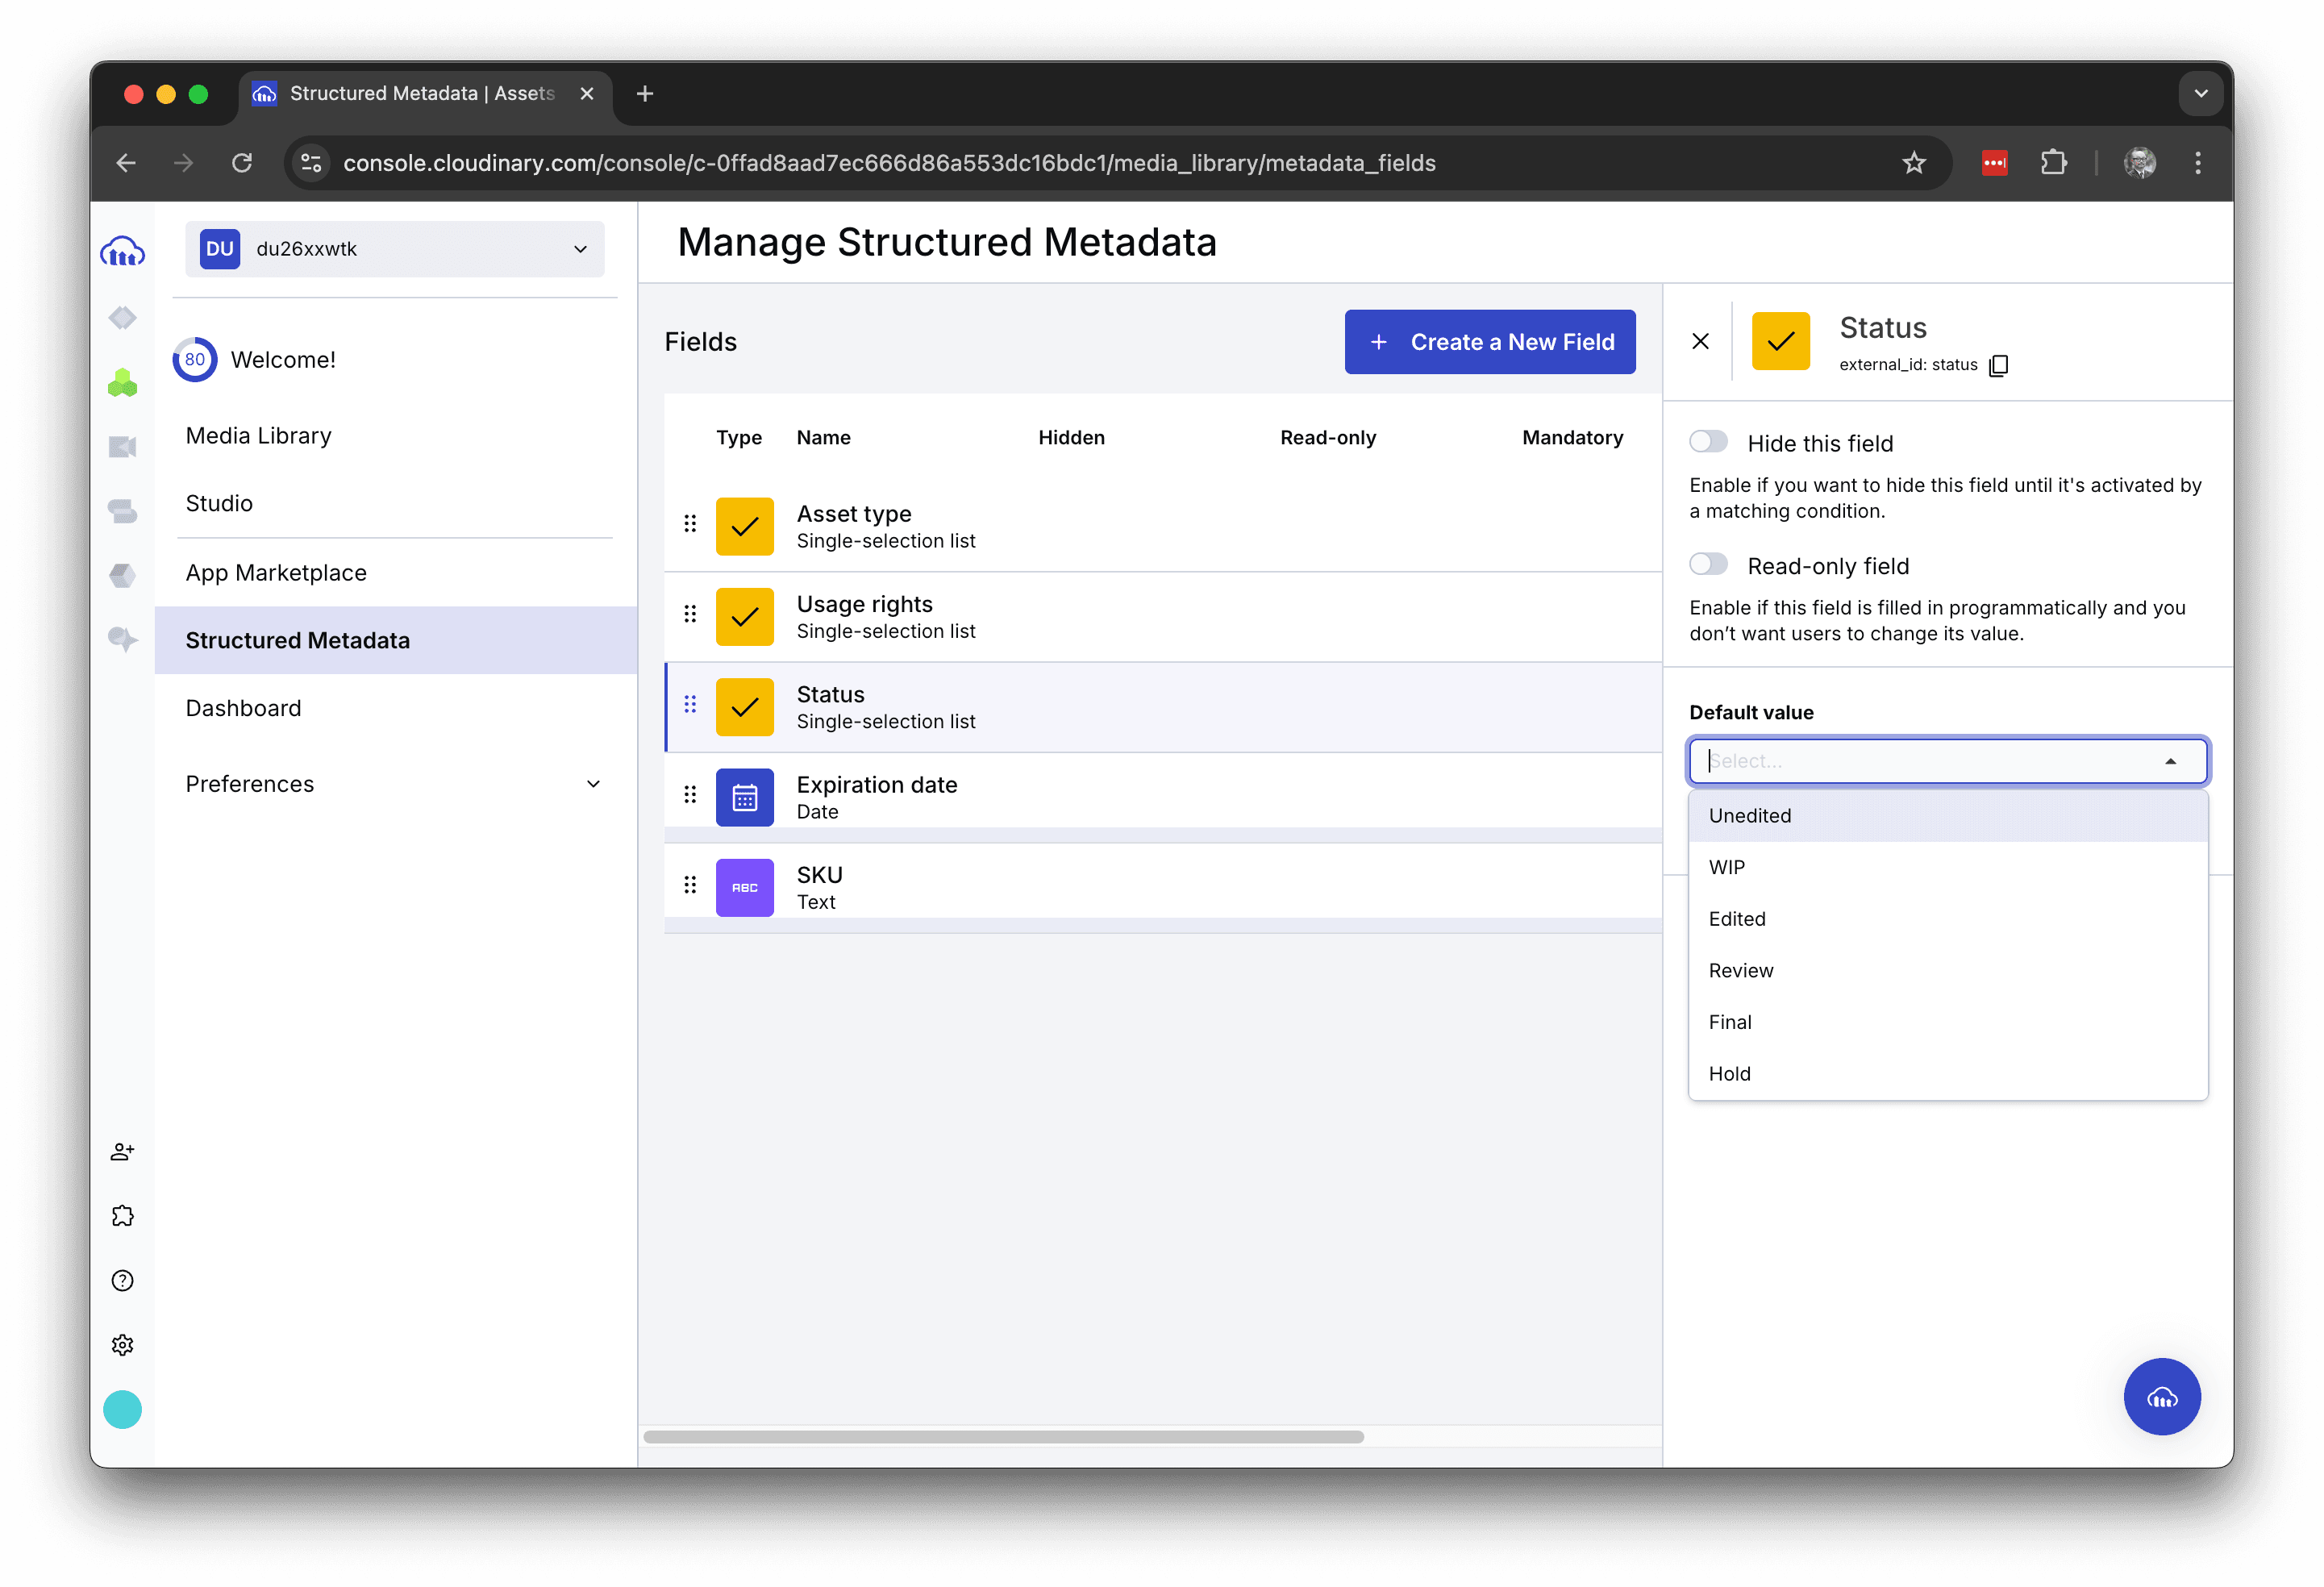
Status
This is a metadata item that sets the status of the asset. The following image shows the status set by default.
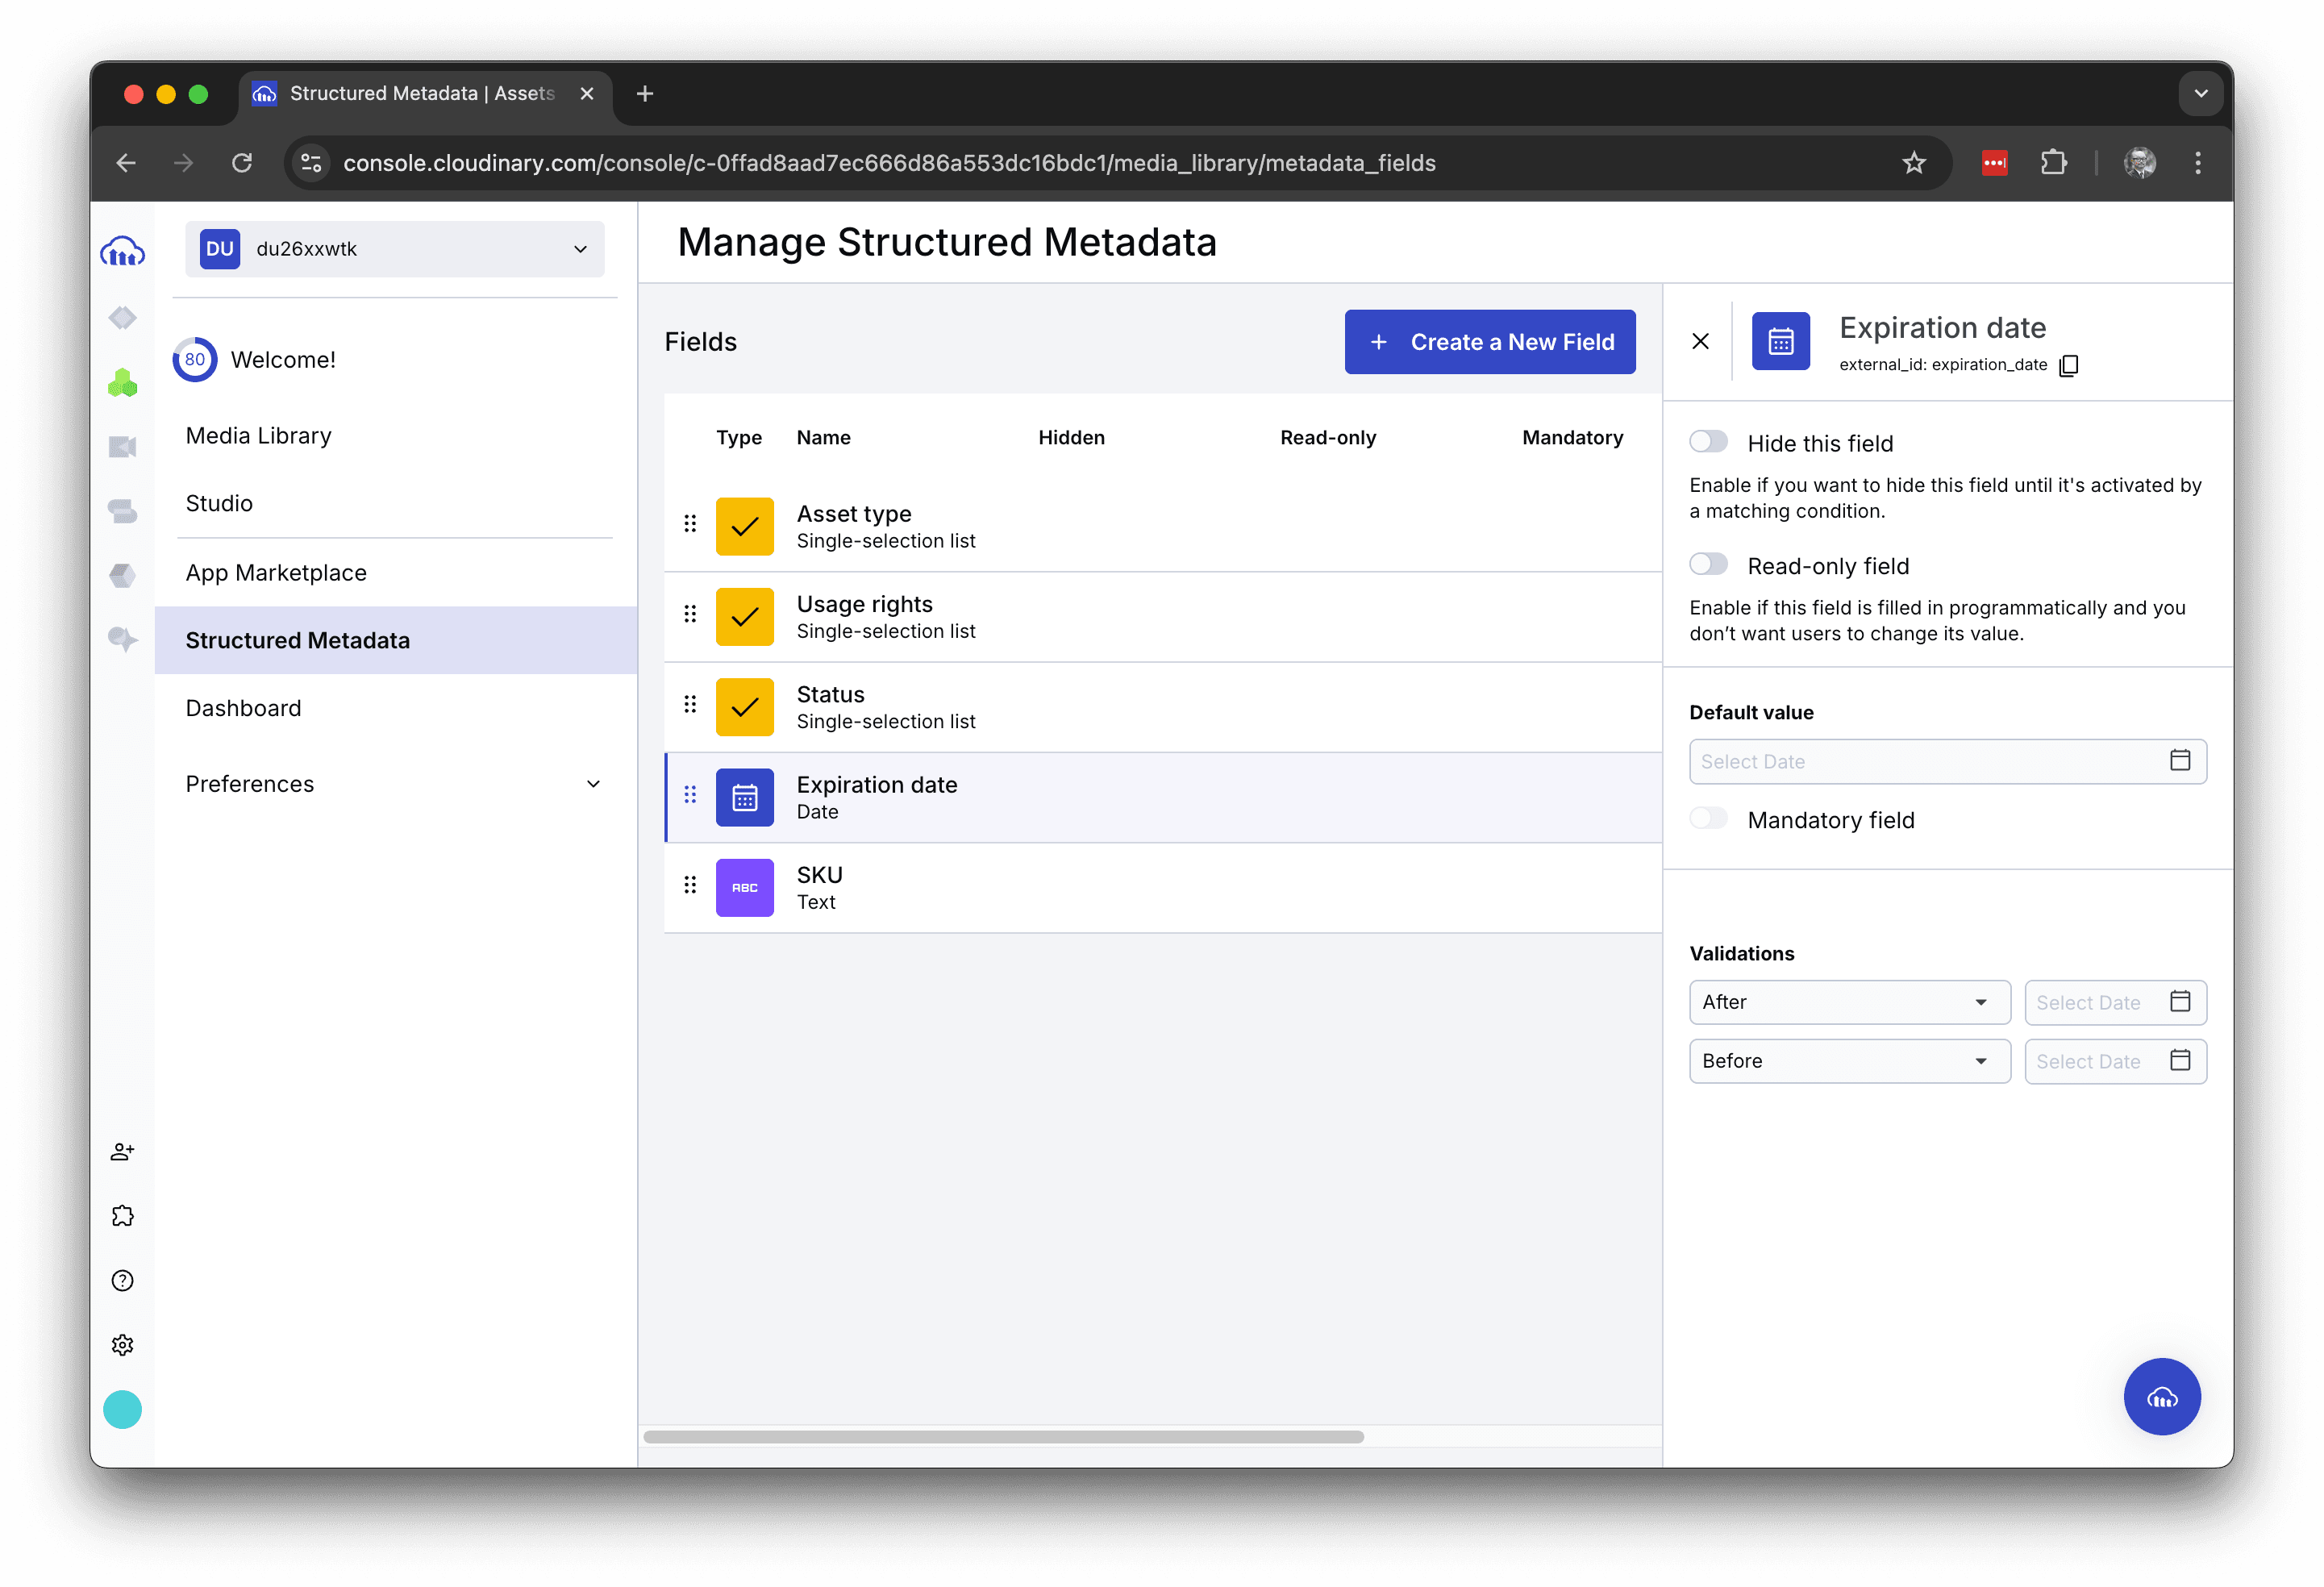
Expiration date
You can set an expiration date for the asset. The items are as follows
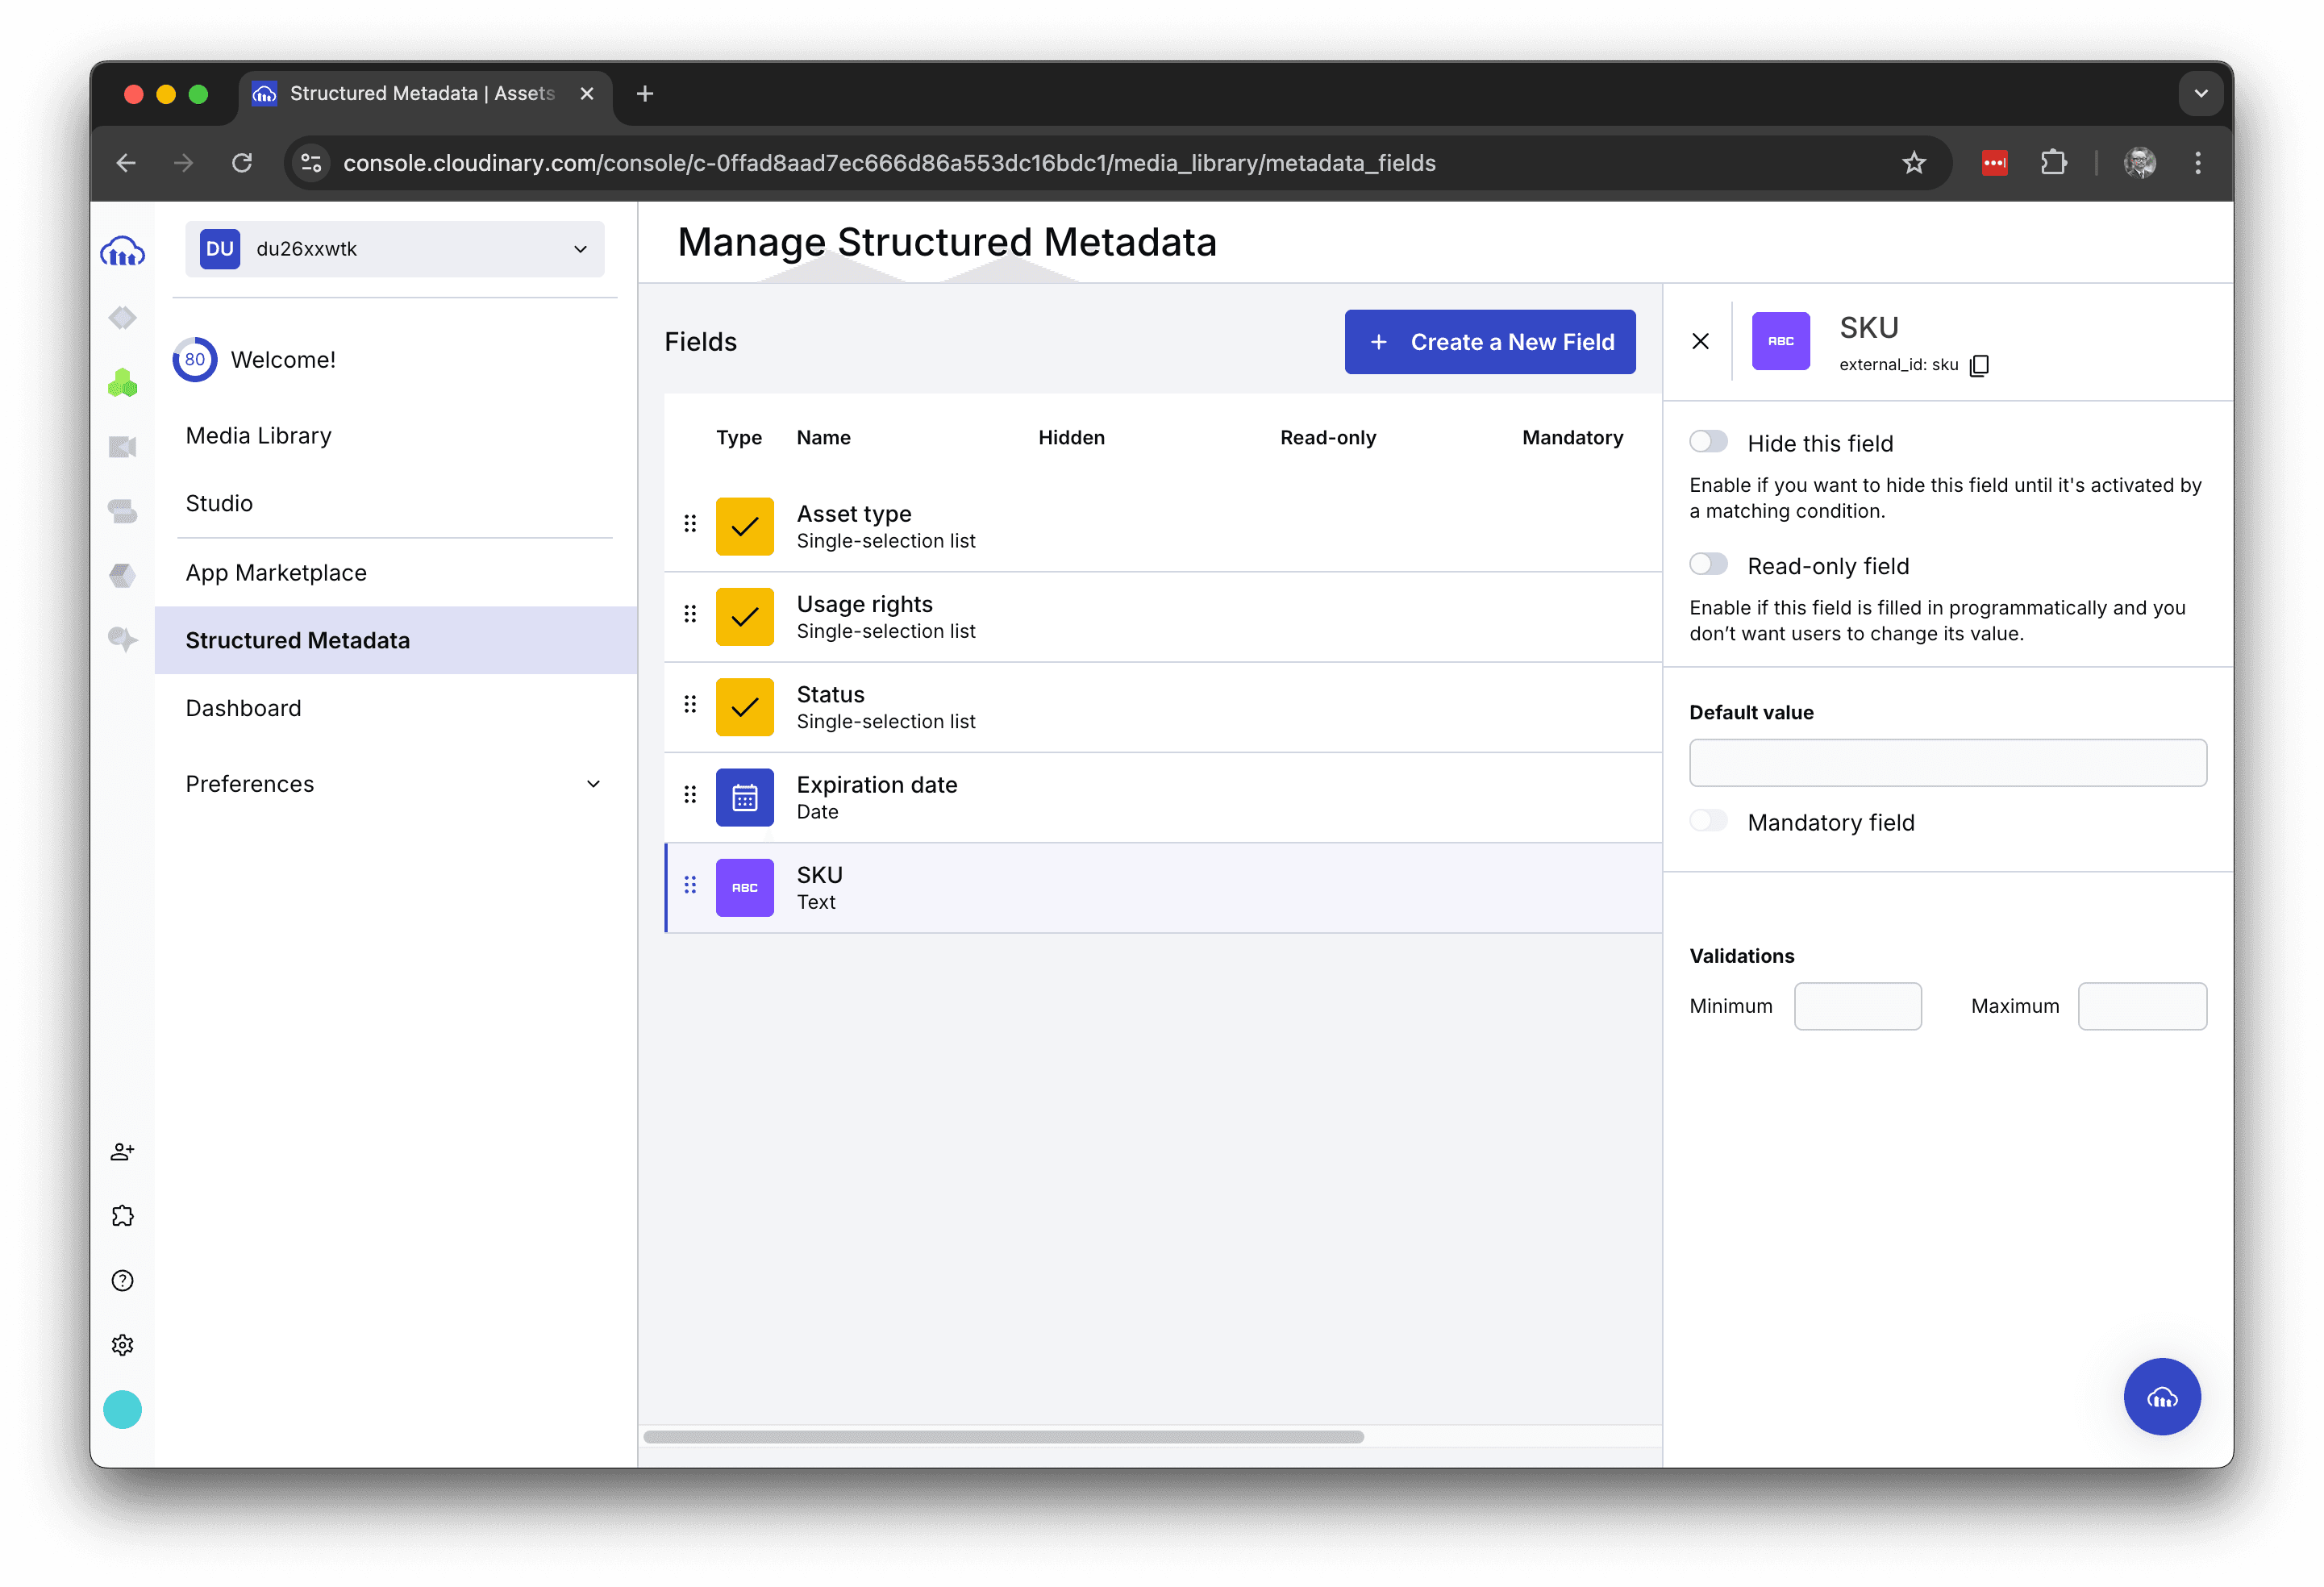
SKU
When registering assets associated with a product, the model number of the product can be set in the metadata of this SKU. This field can be set in text.
Create a New Fields
It is possible to add any metadata you wish to add to the asset, click on the Create a New Field button to add the field. Below is the screen after clicking the button.
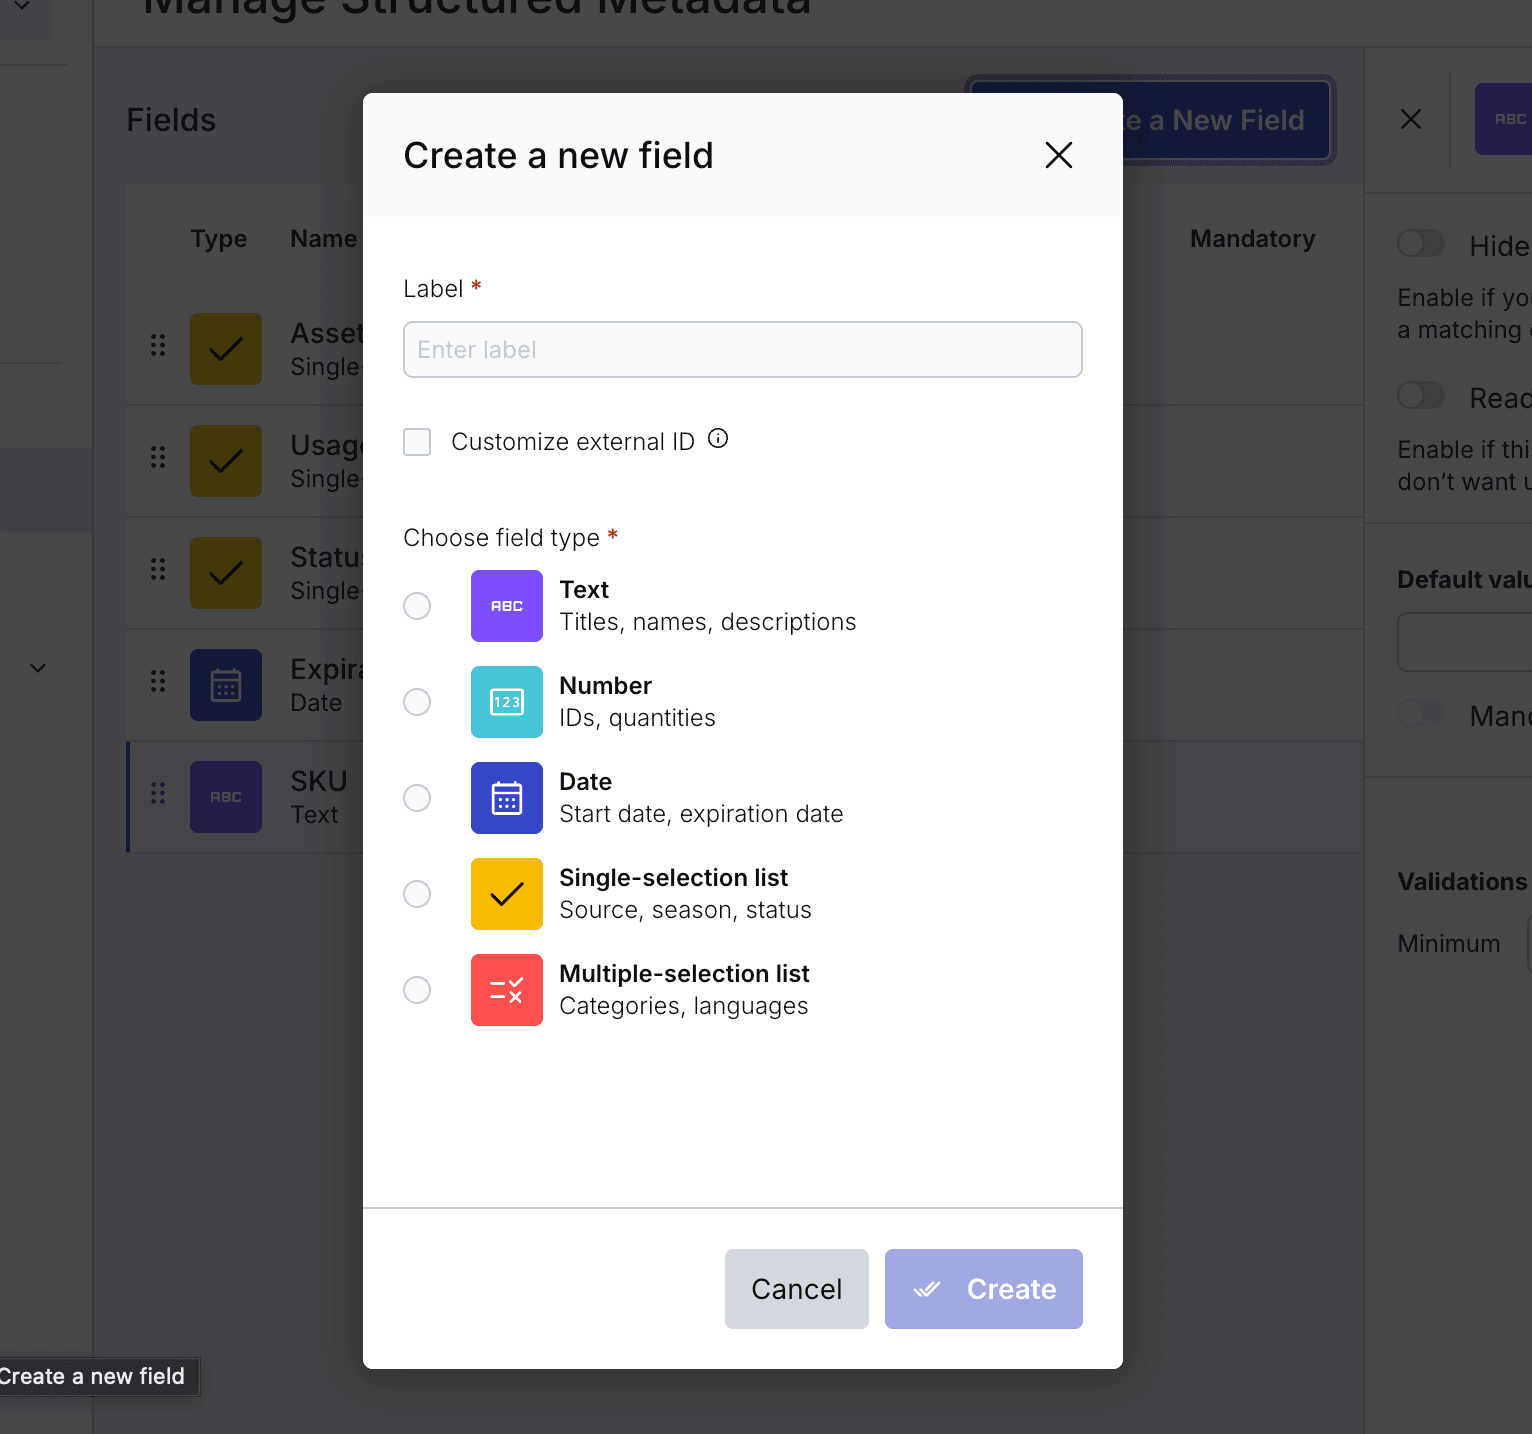
This time, we will just check the field items and complete the process without doing any particular work.
Complete Getting Started
We have identified how to add structured metadata fields. If you need metadata that should actually be set via the API, you can add it here.Getting Started is now 80% complete.
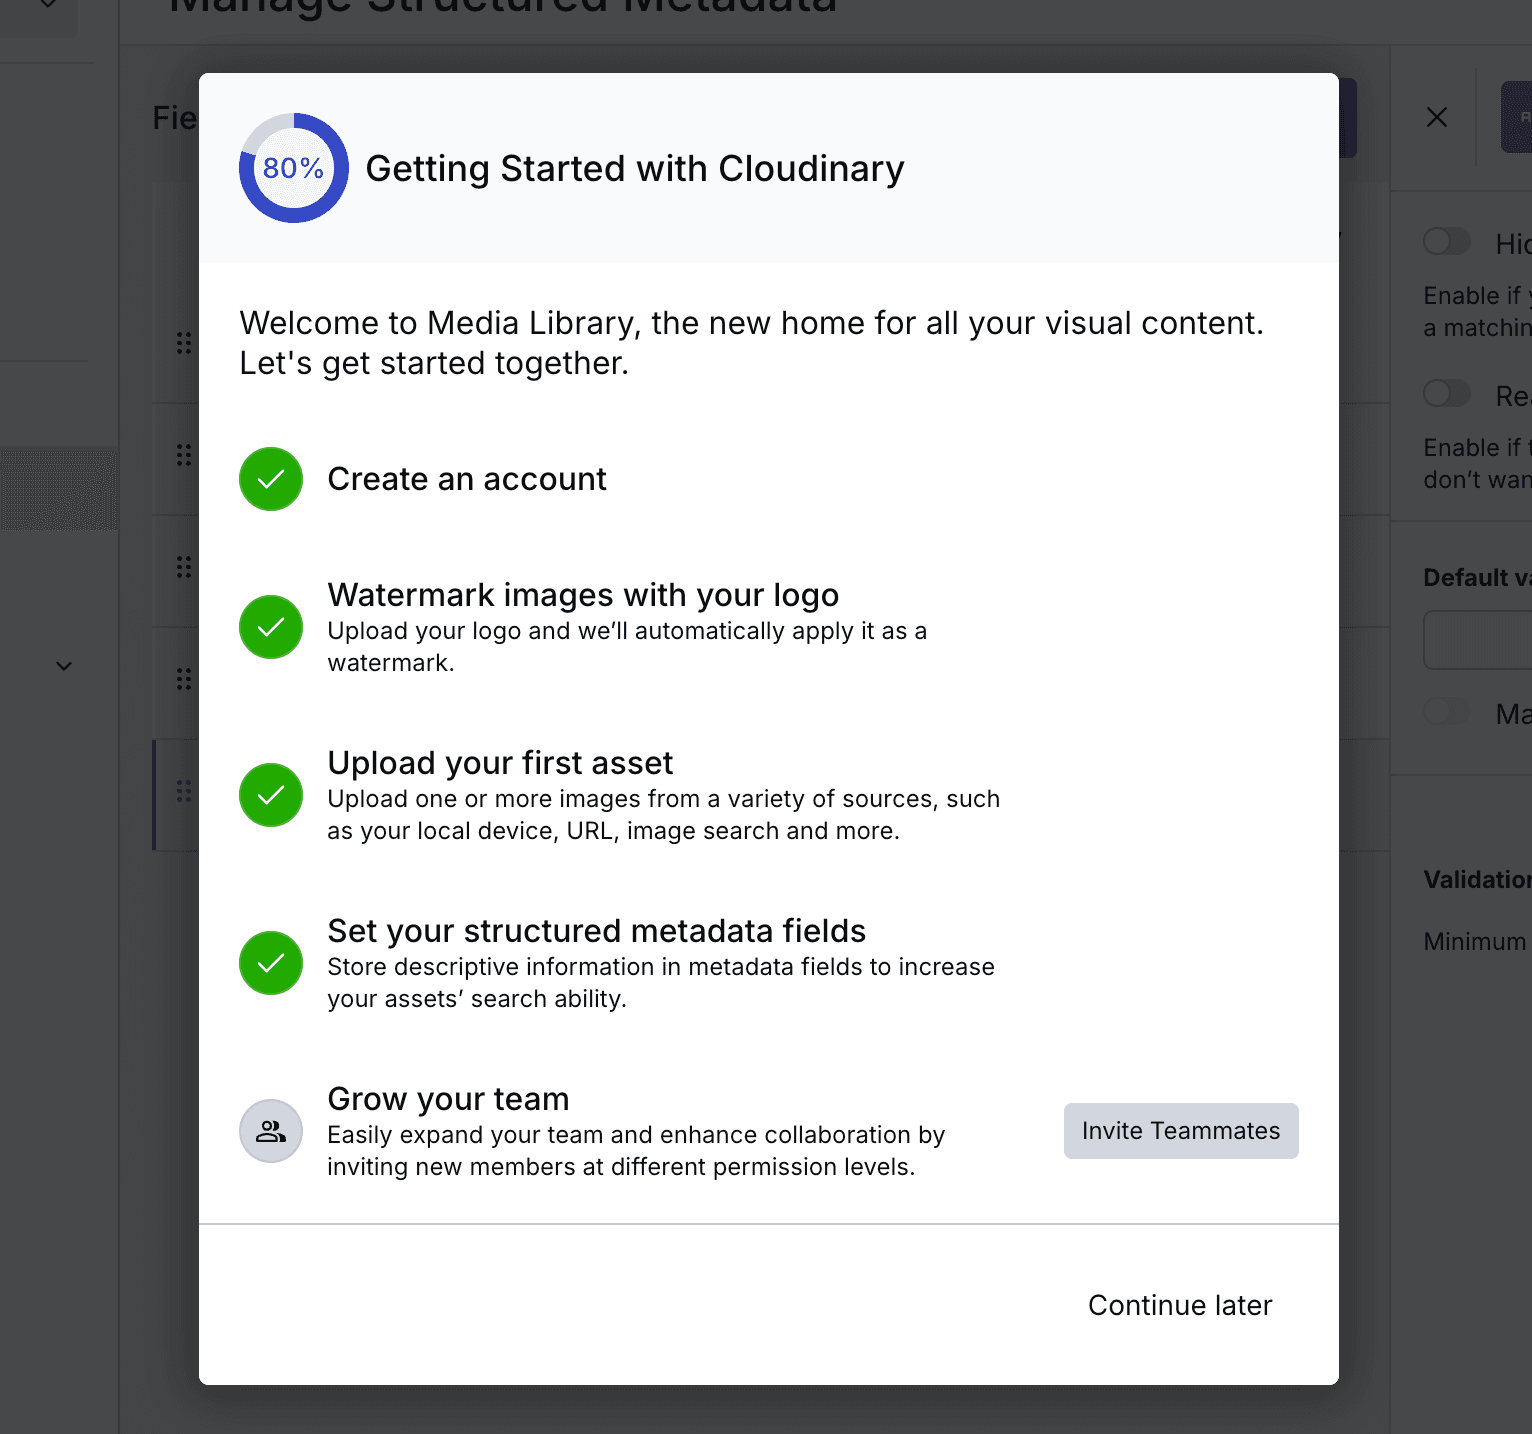
All that remains is to invite team members. Click to add the necessary users. Even if you do not add users, your Getting Started progress will reach 100% when you click the button above.

This completes Getting Started with Cloudinary.