This page summarizes the procedures for setting up an environment running Ubuntu using Windows Subsystem for Linux on a Windows 11 environment.
Setup of Ubuntu environment using WSL
2025-07-08|2025-07-14
Prerequisite
In this environment setting, the following machines were tested in the following environment.
- Intel Core i7-1260
- Memory 32GB
- Windows 11 Pro 24H2
Basically, as long as the environment runs WSL, the following procedures can be used to develop the environment.
Set up a WSL environment
First, several components must be installed in order to run WSL. This procedure can be proceeded by executing the following commands
- Start the terminal in administrator mode
- Execute the following command
sh
- command will automatically download, install, and activate subsystems and Windows componentsdrag embedded assetpublishedwsl01
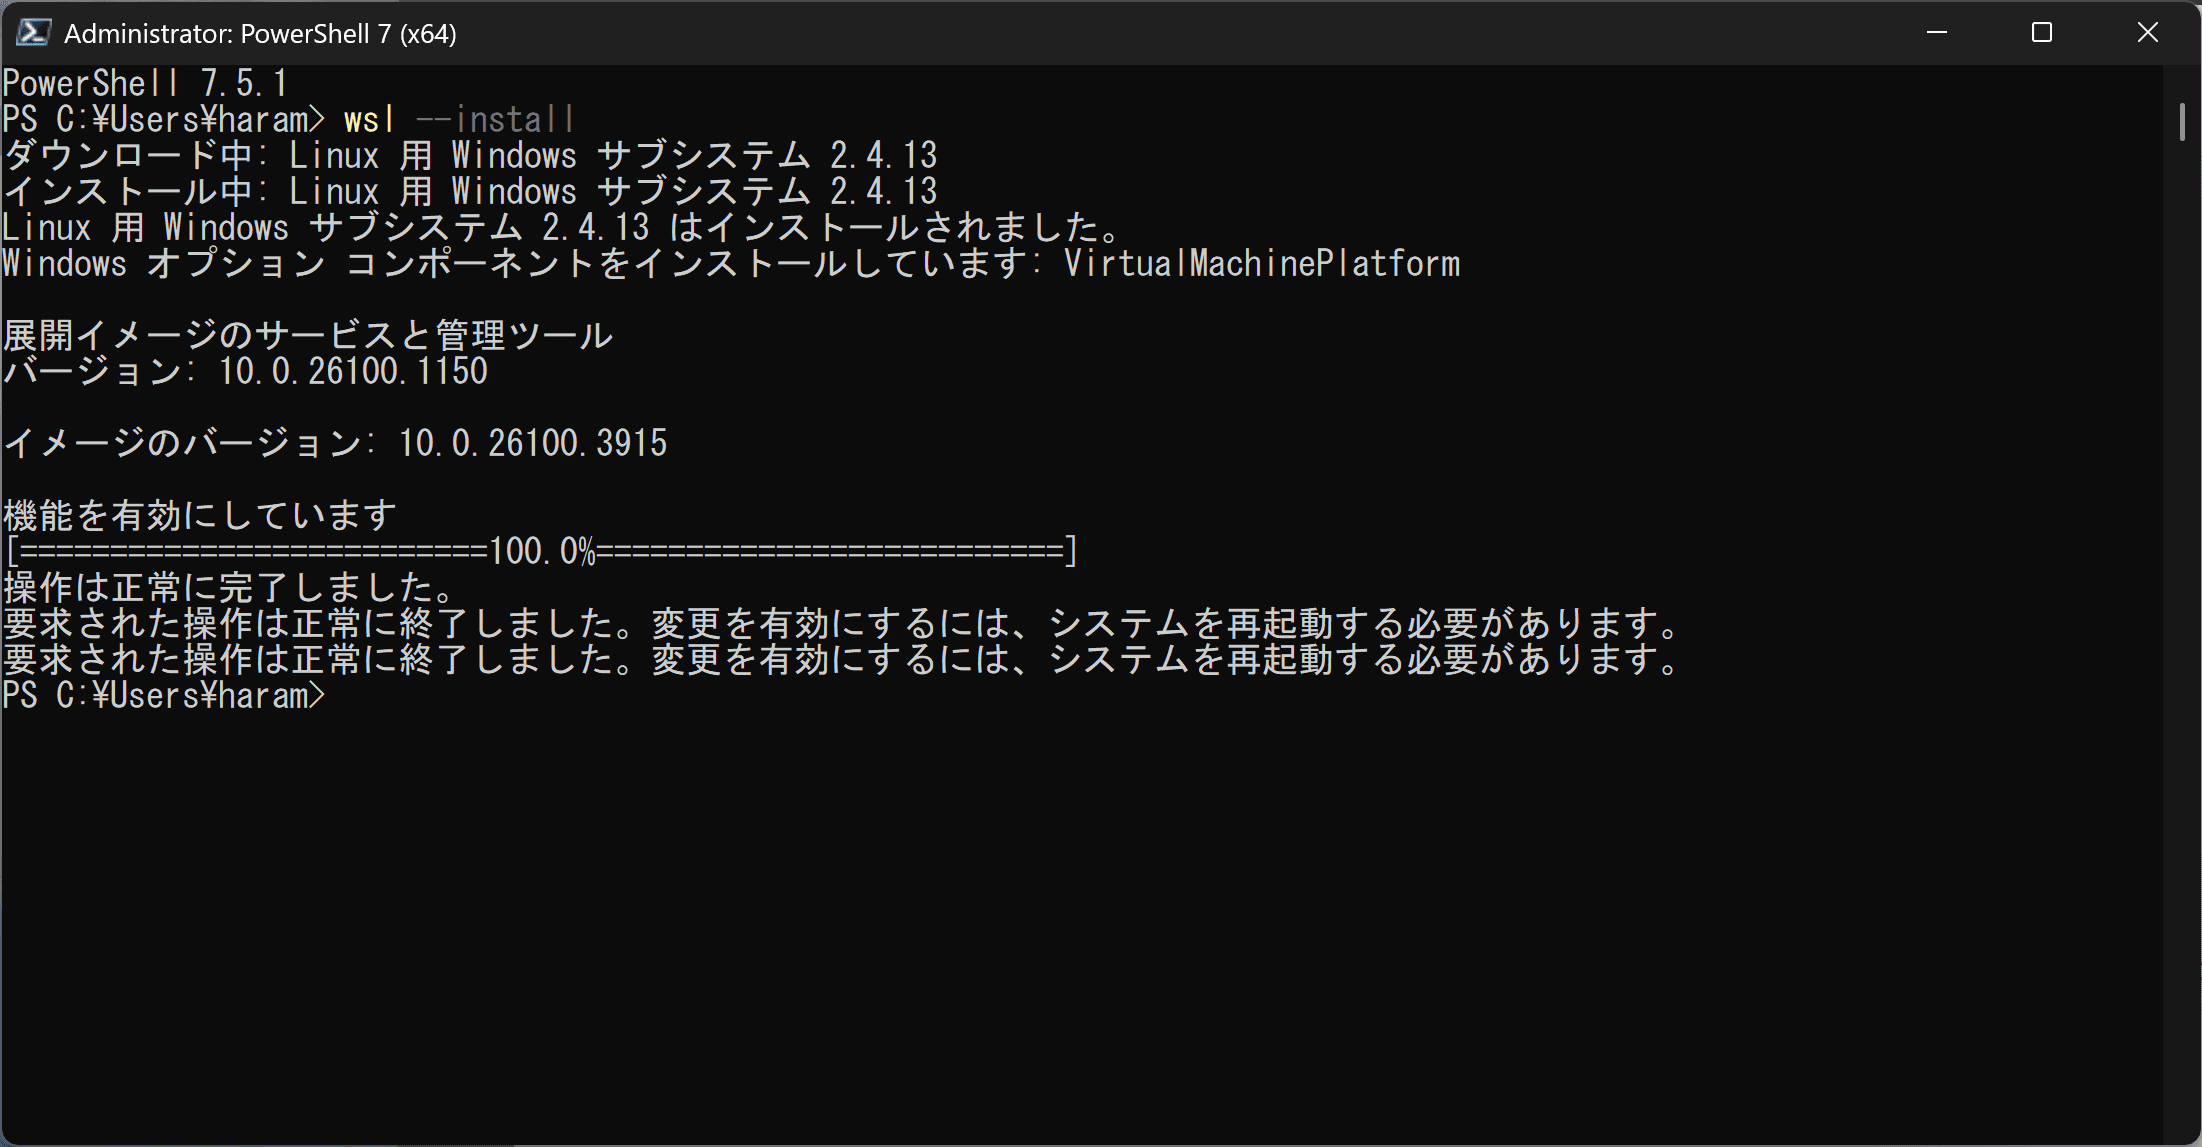
- Reboot the machine after installation is complete
Once the reboot is complete, the WSL can be used.
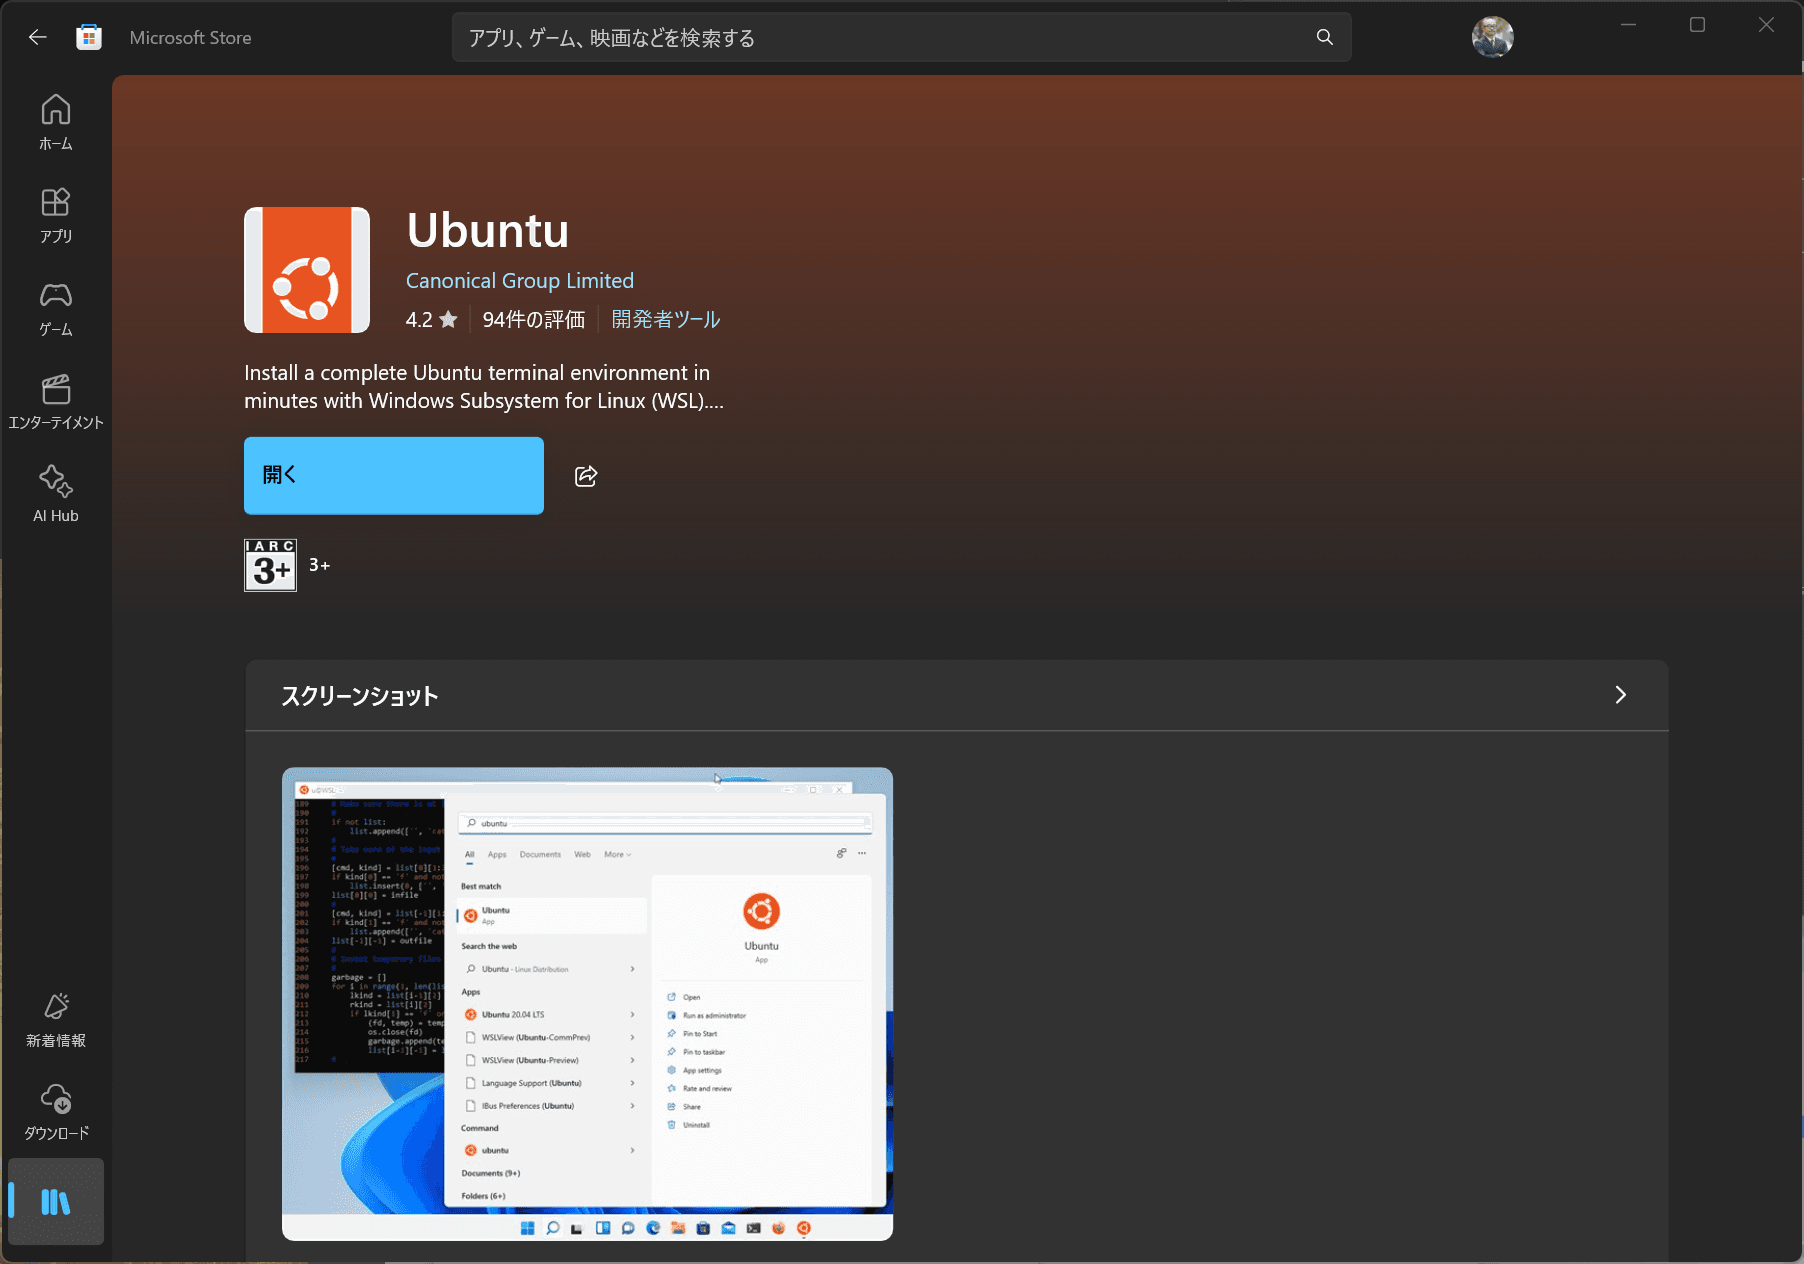
Installing Ubuntu
Select a Linux installation image from the Microsoft Store. In this case, we will install an Ubuntu application.
When you start the program for the first time, you will need to set up a user name and password. Please follow the steps displayed on the screen to proceed with the setup.
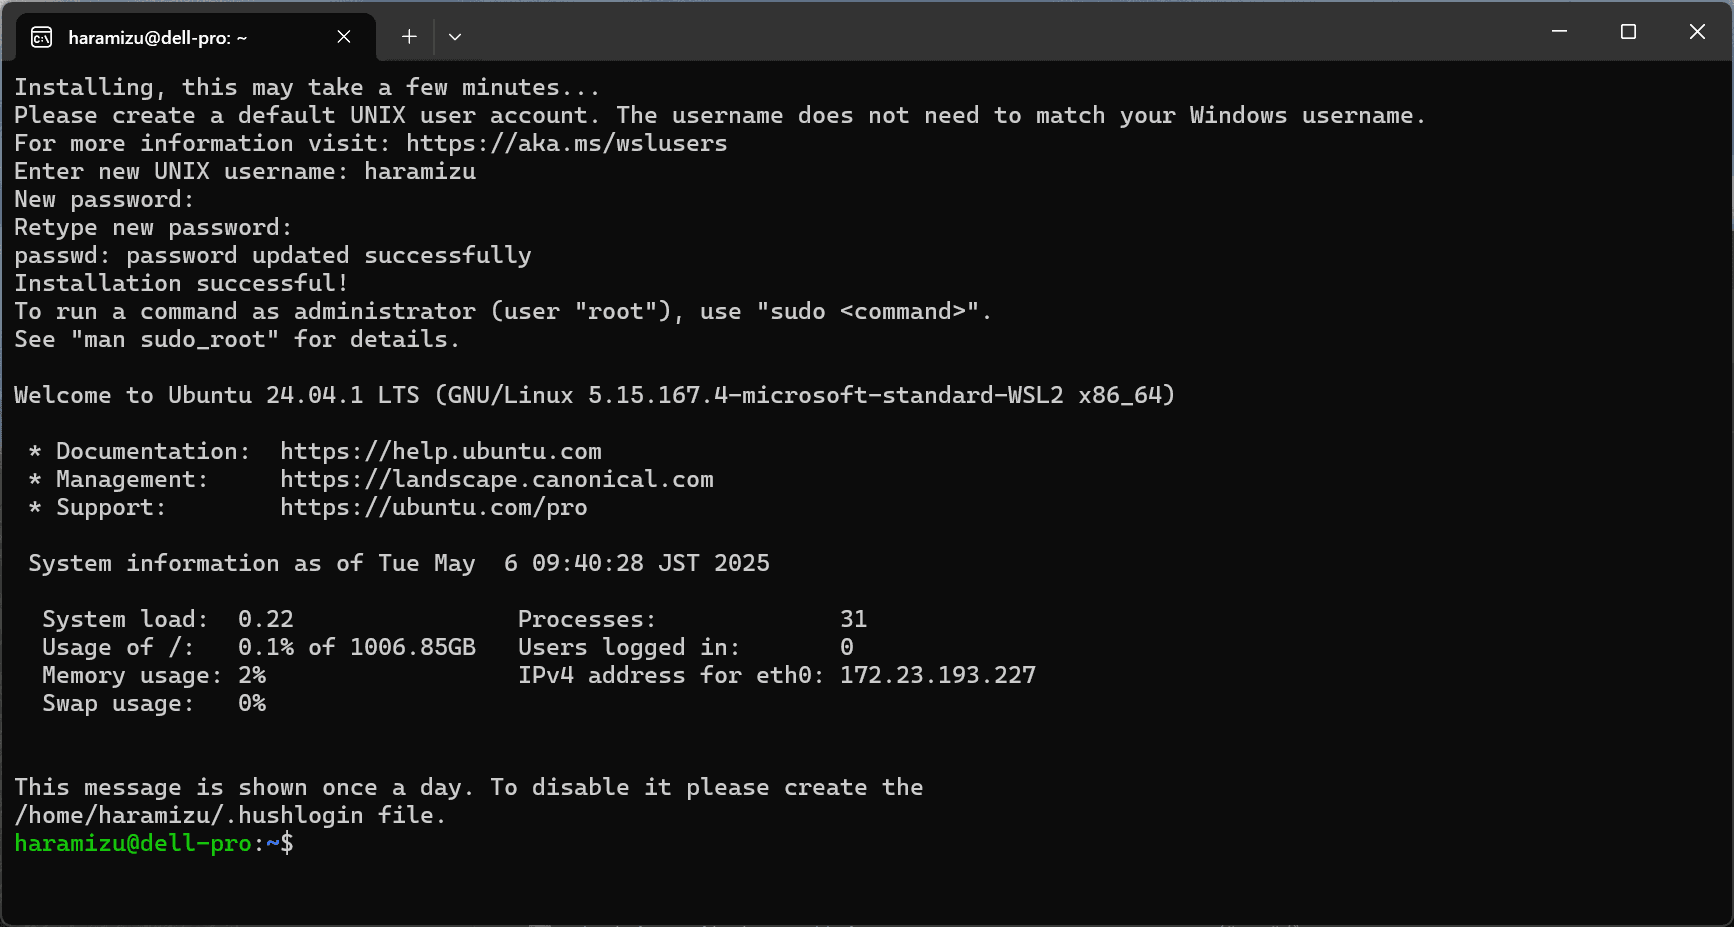
Update the package index of the Ubuntu system on which you have installed.
You are now ready to install the various packages.
Installing Node.js
To set up an environment for developing applications such as Next.js and Astro, we will first install Node.js.In addition, we will install n so that we can easily switch between Node versions.
The following commands can also be used to install the software, though,
sh
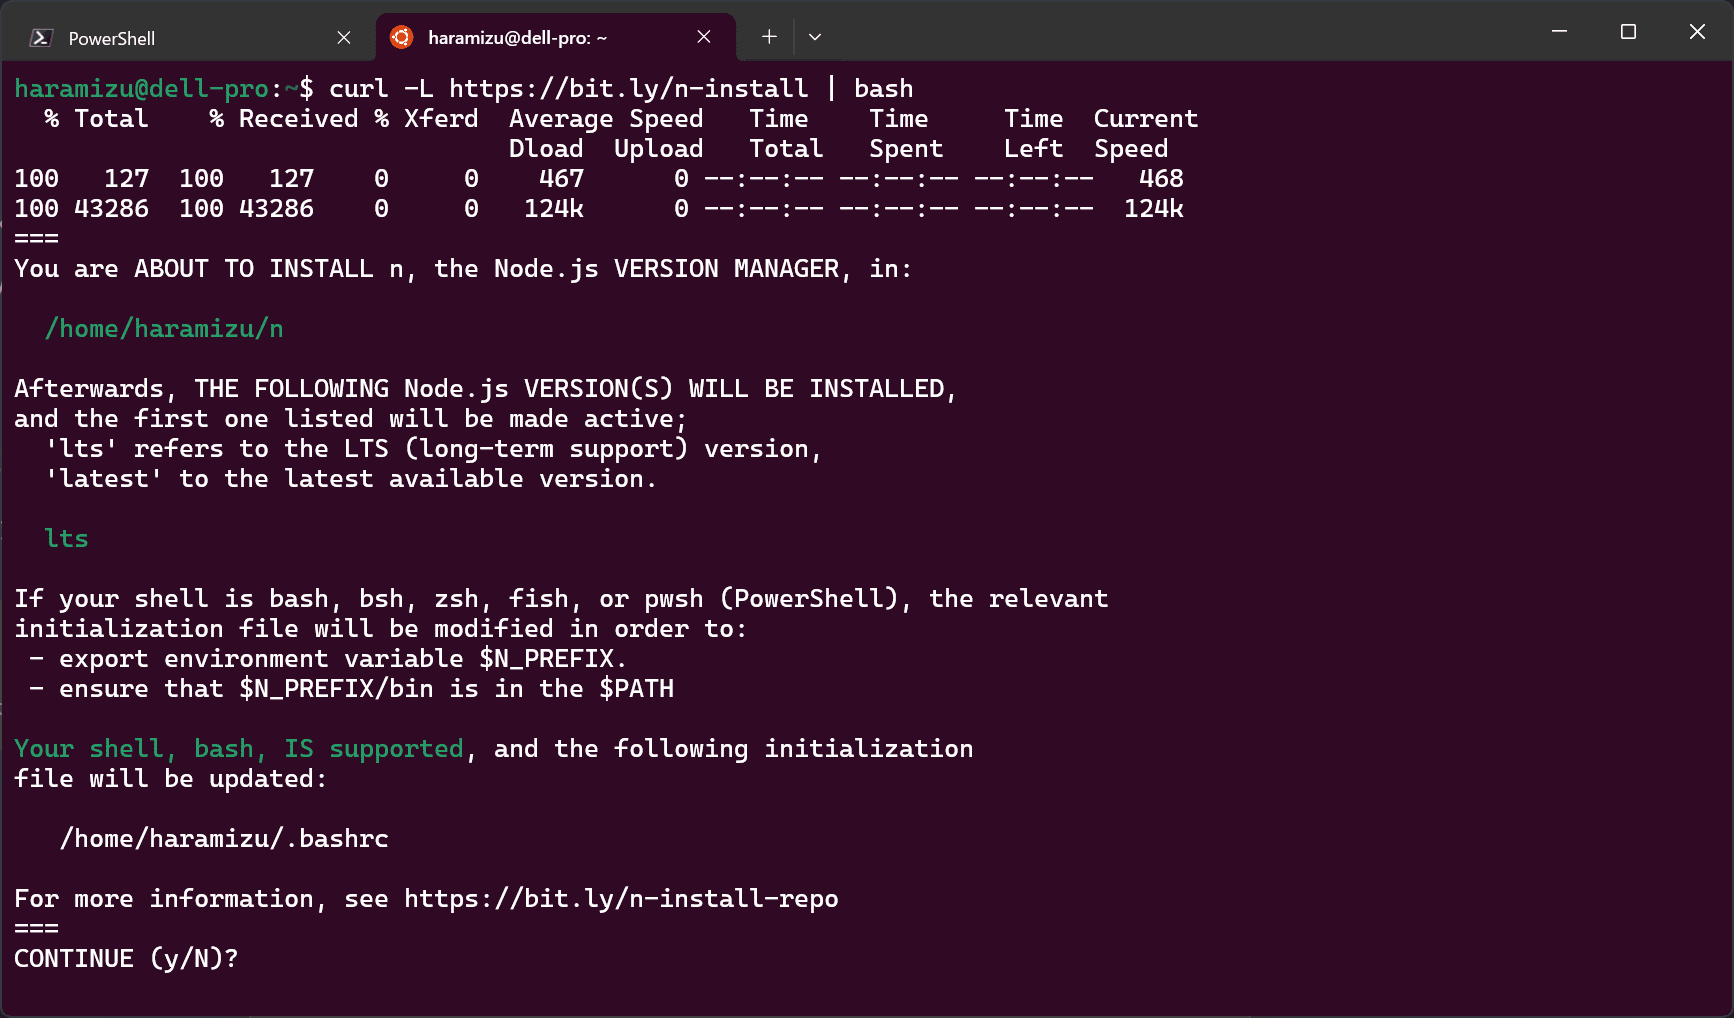
Here we use a script from the following site.
If this procedure is followed, it is possible to use node without running sudo each time.Execute the following command
sh
A confirmation will appear asking if you wish to proceed with the installation.The default is "No", so be sure to press "y" to execute the installation.
After installation is complete, run the following command to activate the installed path
sh
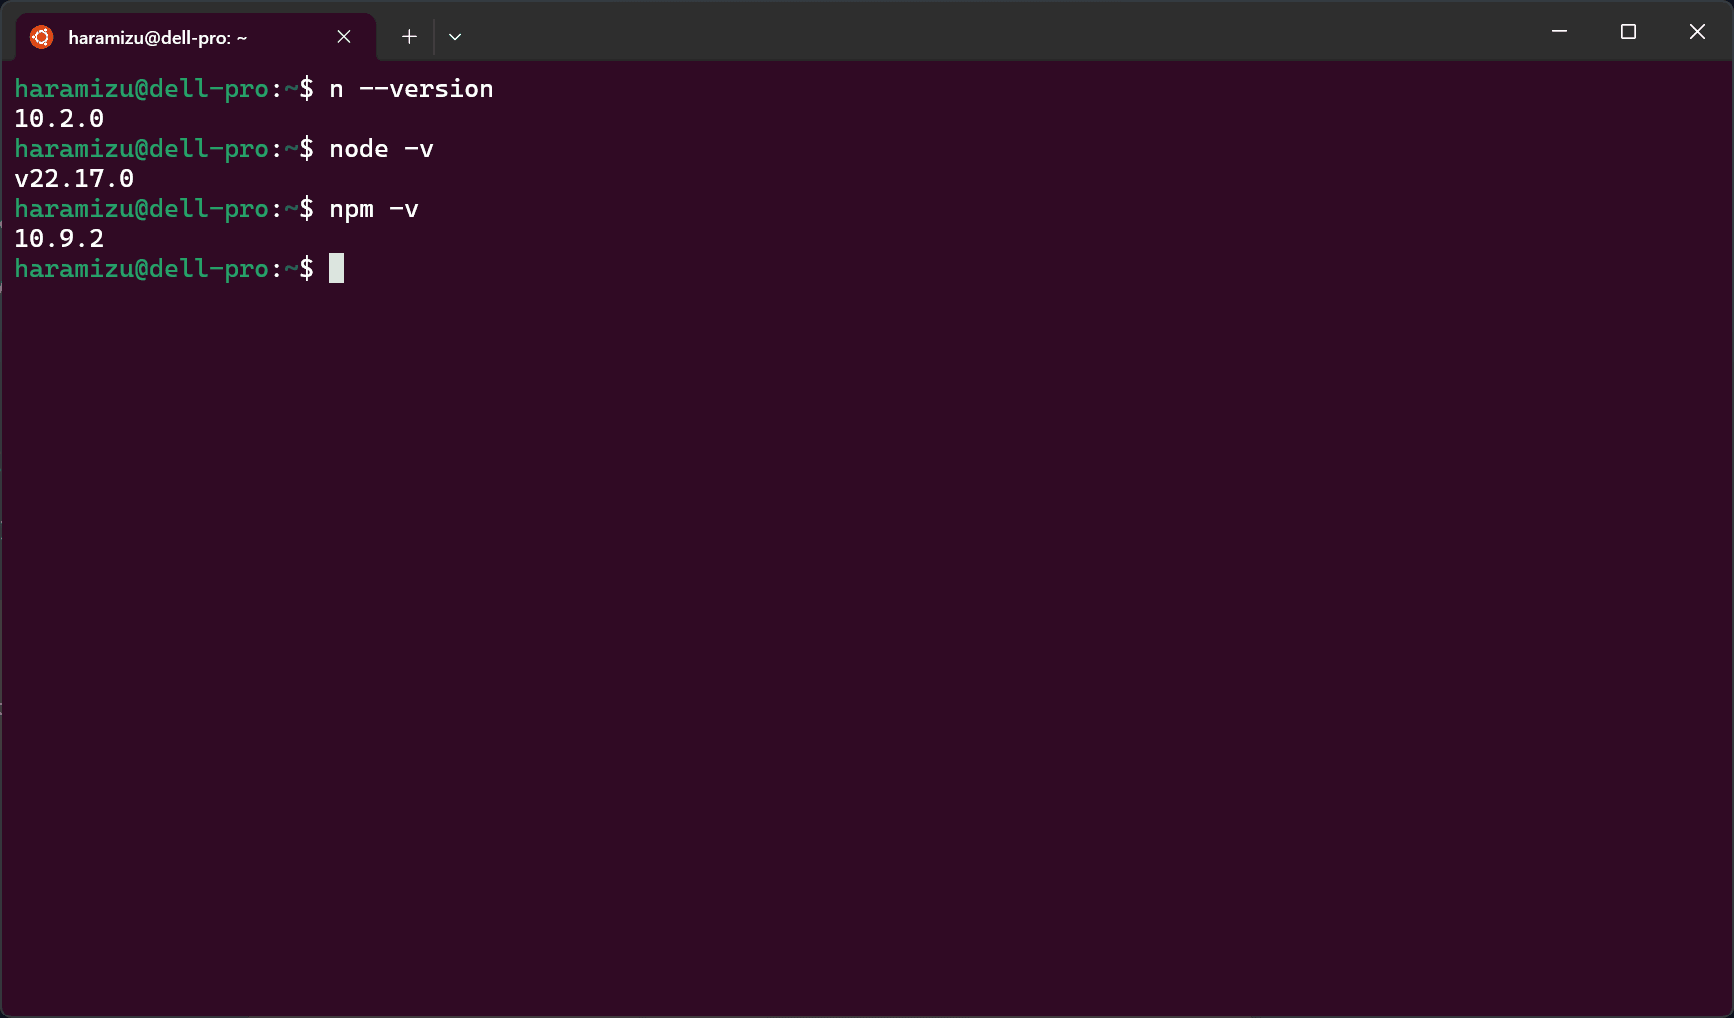
The version could be confirmed as follows.
Uninstall node
Now that node installed with n has been installed, remove the node and npm packages installed with the apt command that was used to install the first time.
sh
The environment for using node and npm is now ready.
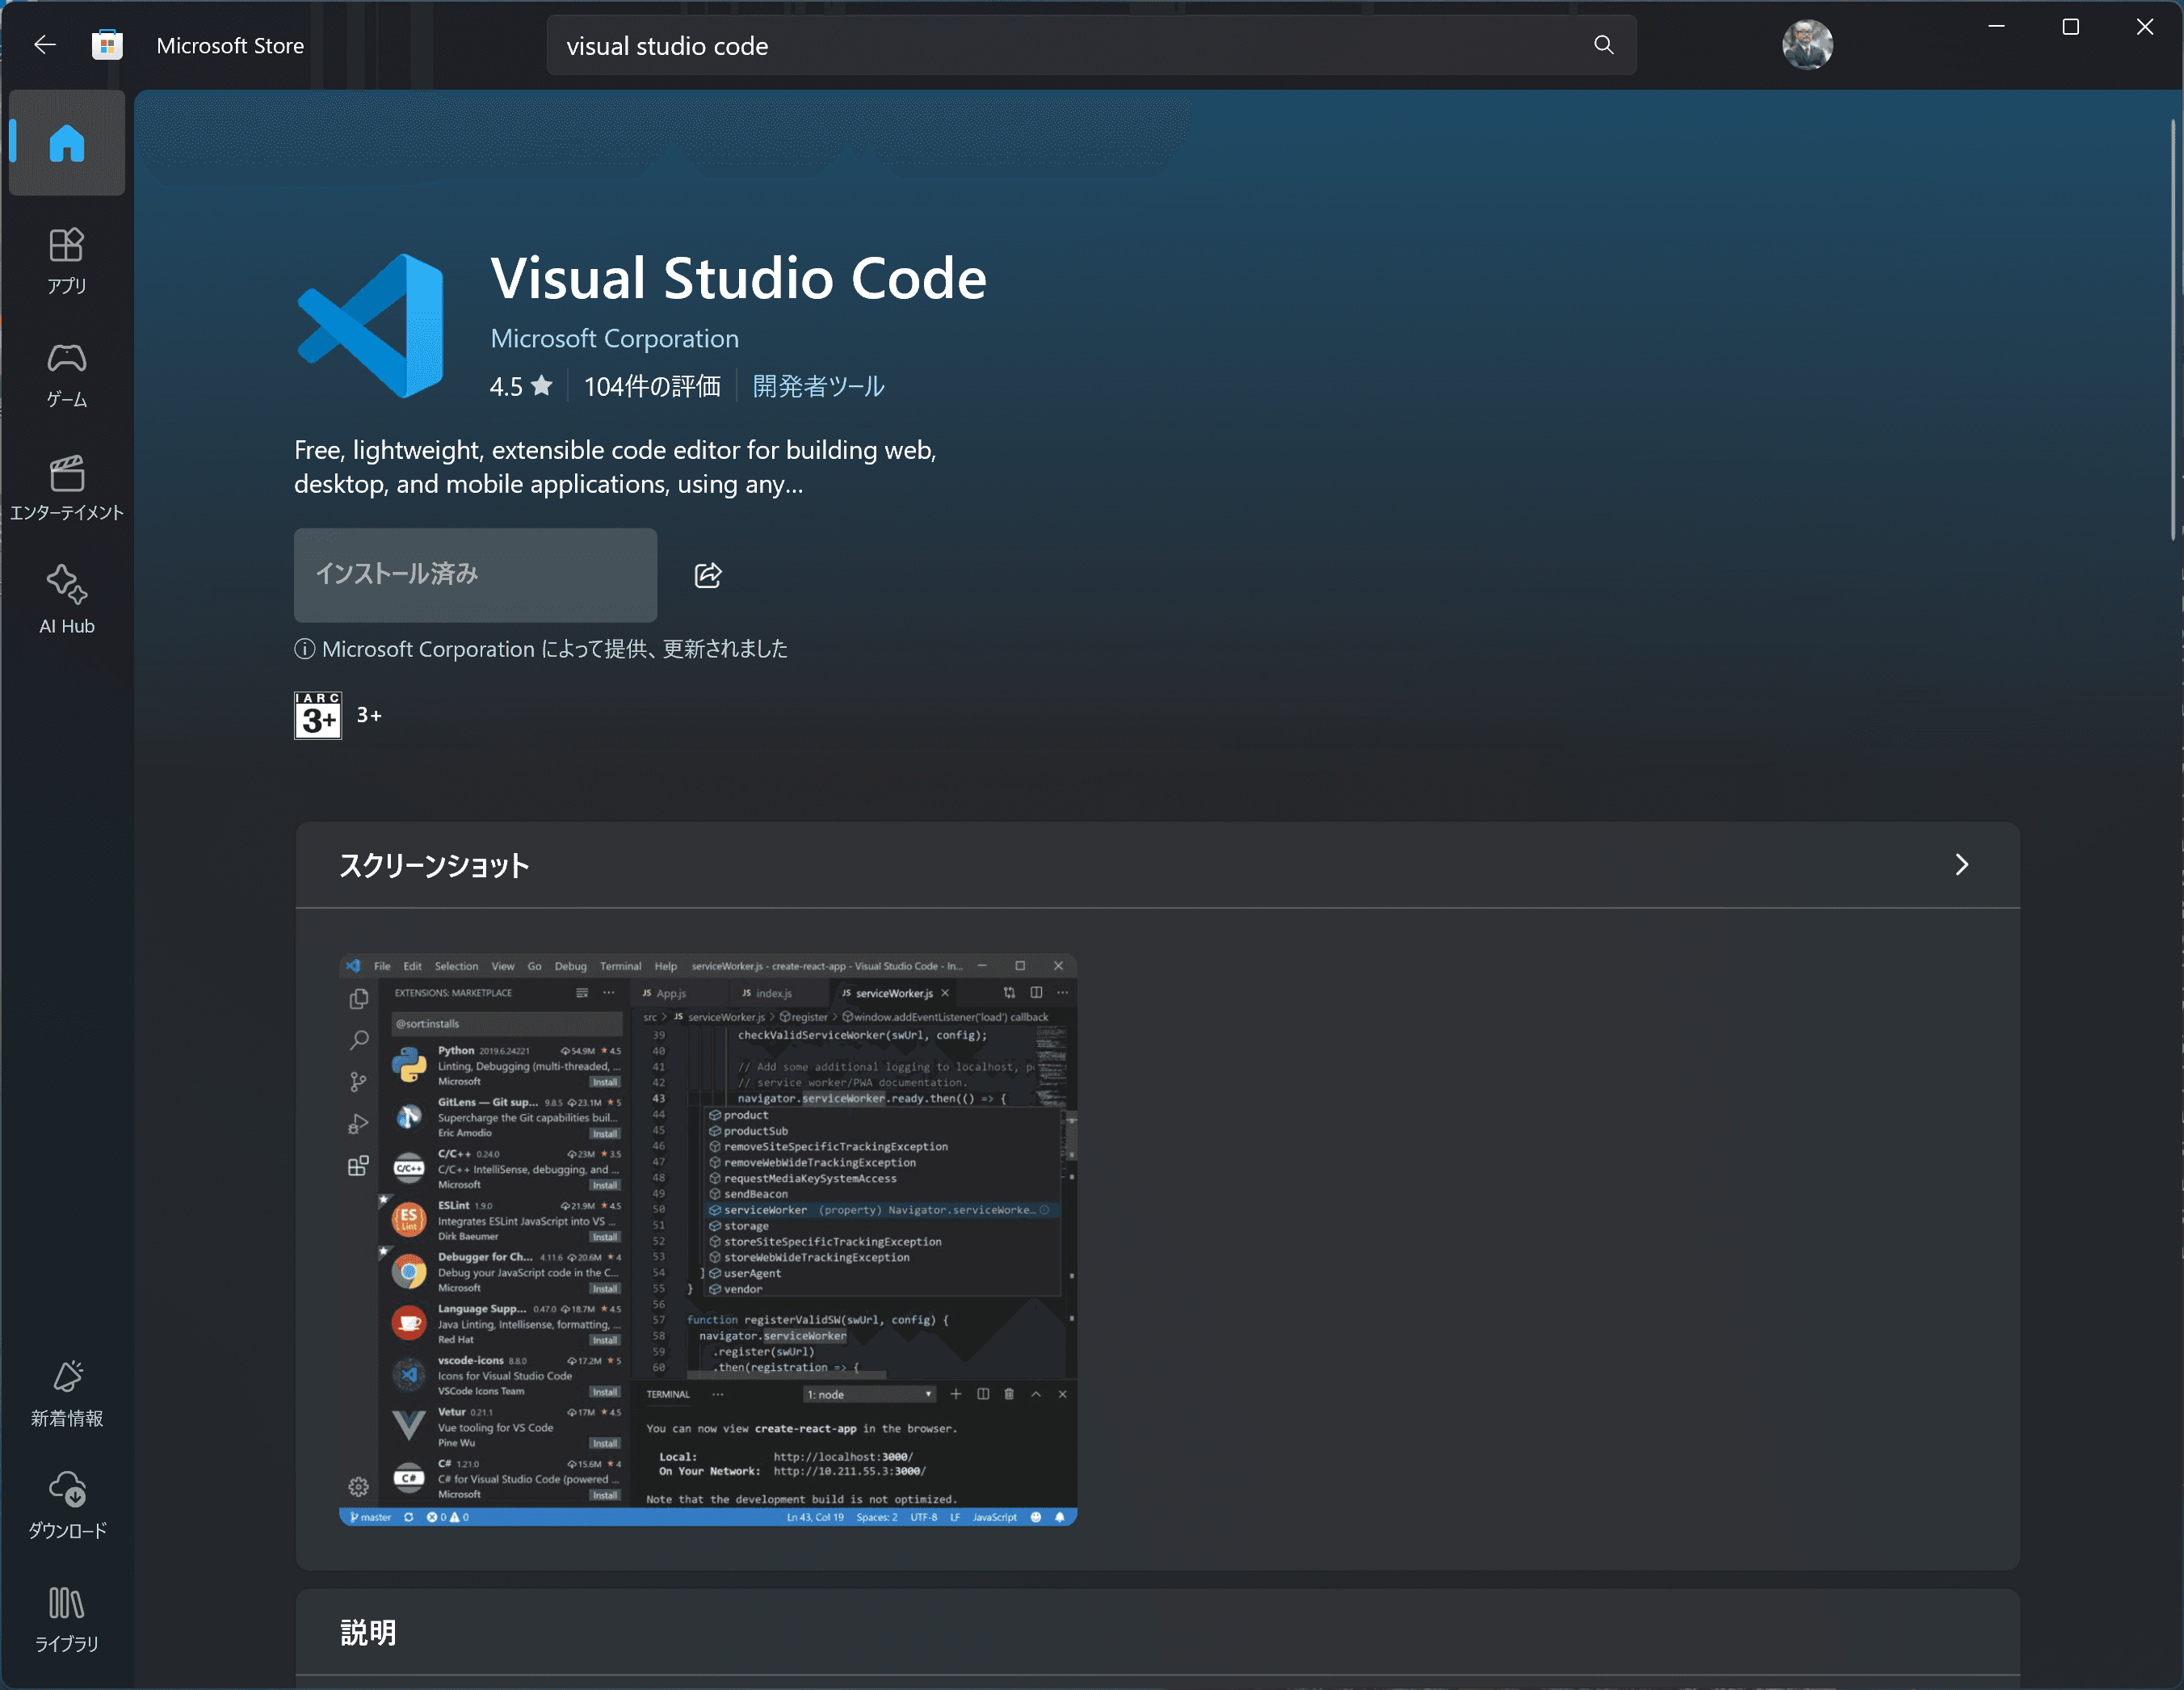
Installing Visual Studio Code
Now node is running in the Ubuntu environment running on WSL. Next, install Visual Studio Code, which is installed in the Windows environment. This time, we installed Visual Studio Code from the Microsoft Store.
Start Visual Studio Code after installation, open the Install Extension screen, enter the three letters WSL, and install the Microsoft WSL extension that comes up as a search result.
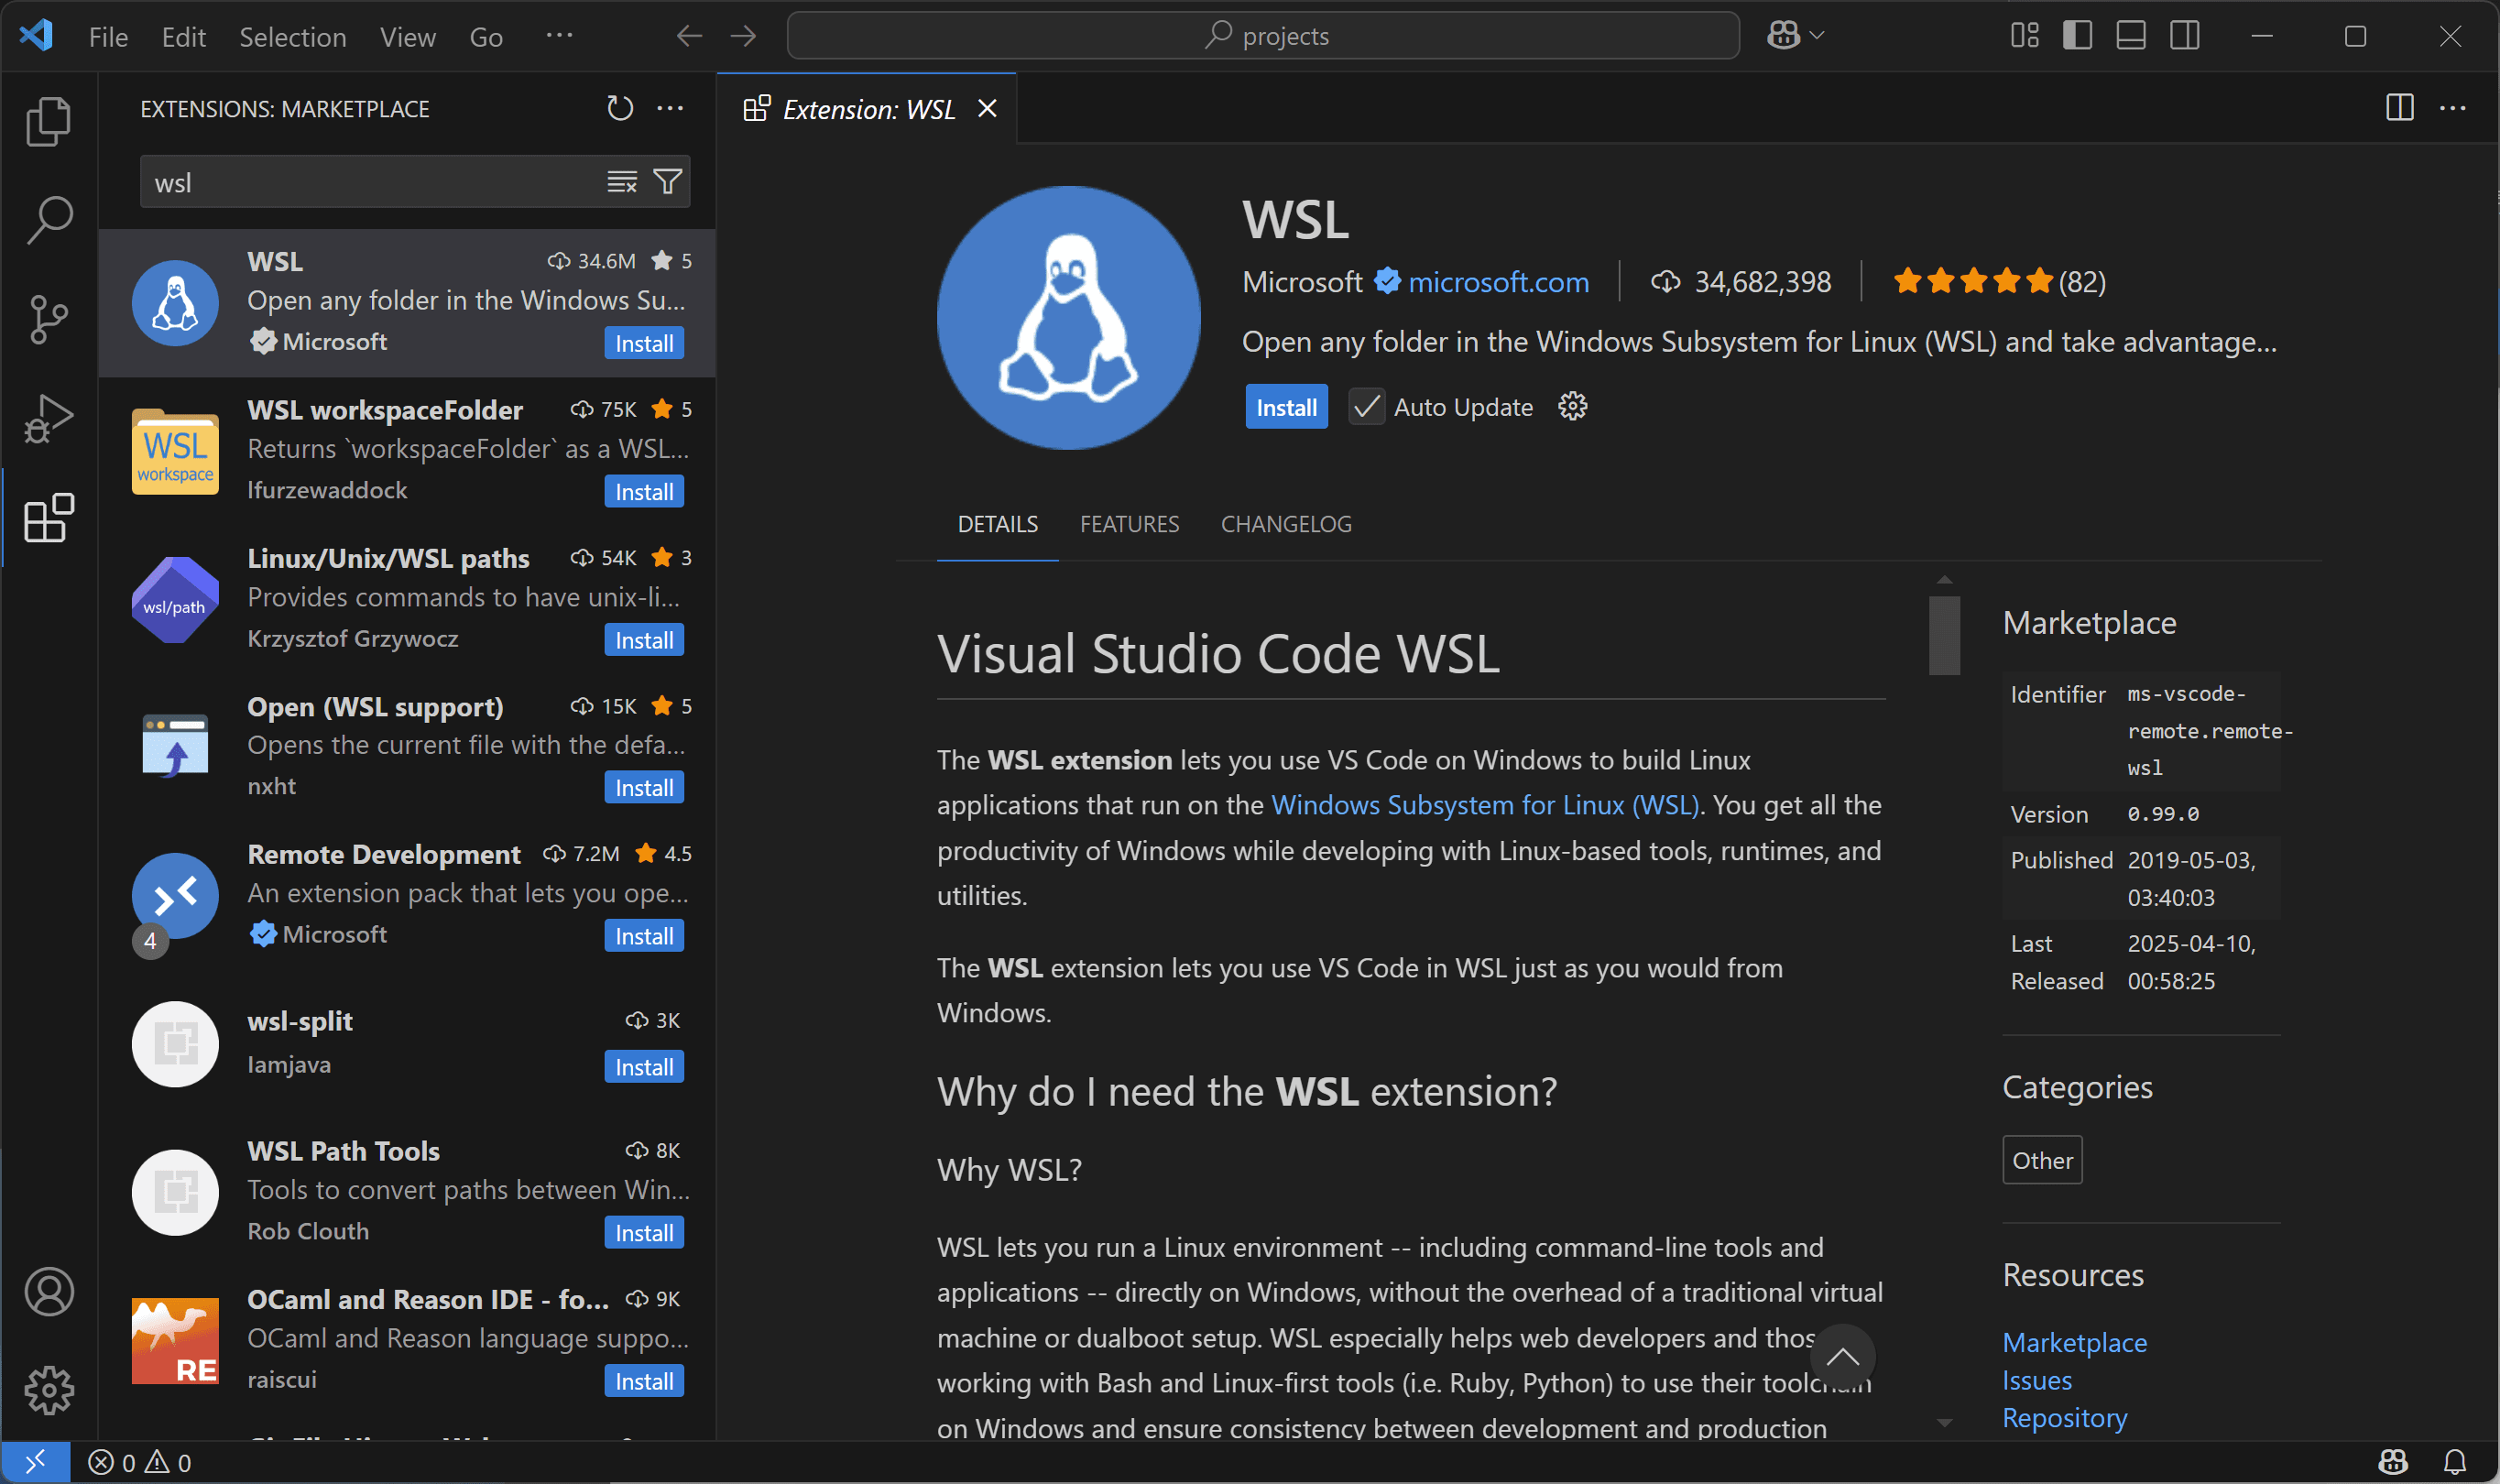
This will allow Visual Studio Code to work with WSL.As soon as possible, open the Ubuntu command line screen and execute the following command.
sh
For the first time, perform the installation of the required components into the Ubuntu environment.

When Visual Studio Code starts, you will see that it is connected to the Ubuntu environment. You will see WSL:Ubuntu in the lower left corner of the screen below, and you will also see that all files are from your Ubuntu home.
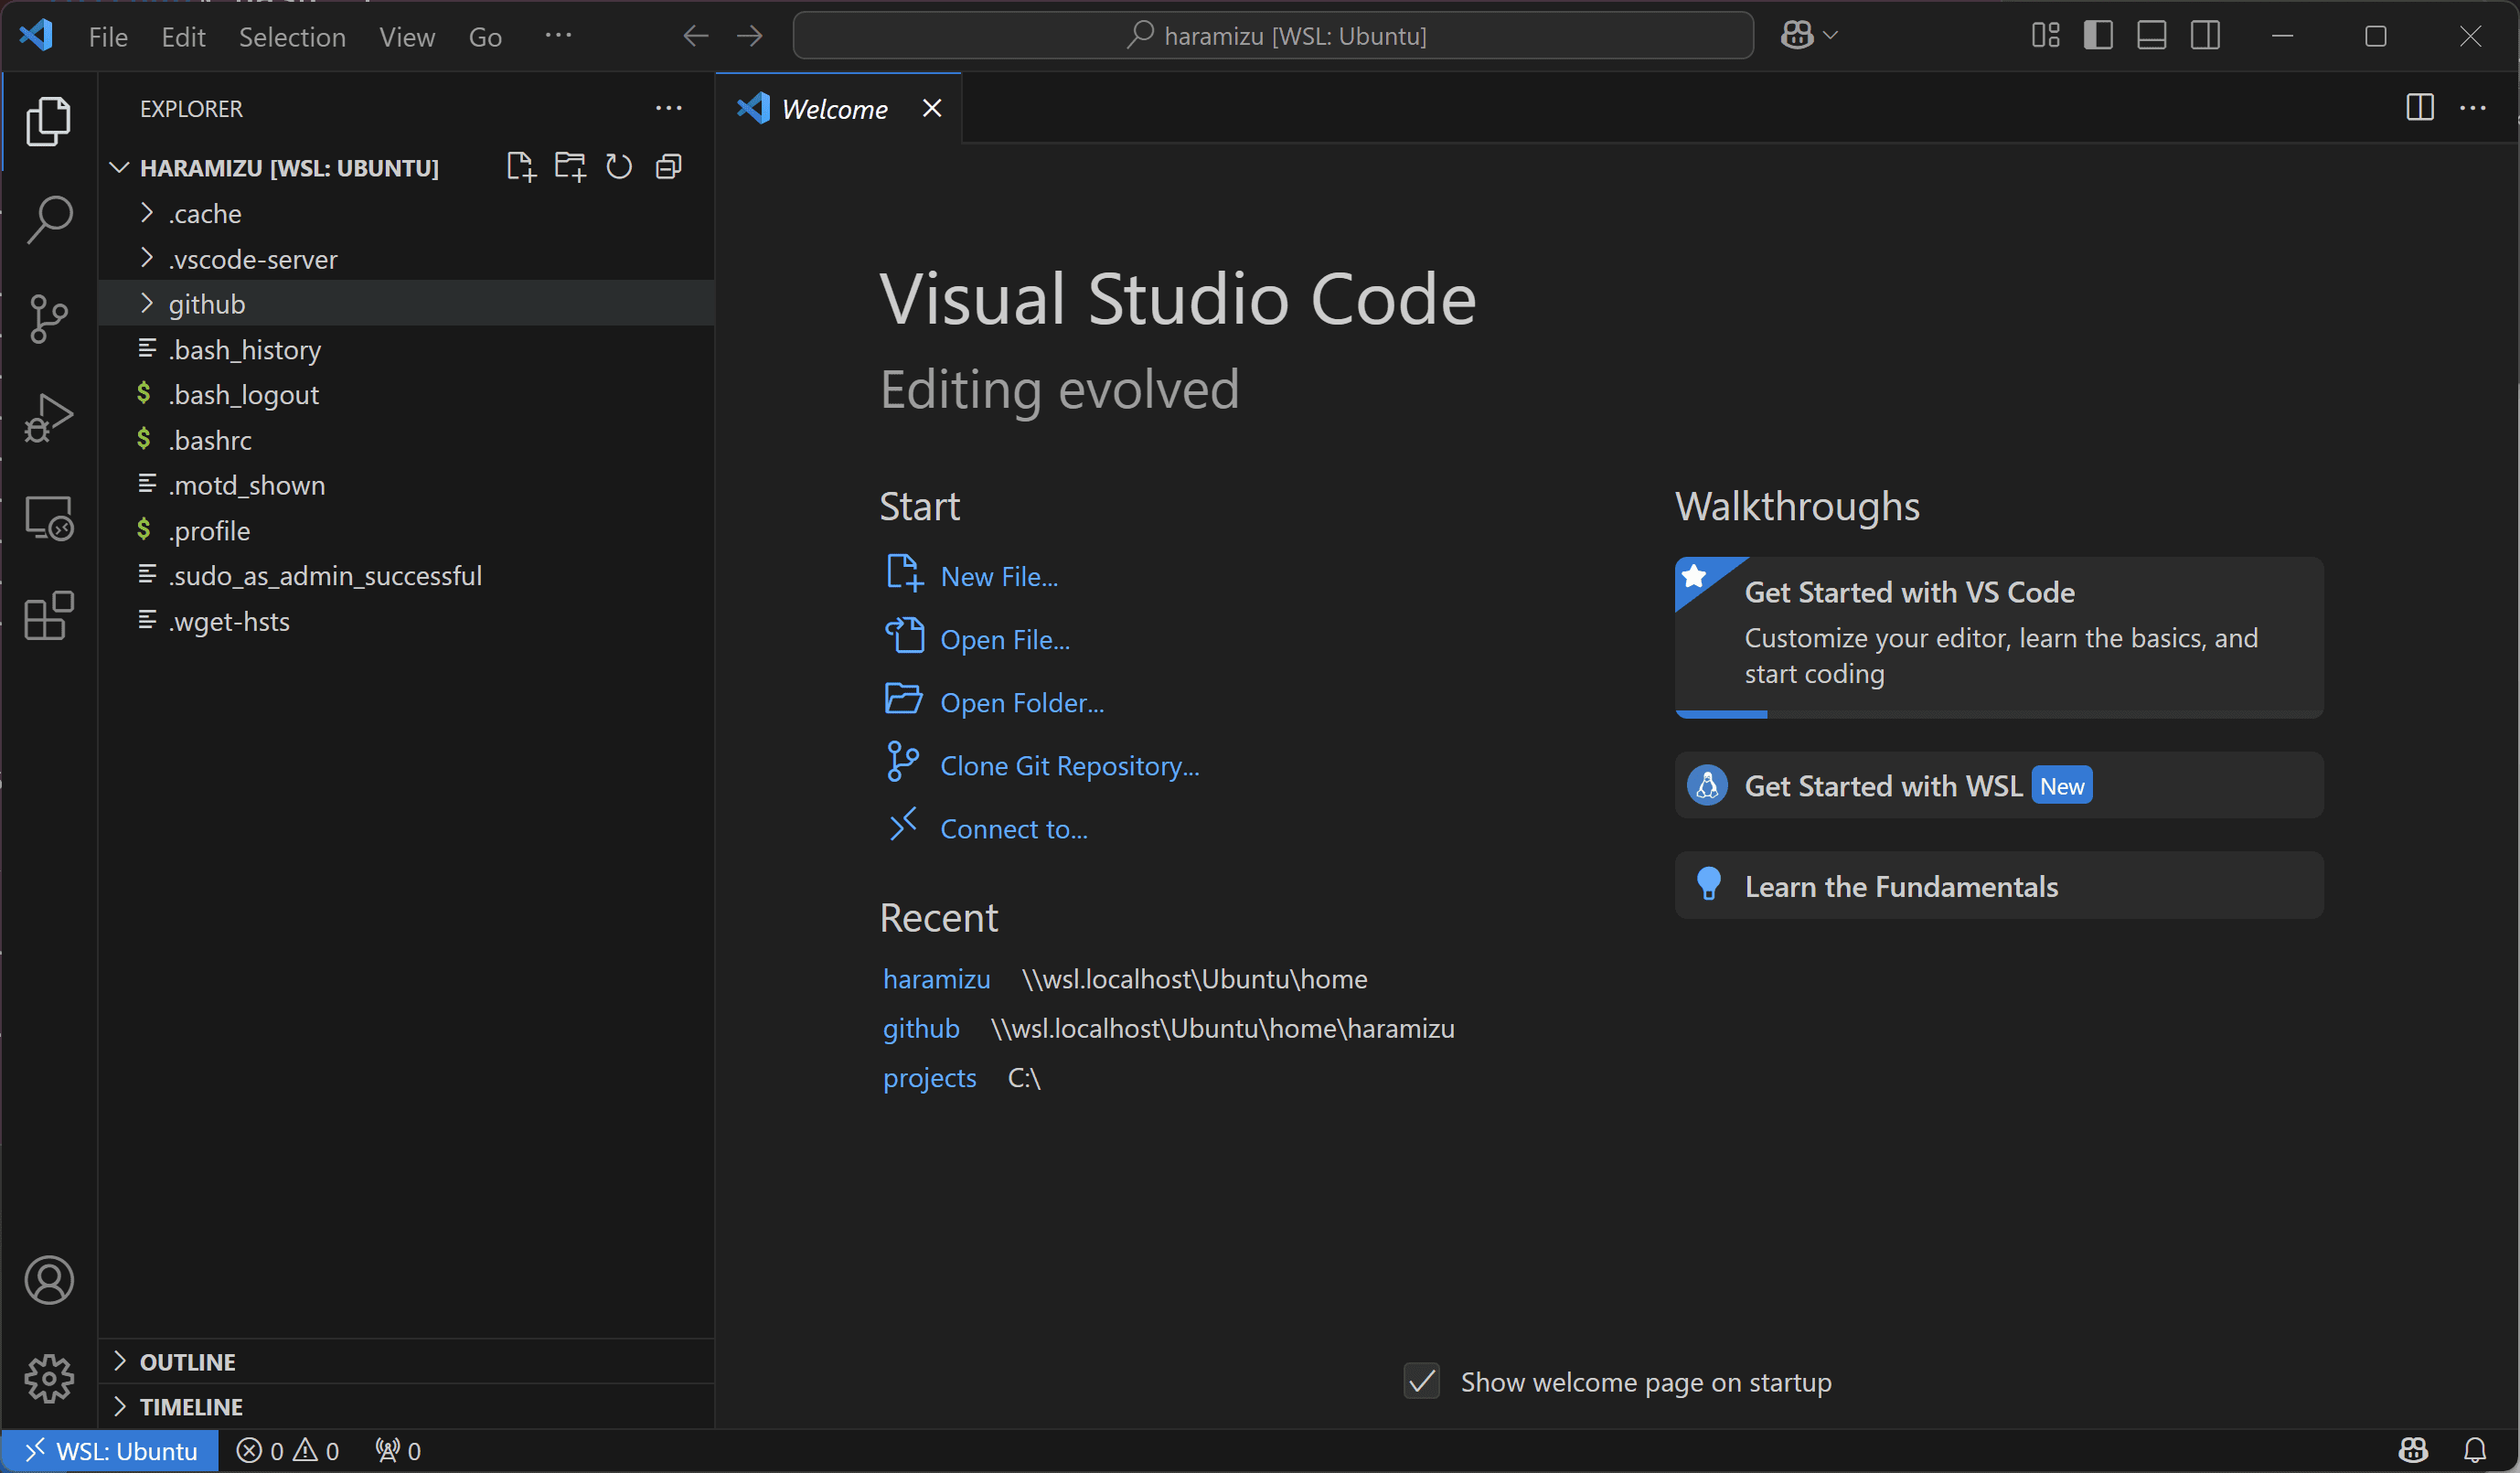
Now that the above situation is in place, it is possible to develop in the Ubuntu environment using Visual Studio Code.
Update History
- 2025-07-14 n installation procedure has been adapted to the macOS procedure.