When publishing content with Sanity, this guide explains how to create a webhook to update sites deployed via Cloudflare.
Use webhooks to execute site updates - Sanity
2025-12-29
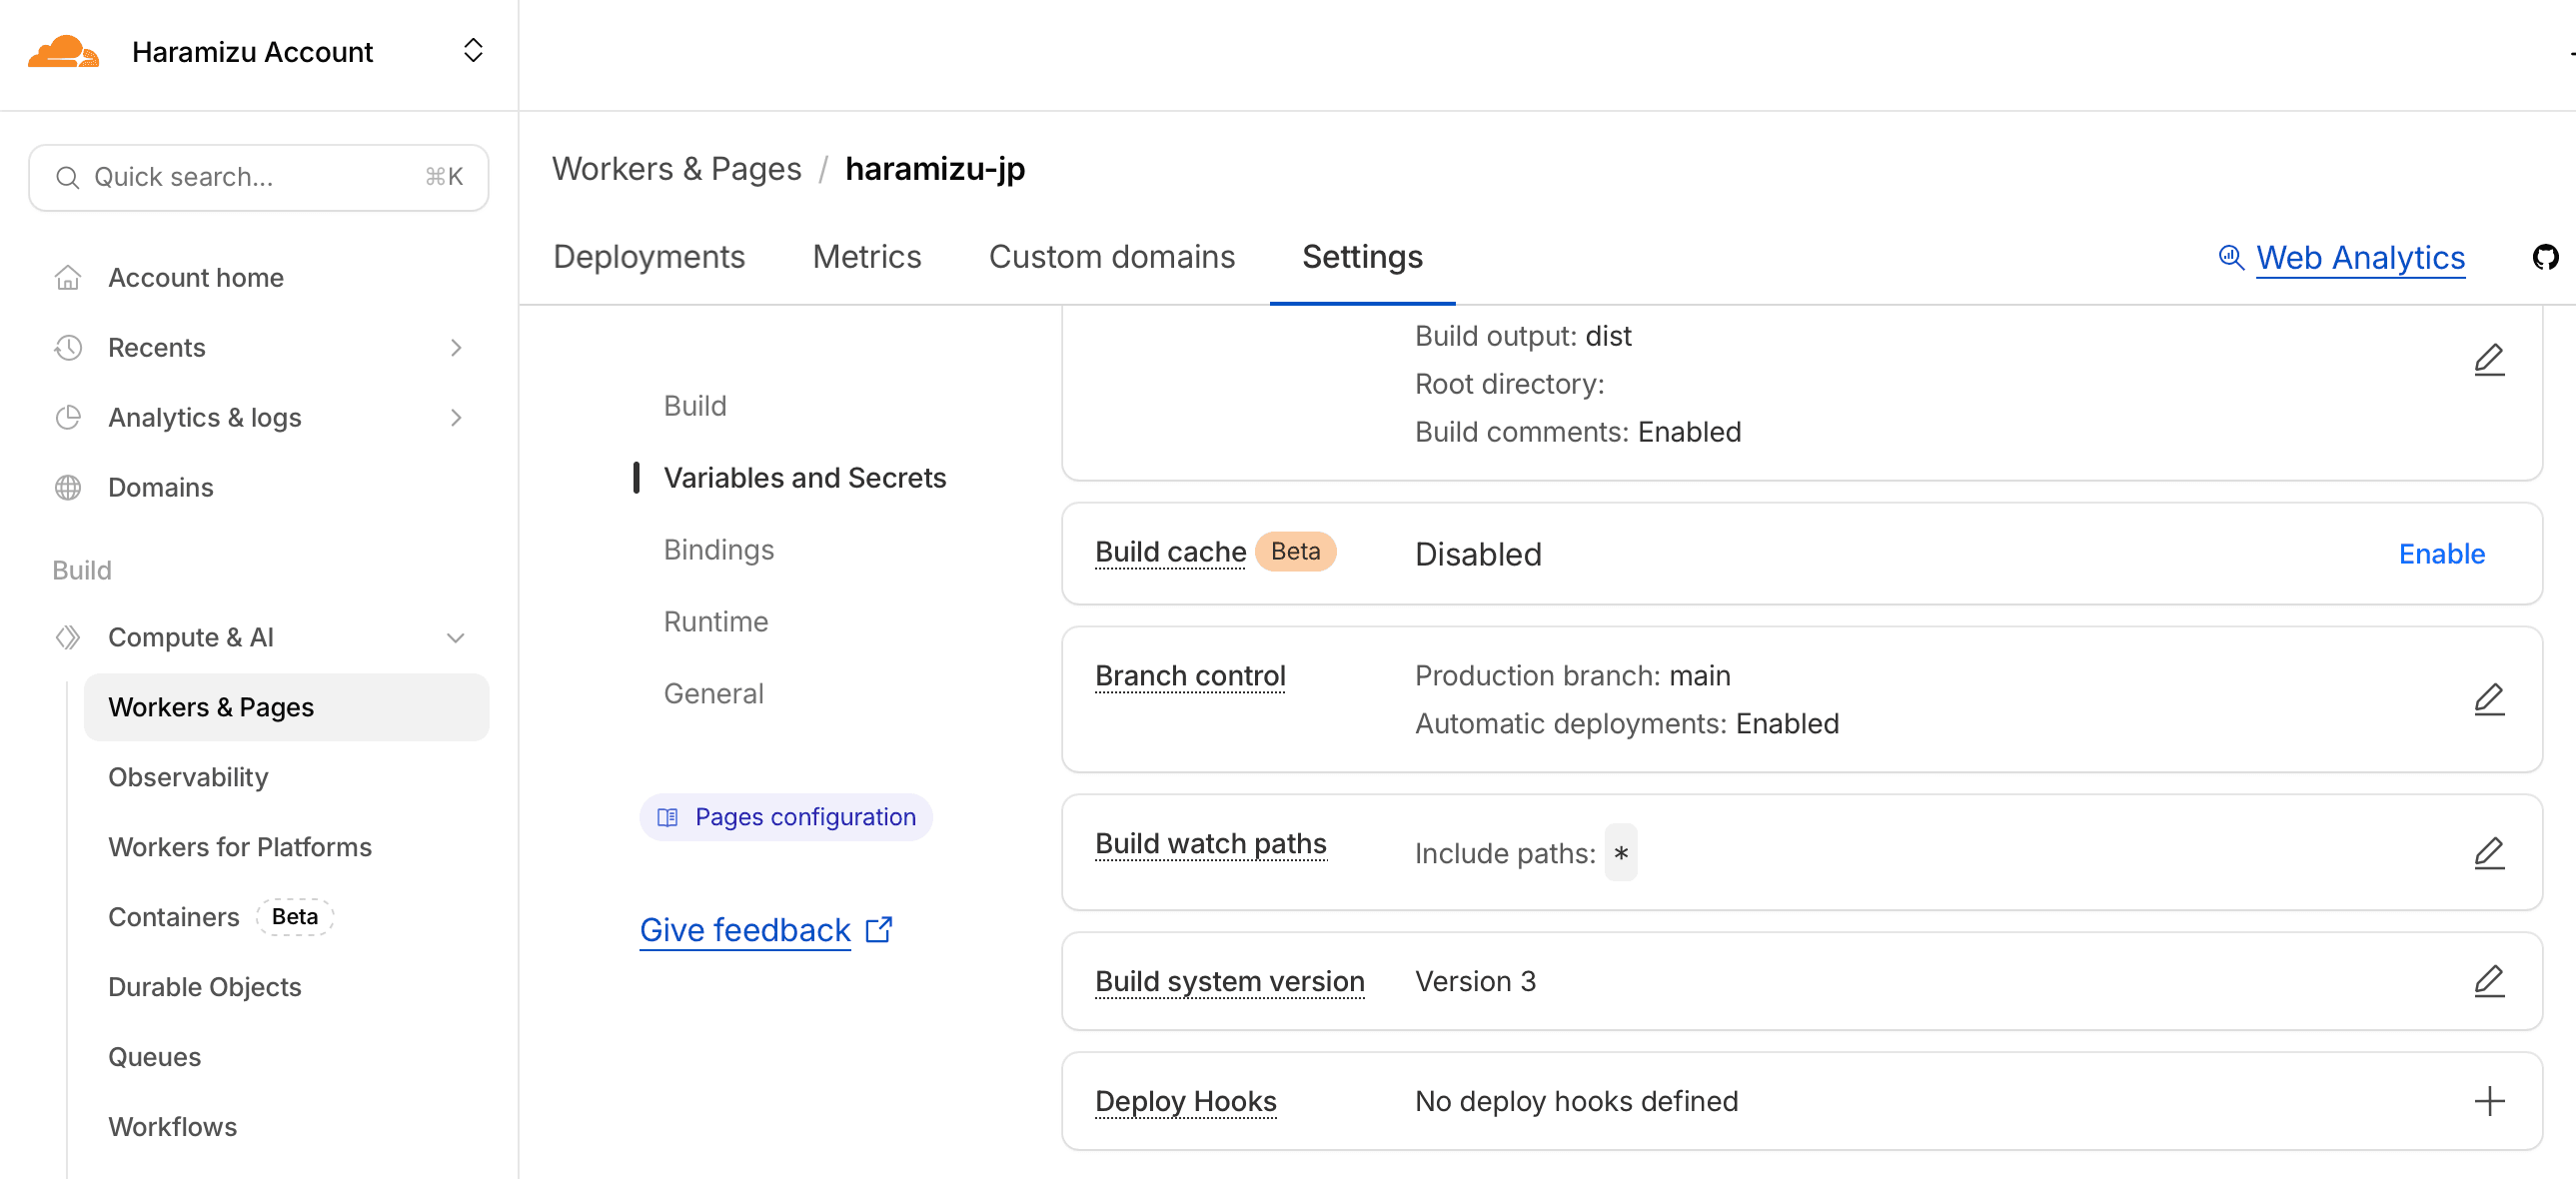
Cloudflare Settings
First, create a webhook endpoint to handle processes like page updates. Since we're using Cloudflare Pages this time, navigate to the target site's Settings and Deploy hook configuration. Click the + here to access the screen for adding a webhook.
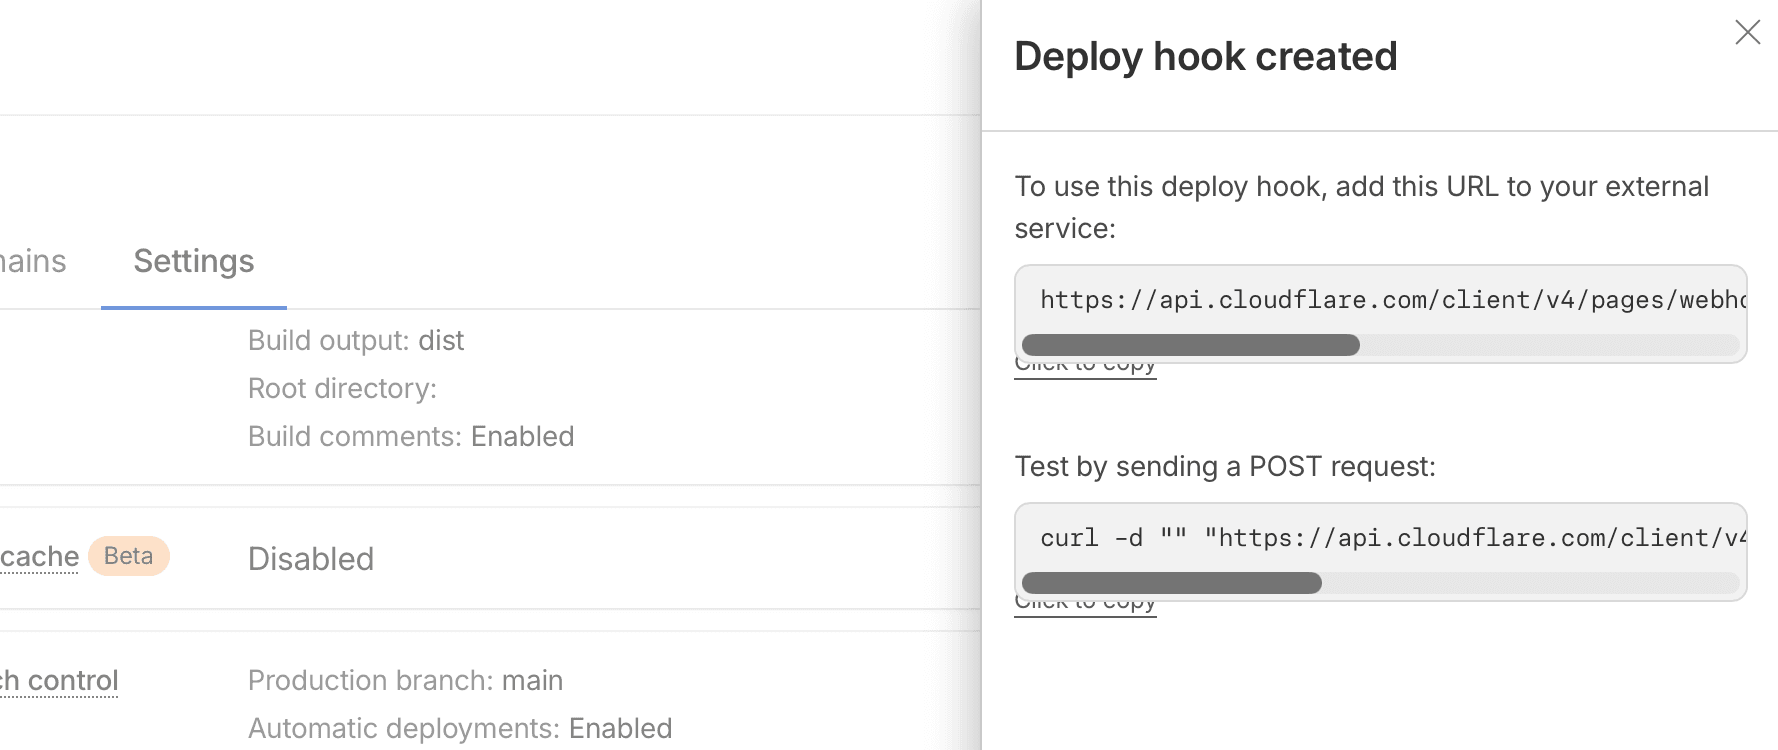
The sidebar opens from the right side, where you specify the name of the Deploy hook and which branch to build when the instruction is received.

When you create it, the URL to use will be displayed. This time, you will set the URL shown above in your Sanity project.
Sanity Settings
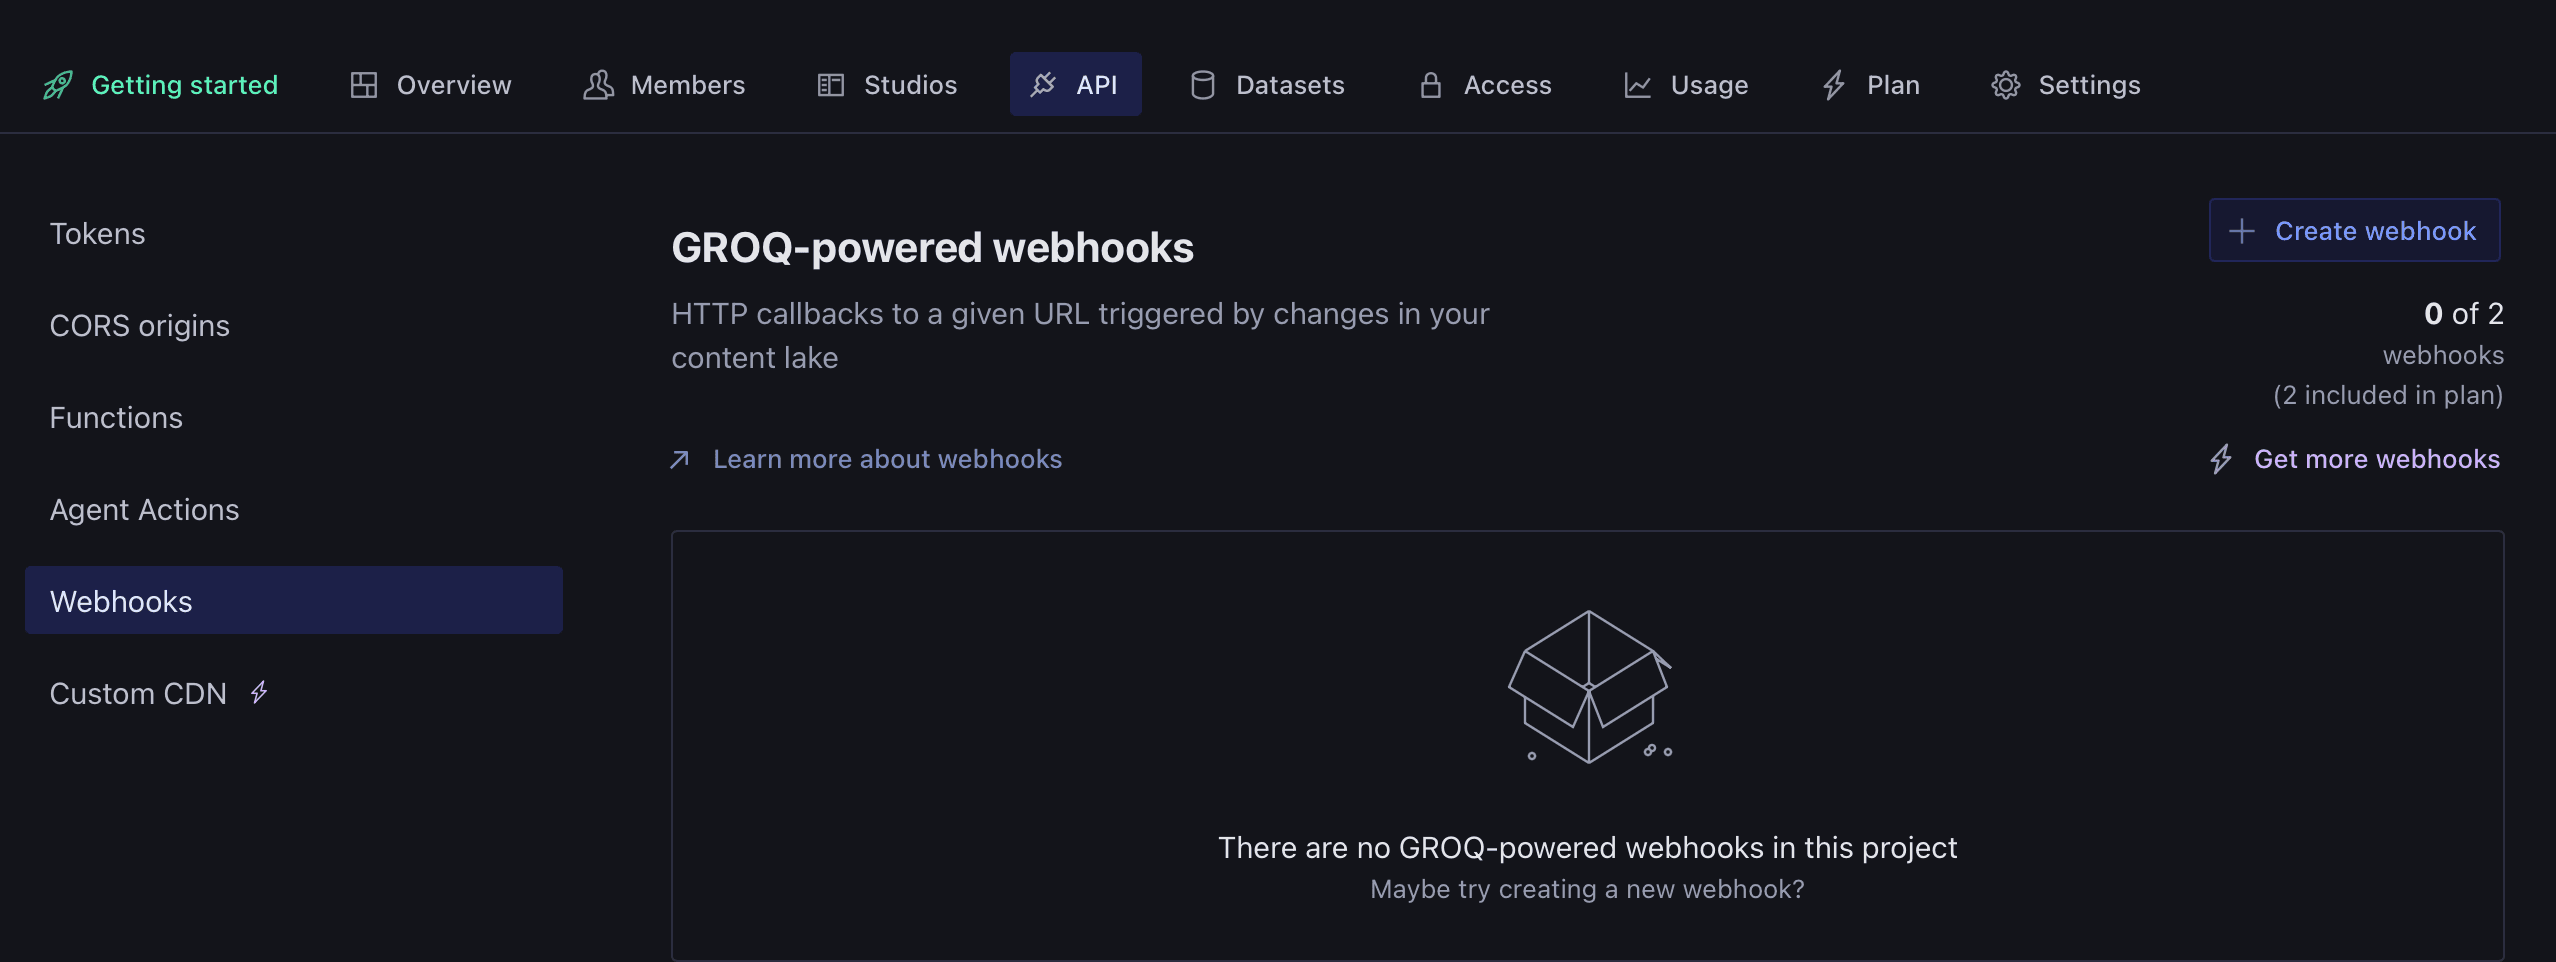
Next, open the Sanity project you want to connect and select the API tab. If this is your first time, no APIs will be configured yet.
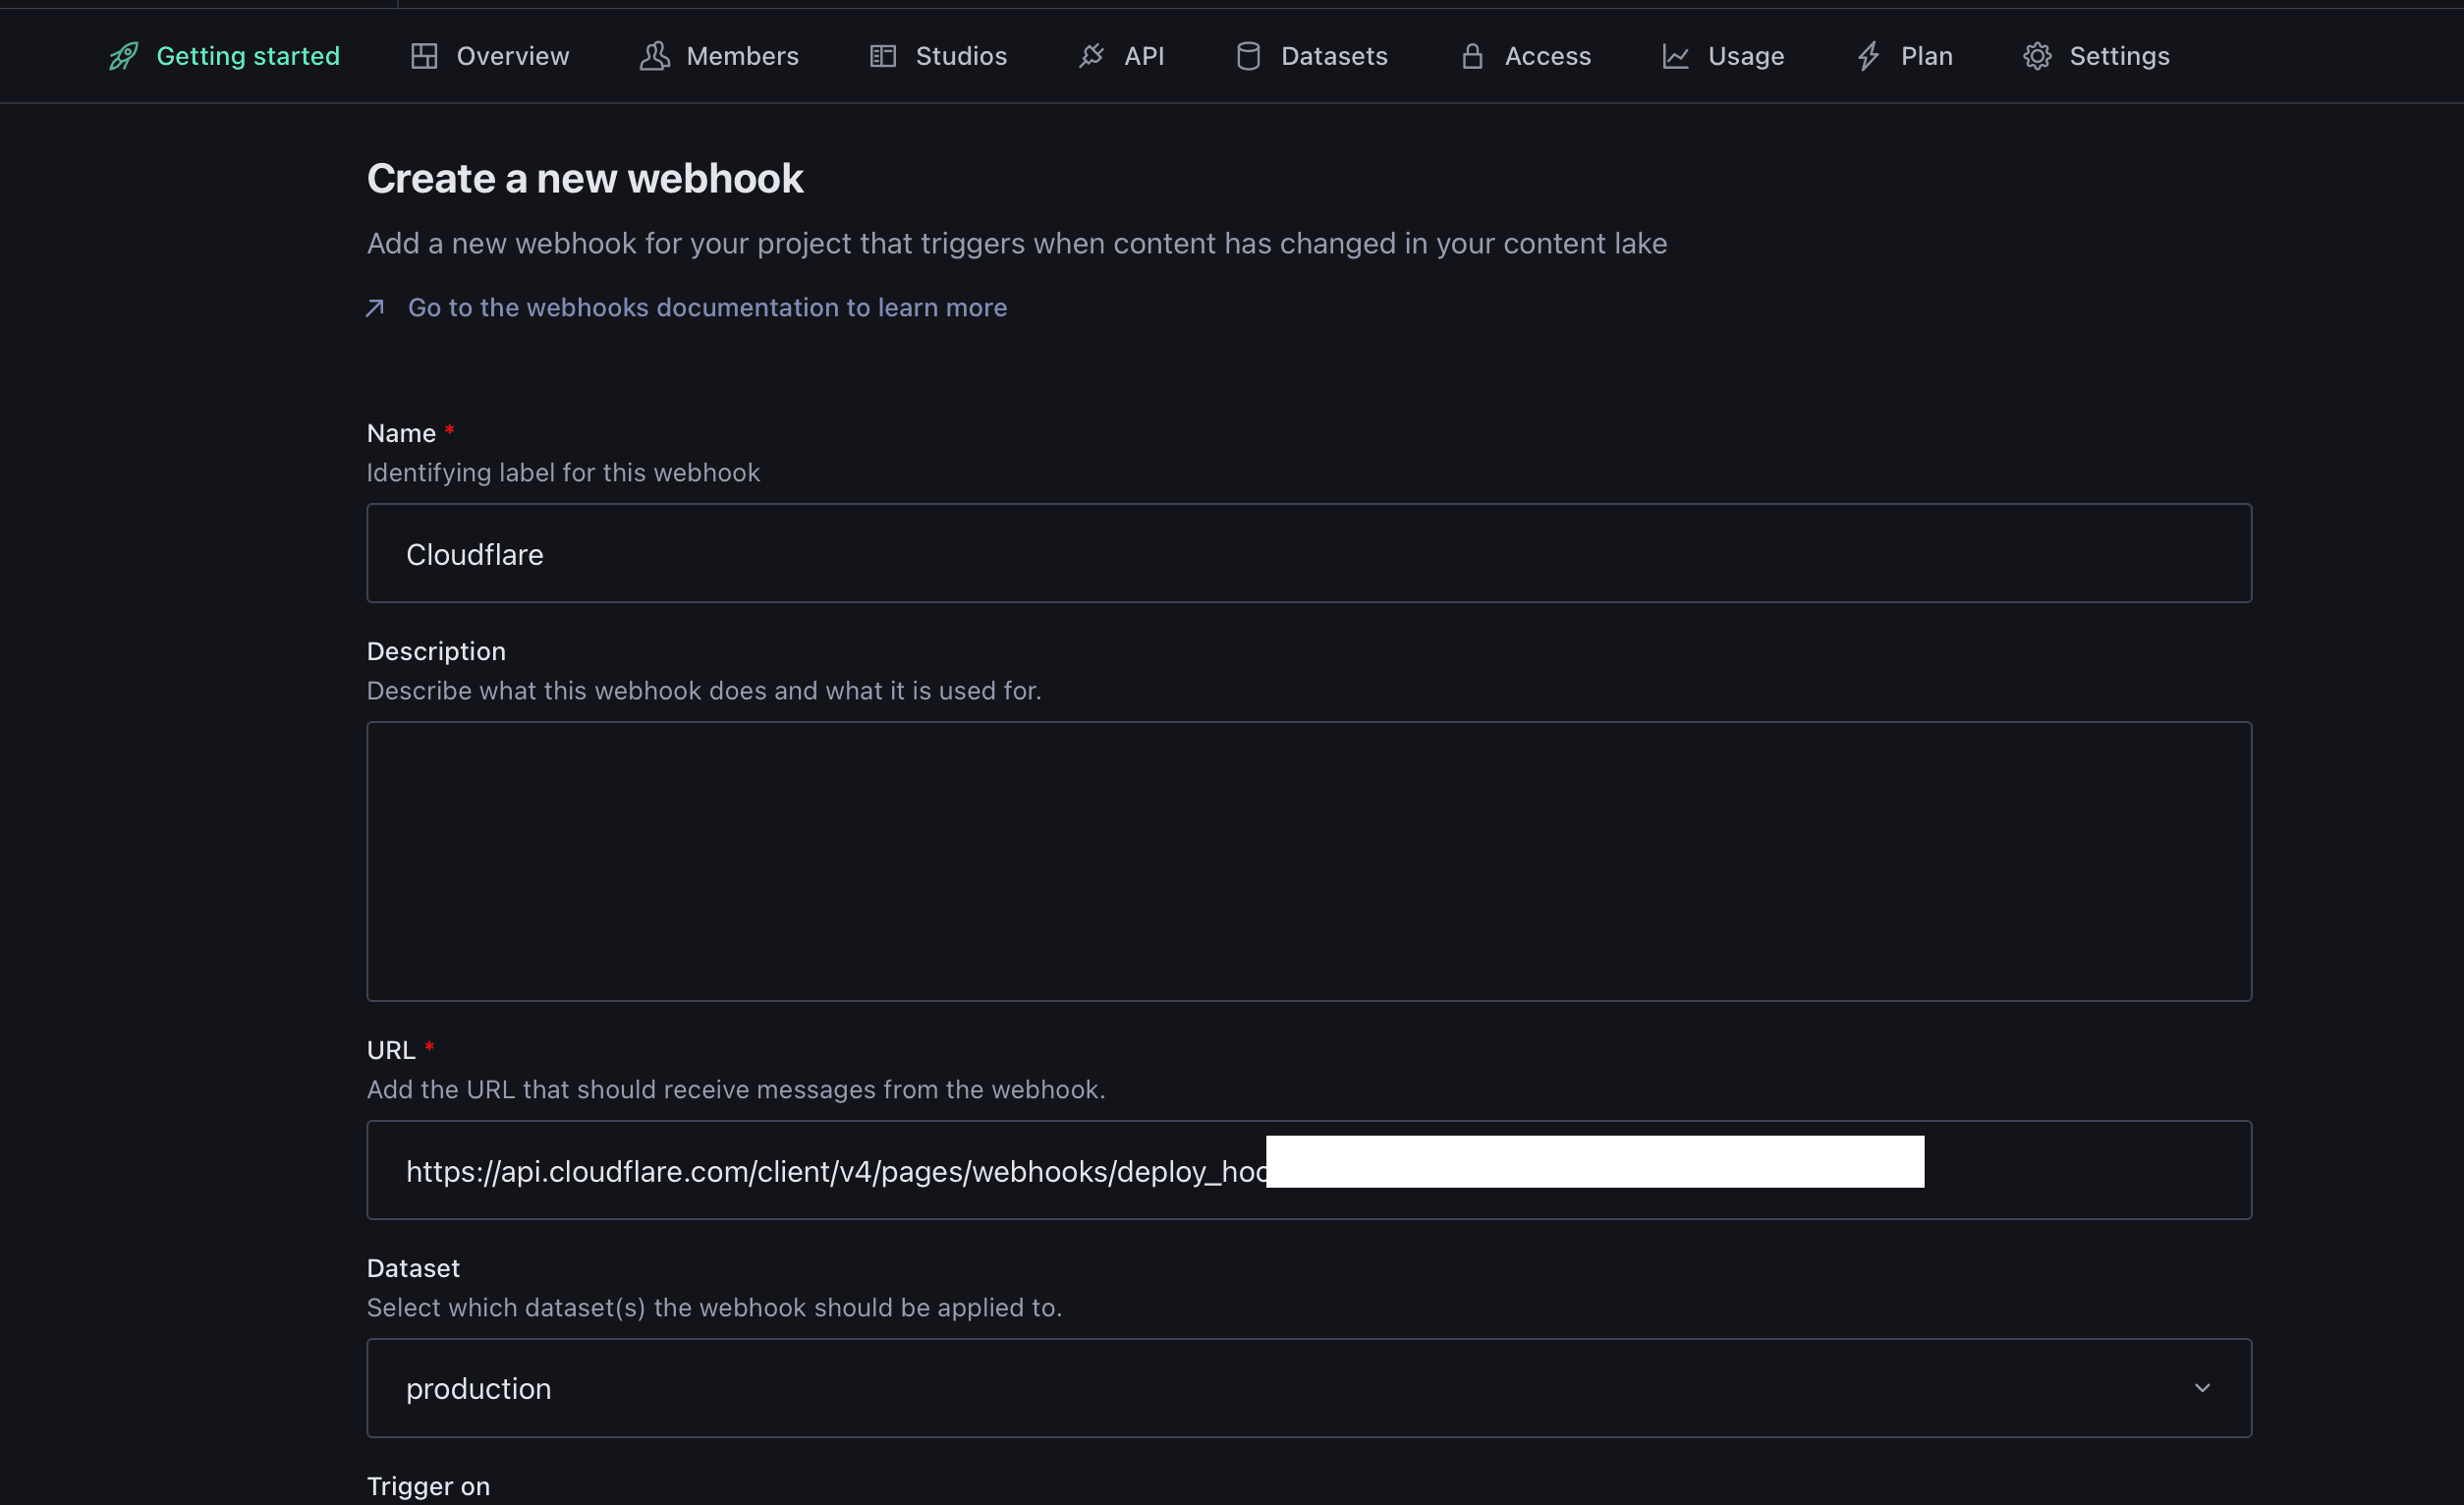
Create a new Webhook. For the setup steps, enter the name of the destination service as the Webhook name, and input the URL that Cloudflare has configured as the destination. Additionally, select the dataset for when content is updated and the trigger event (publish, update, delete) to complete the Webhook configuration.
Functional Verification
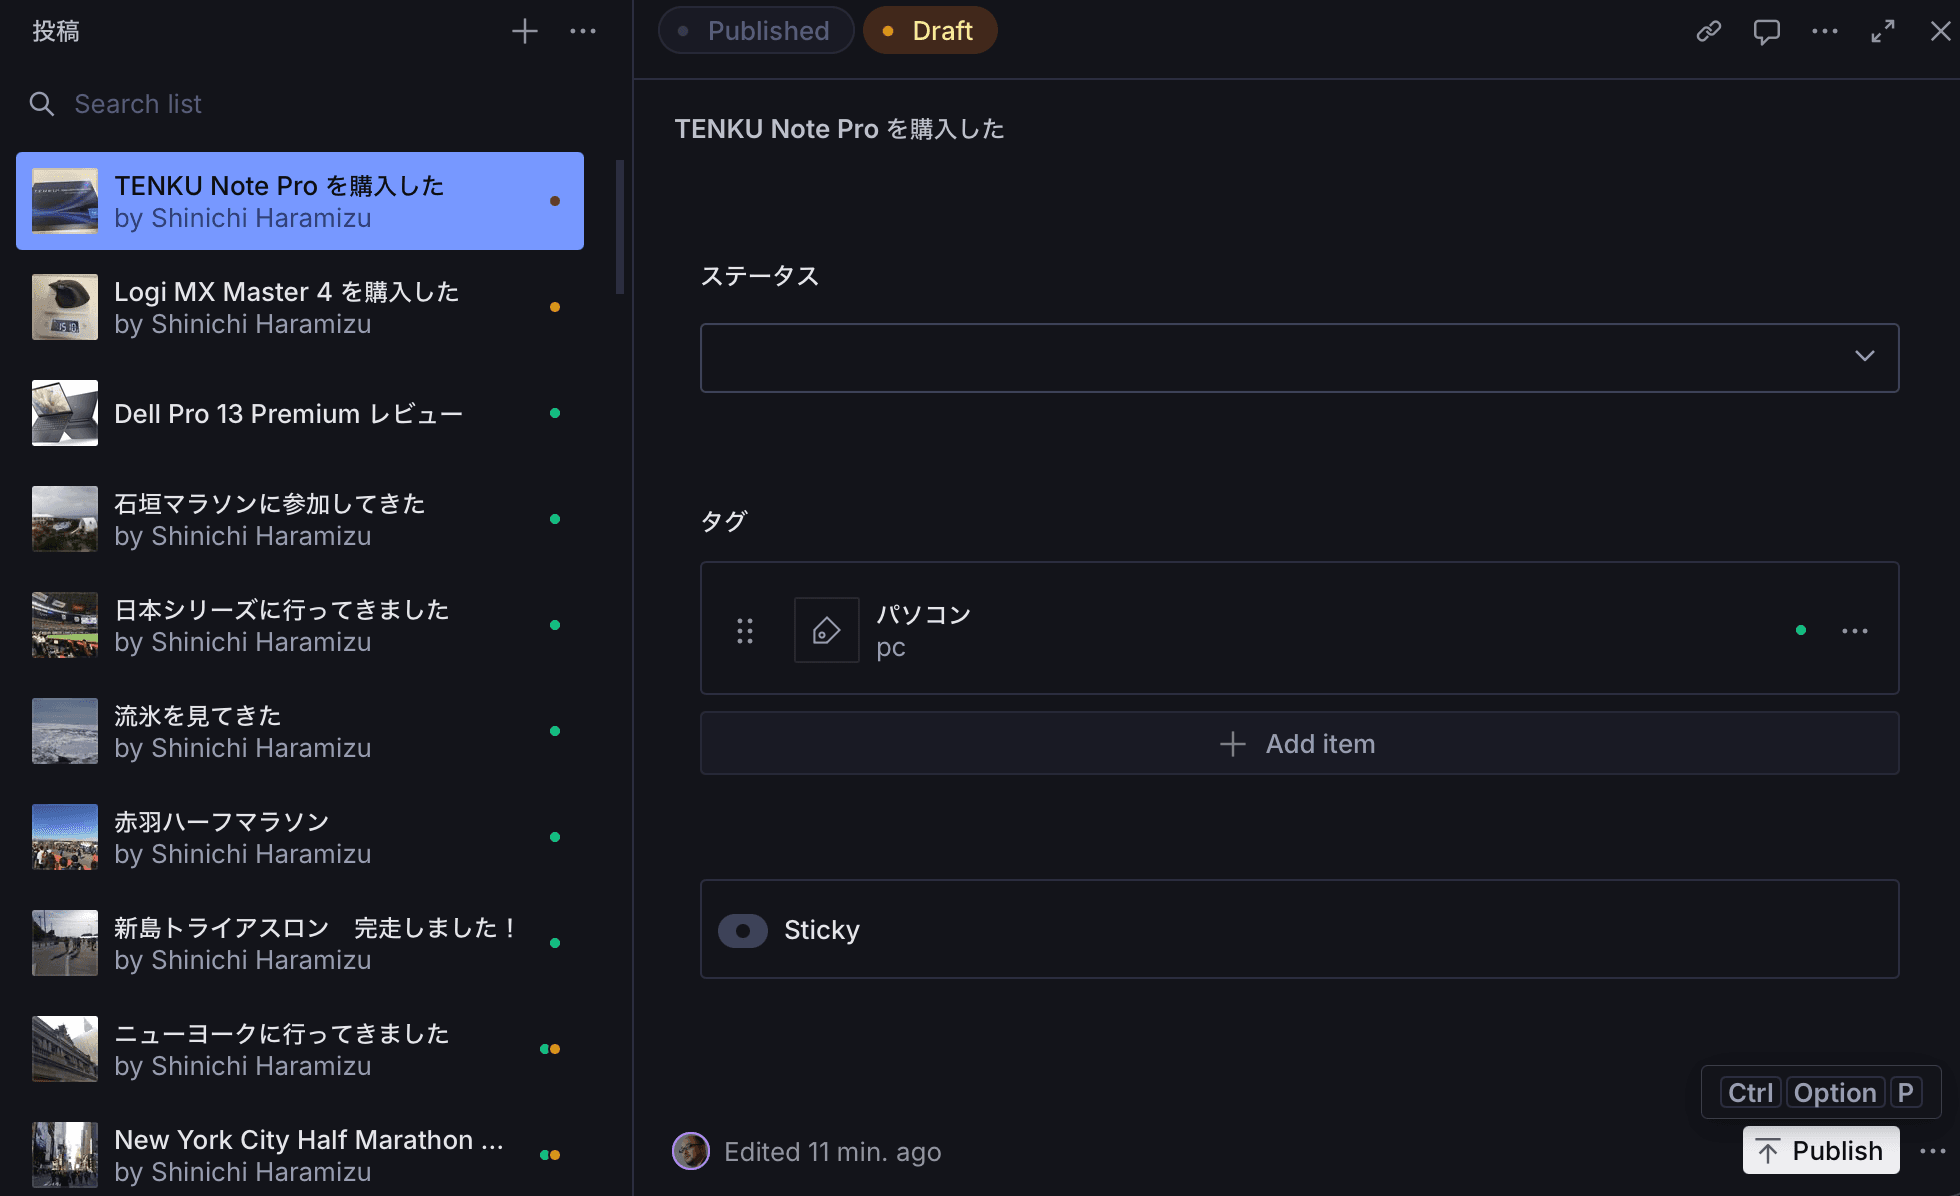
We will verify whether it functions as intended when the content is actually published. The content prior to verification is as follows:

Select the unpublished content, then select Publish to make the content live.
Once the publishing process is complete, you can verify that the build has started in the Cloudflare environment.
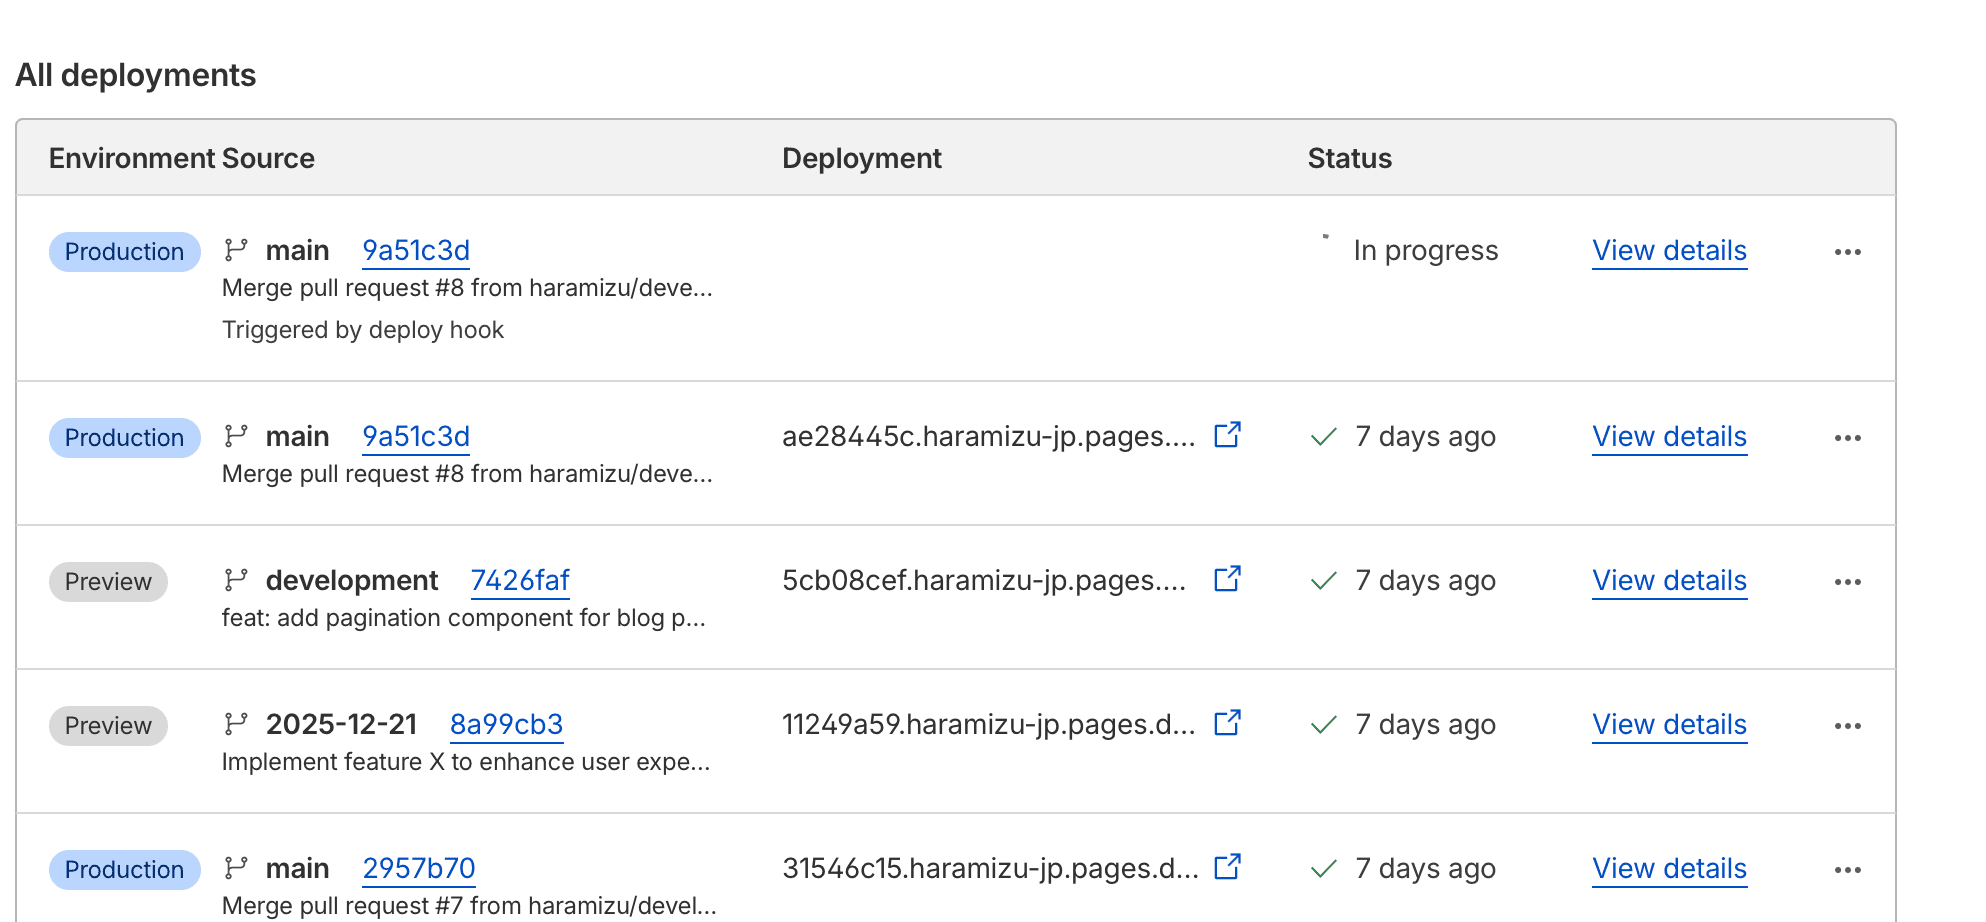
Upon completion of the build, I was able to confirm that a new article had been published as follows.

Summary
This time, we introduced the steps to integrate using webhooks so that the Cloudflare site updates in sync with content publication, updates, and deletions. This makes it easy to update blogs and sites by creating and publishing content within the Sanity environment, as well as scheduling content for publication.
References
- Cloudflare - Deploy Hooks
- Sanity - Webhooks