ここでは公式ガイドの前提条件と次のステップに関して紹介をします。このステップが完了した時には、Sanity の管理画面となる Sanity Studio にアクセスすることが可能となります。
Starting Sanity Studio
2025-08-04
This document is a translated version of the official steps explained in Japanese. If you would like to check the English version, we recommend referring to the official page.
Starting Sanity Studio
We will launch Sanity Studio, which will serve as the basis for the content management we will be implementing going forward.
Instead of the commands provided in the guide, execute the following commands.
sh
In order to set up the same as the sample, we will answer each question as follows.
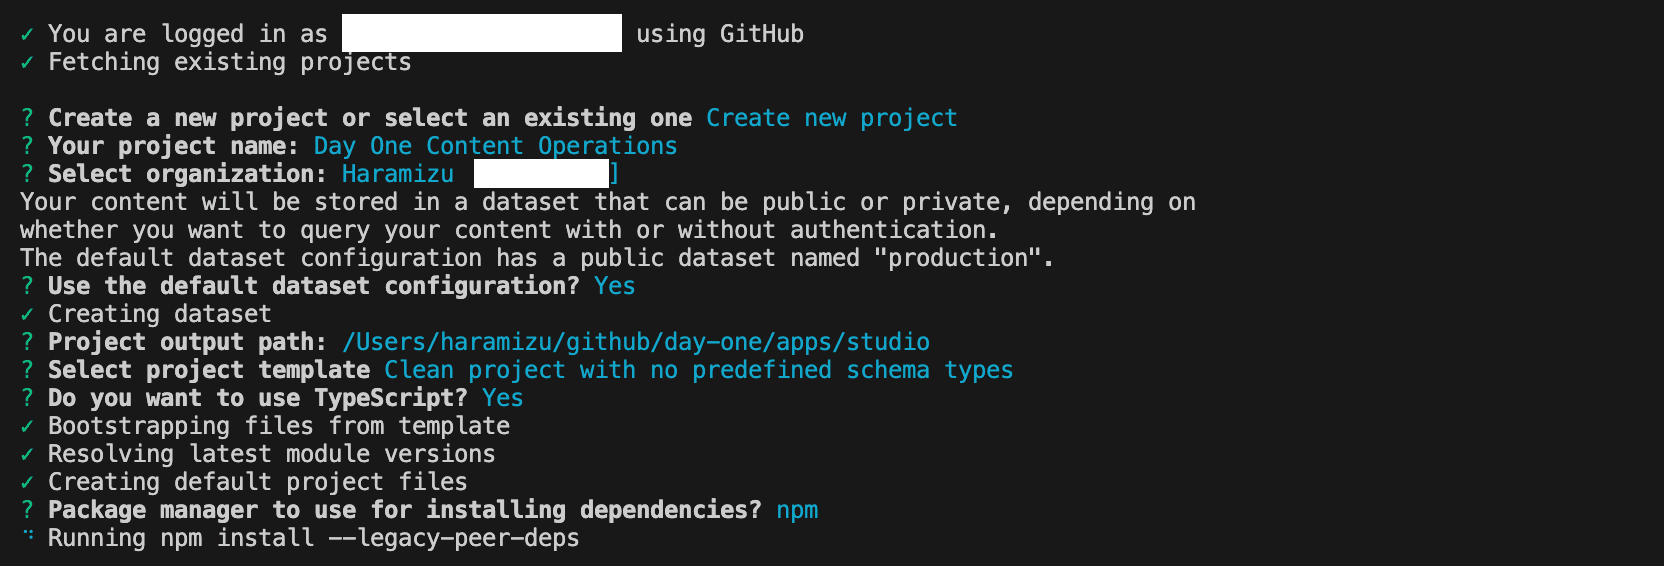
Once the project has been created, navigate to the path you created and execute the following command.
sh
When you execute it, the URL will be displayed, so please access it. After logging in, the following screen will be displayed.
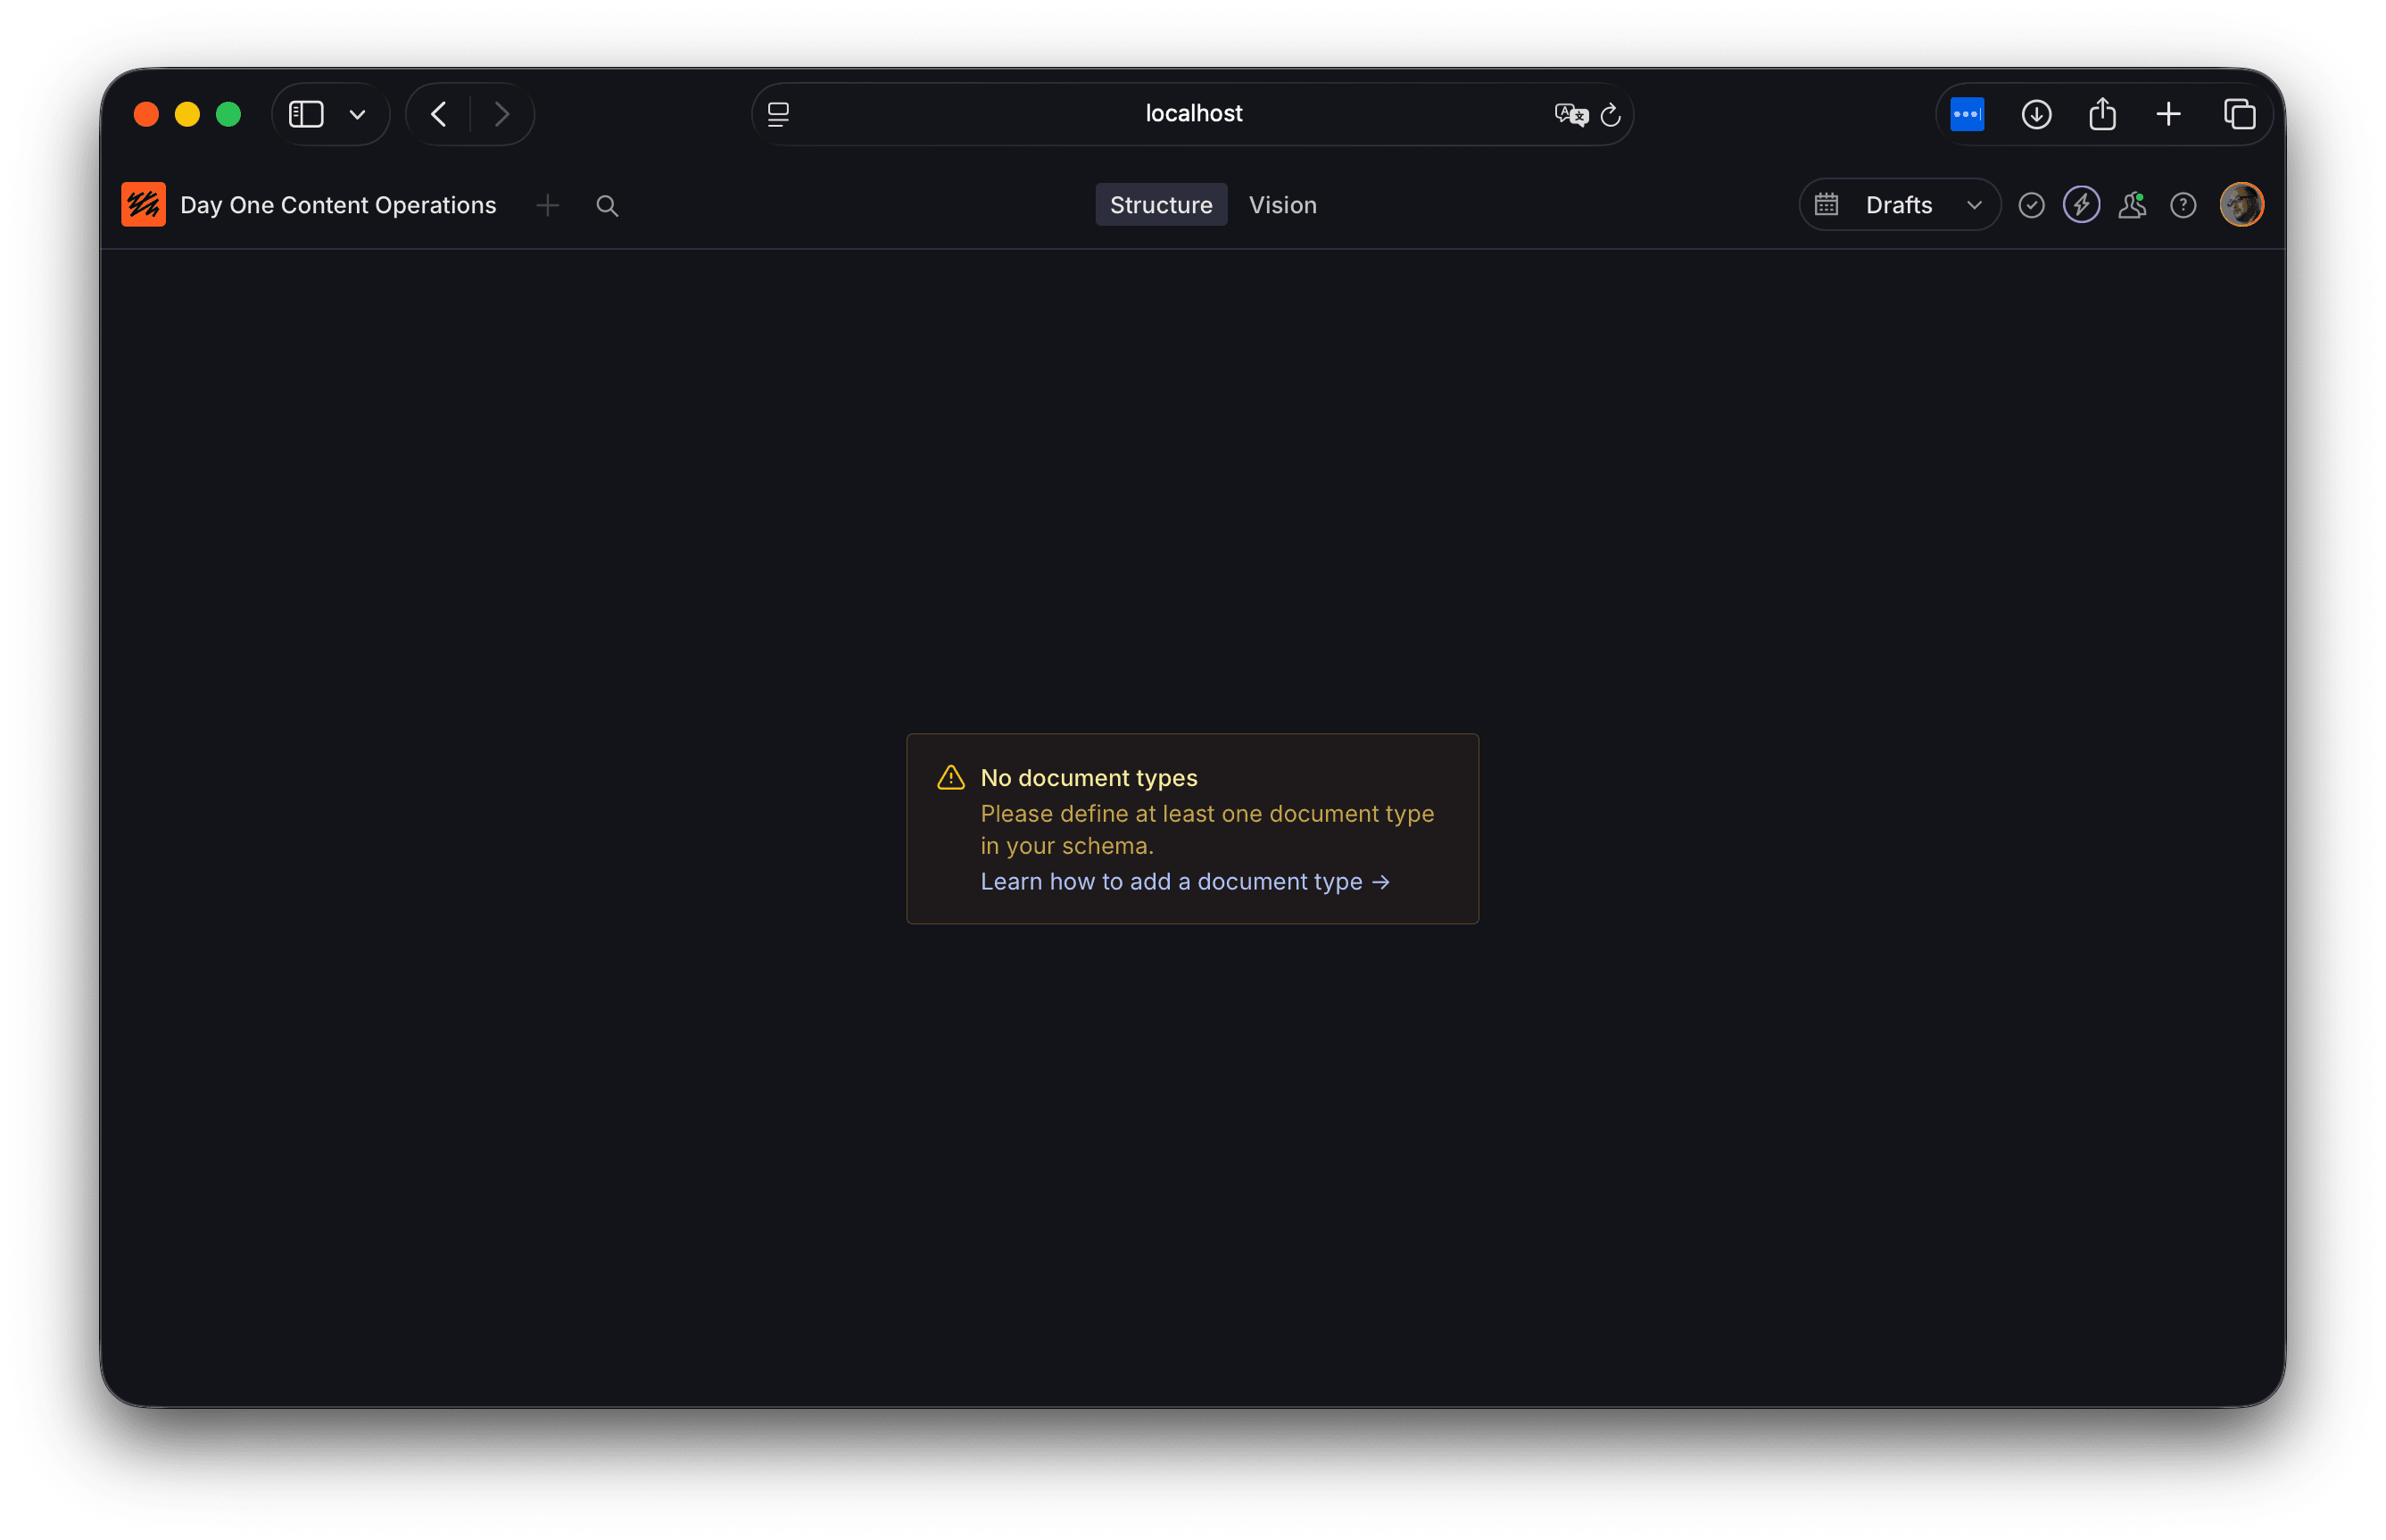
You were able to log in, but since you have not defined any content, nothing will be displayed.
Creating a schema
Regarding the creation of Sanity Studio schemas, the configuration file states the following (excerpt only)
apps/studio/sanity.config.ts
The contents of the file being read above are as follows.
apps/studio/schemaTypes/index.ts
Sanity allows you to define content schemas using TypeScript.
I would like to create a schema for event information. Create the file apps/studio/schemaTypes/eventType.ts.
apps/studio/schemaTypes/eventType.ts
Let's load this schema into index.ts.
apps/studio/schemaTypes/index.ts
Once the above changes are applied, the management screen that is currently running will be updated, enabling you to add content called "Event."
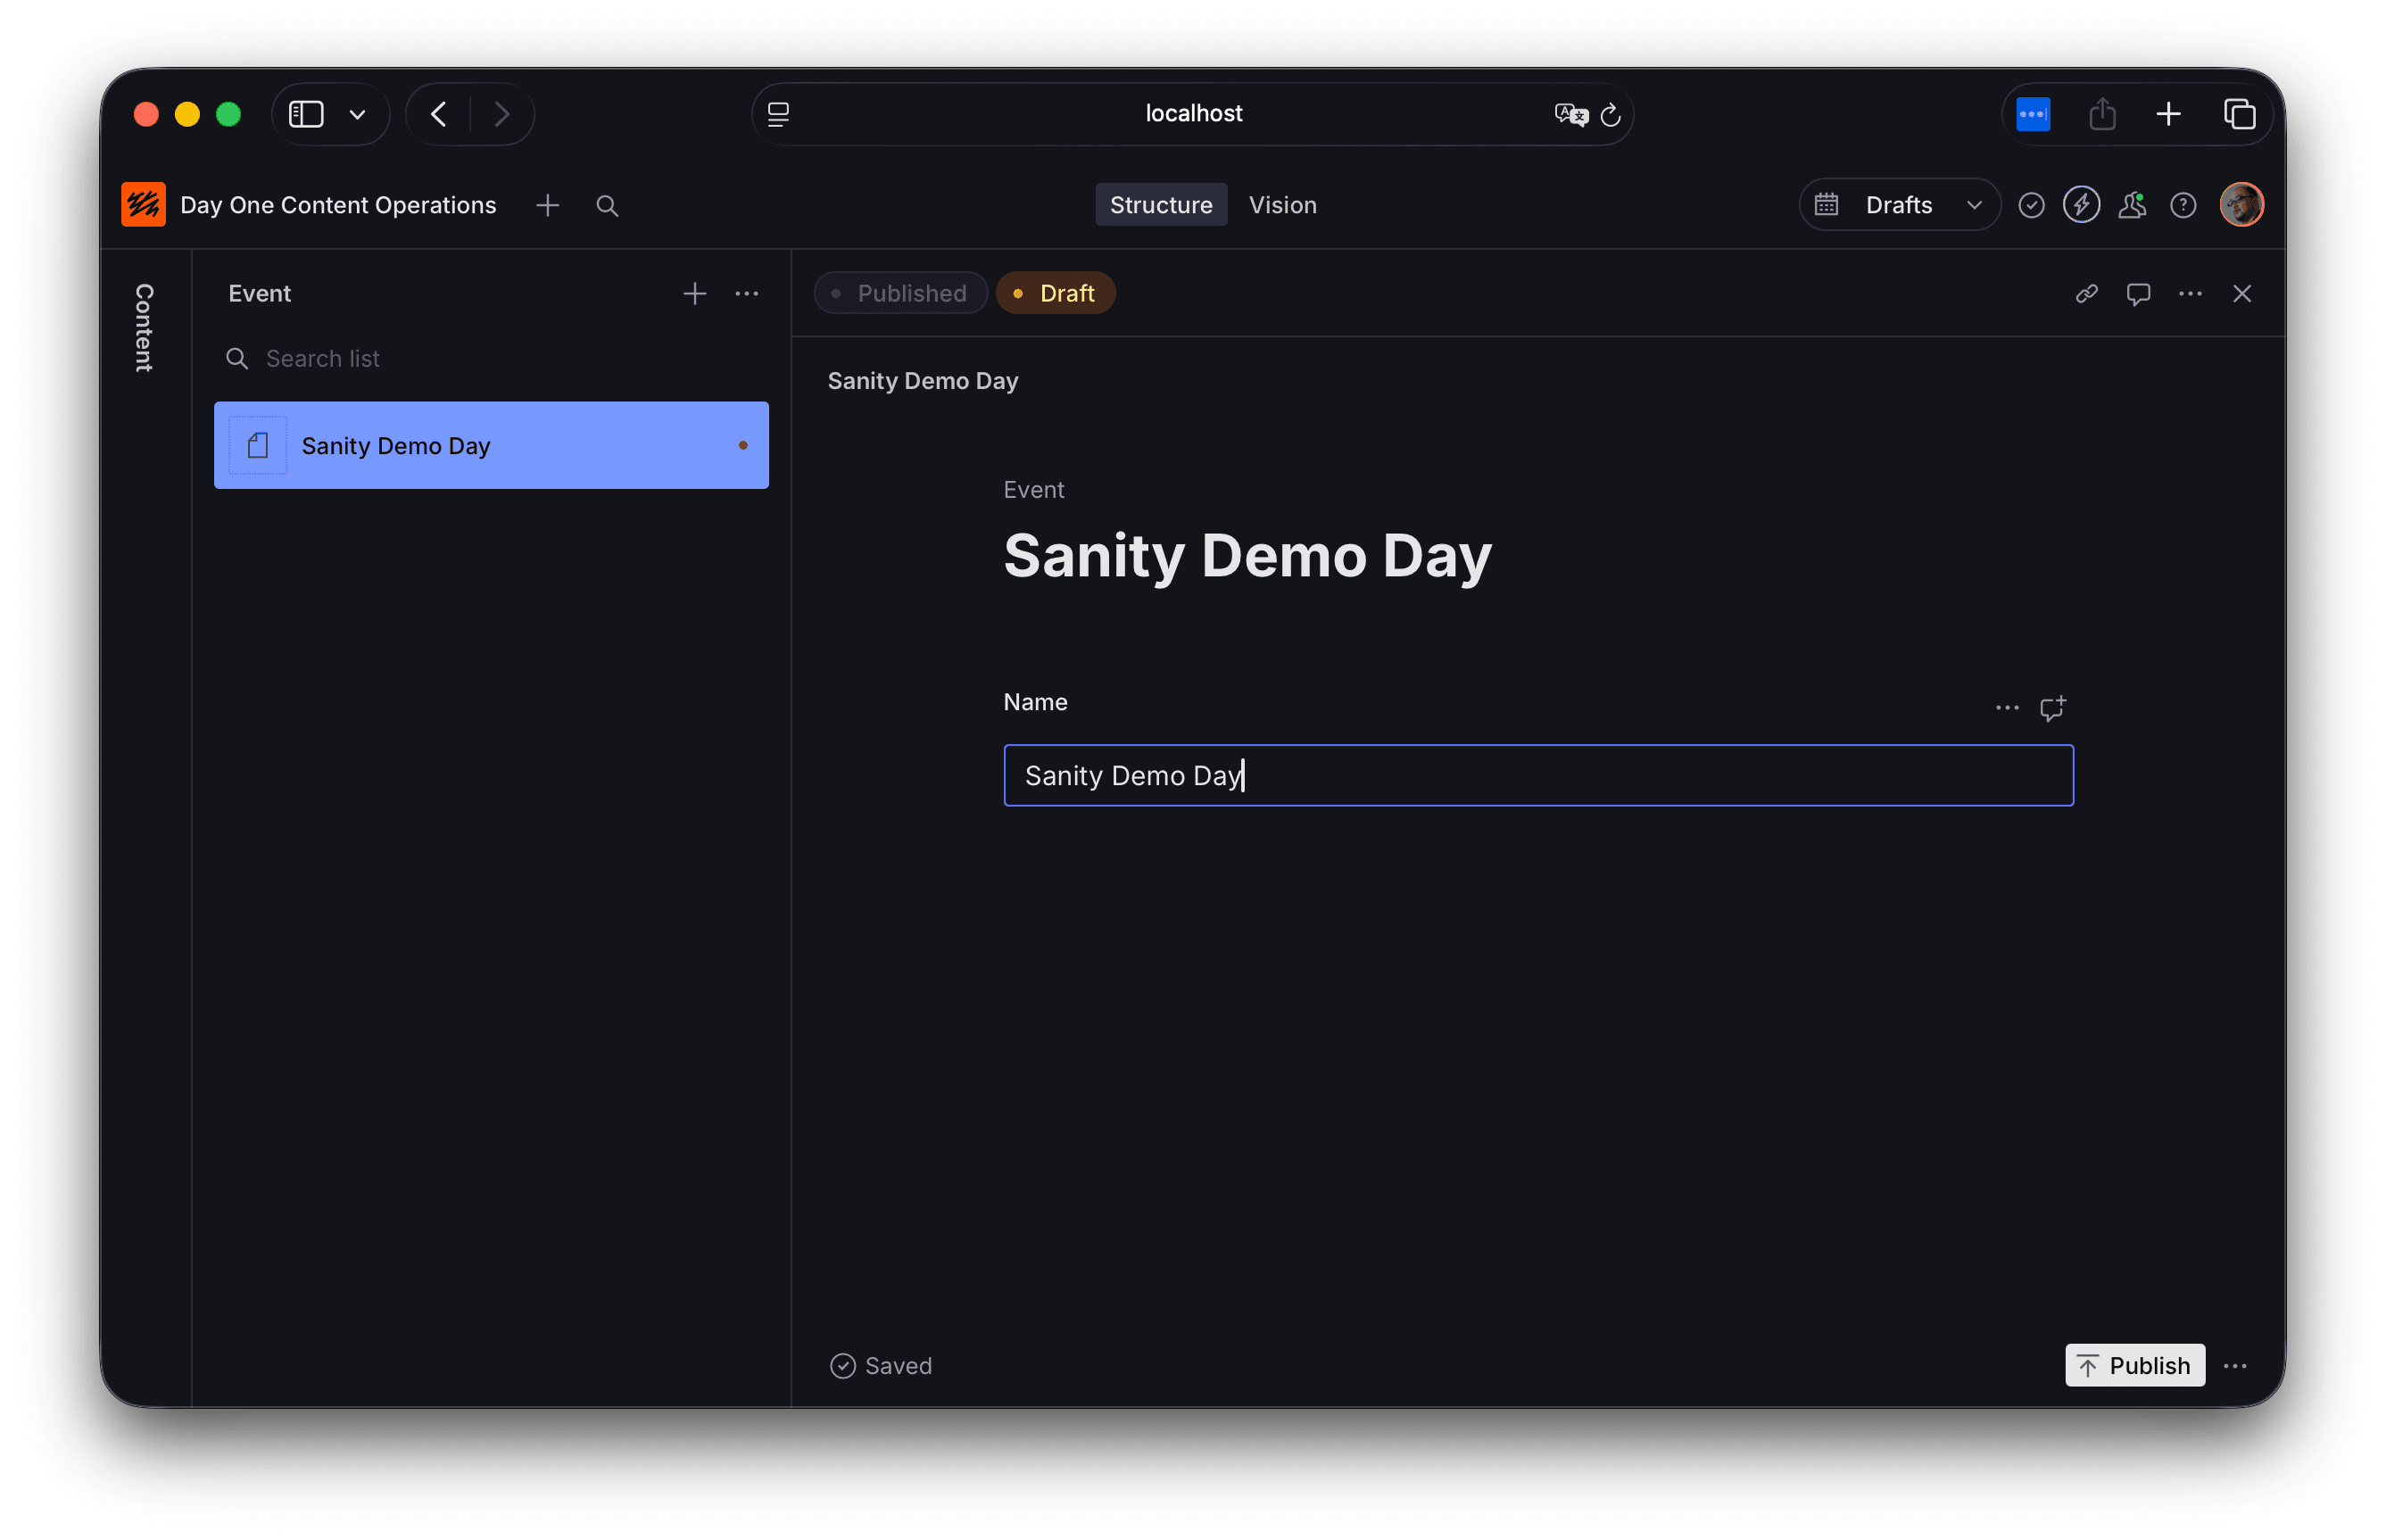
In this way, the items defined in the schema are defined as content items.
Next, we will add the Artist and Venue schemas.
The artist samples are as follows.
apps/studio/schemaTypes/artistType.ts
Next, create a Venue.
apps/studio/schemaTypes/venueType.ts
Reflect the above two in index.ts.
apps/studio/schemaTypes/index.ts
After the change, refer to the Sanity Studio screen to see the updates.

Next, update the event schema. Several fields are provided on the official website, which you will add in order. The completed code will look like this.
apps/studio/schemaTypes/eventType.ts
There are two additional points to note regarding field types.
- reference: This type is a field that references content of a different schema type.
- block: A field type that allows you to create content that is as versatile as rich text.
Importing sample data
Download the sample data provided on the official website, create a data folder in day-one, and move it there.
Next, execute the following command in the studio path to import (replace path as appropriate).
sh
When the import is successful, the following message will be displayed.
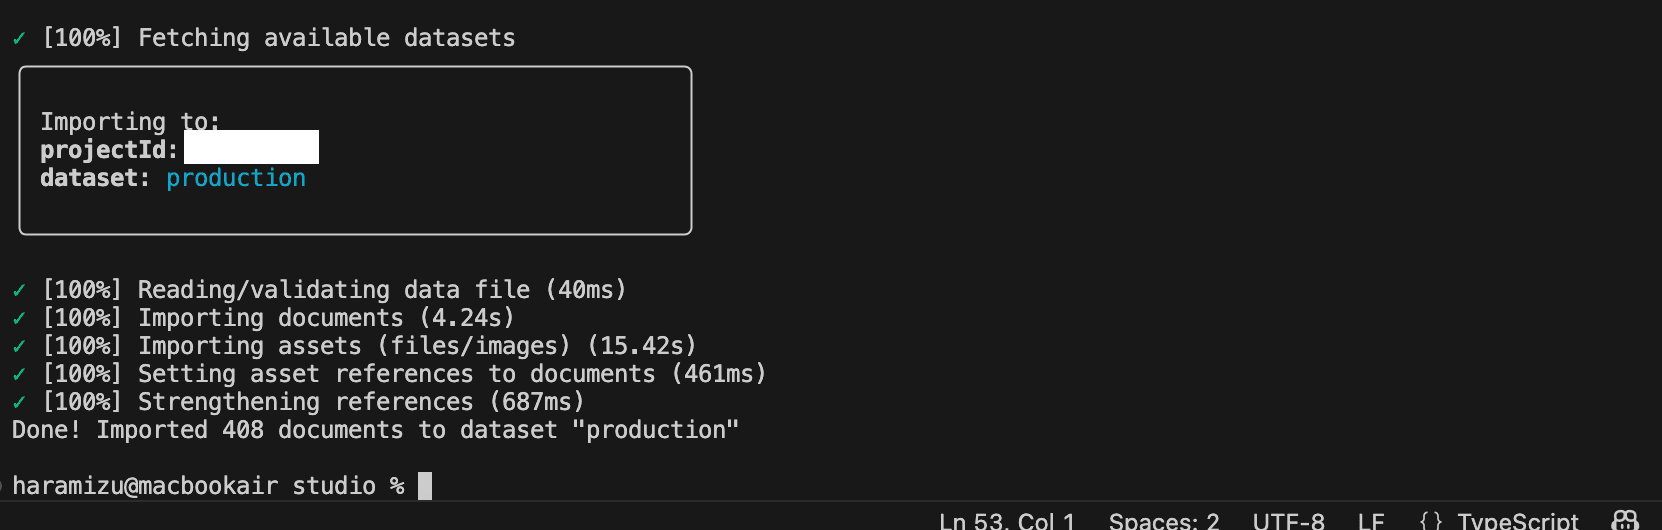
After the import is complete, check Sanity Studio to confirm that the content has been imported.
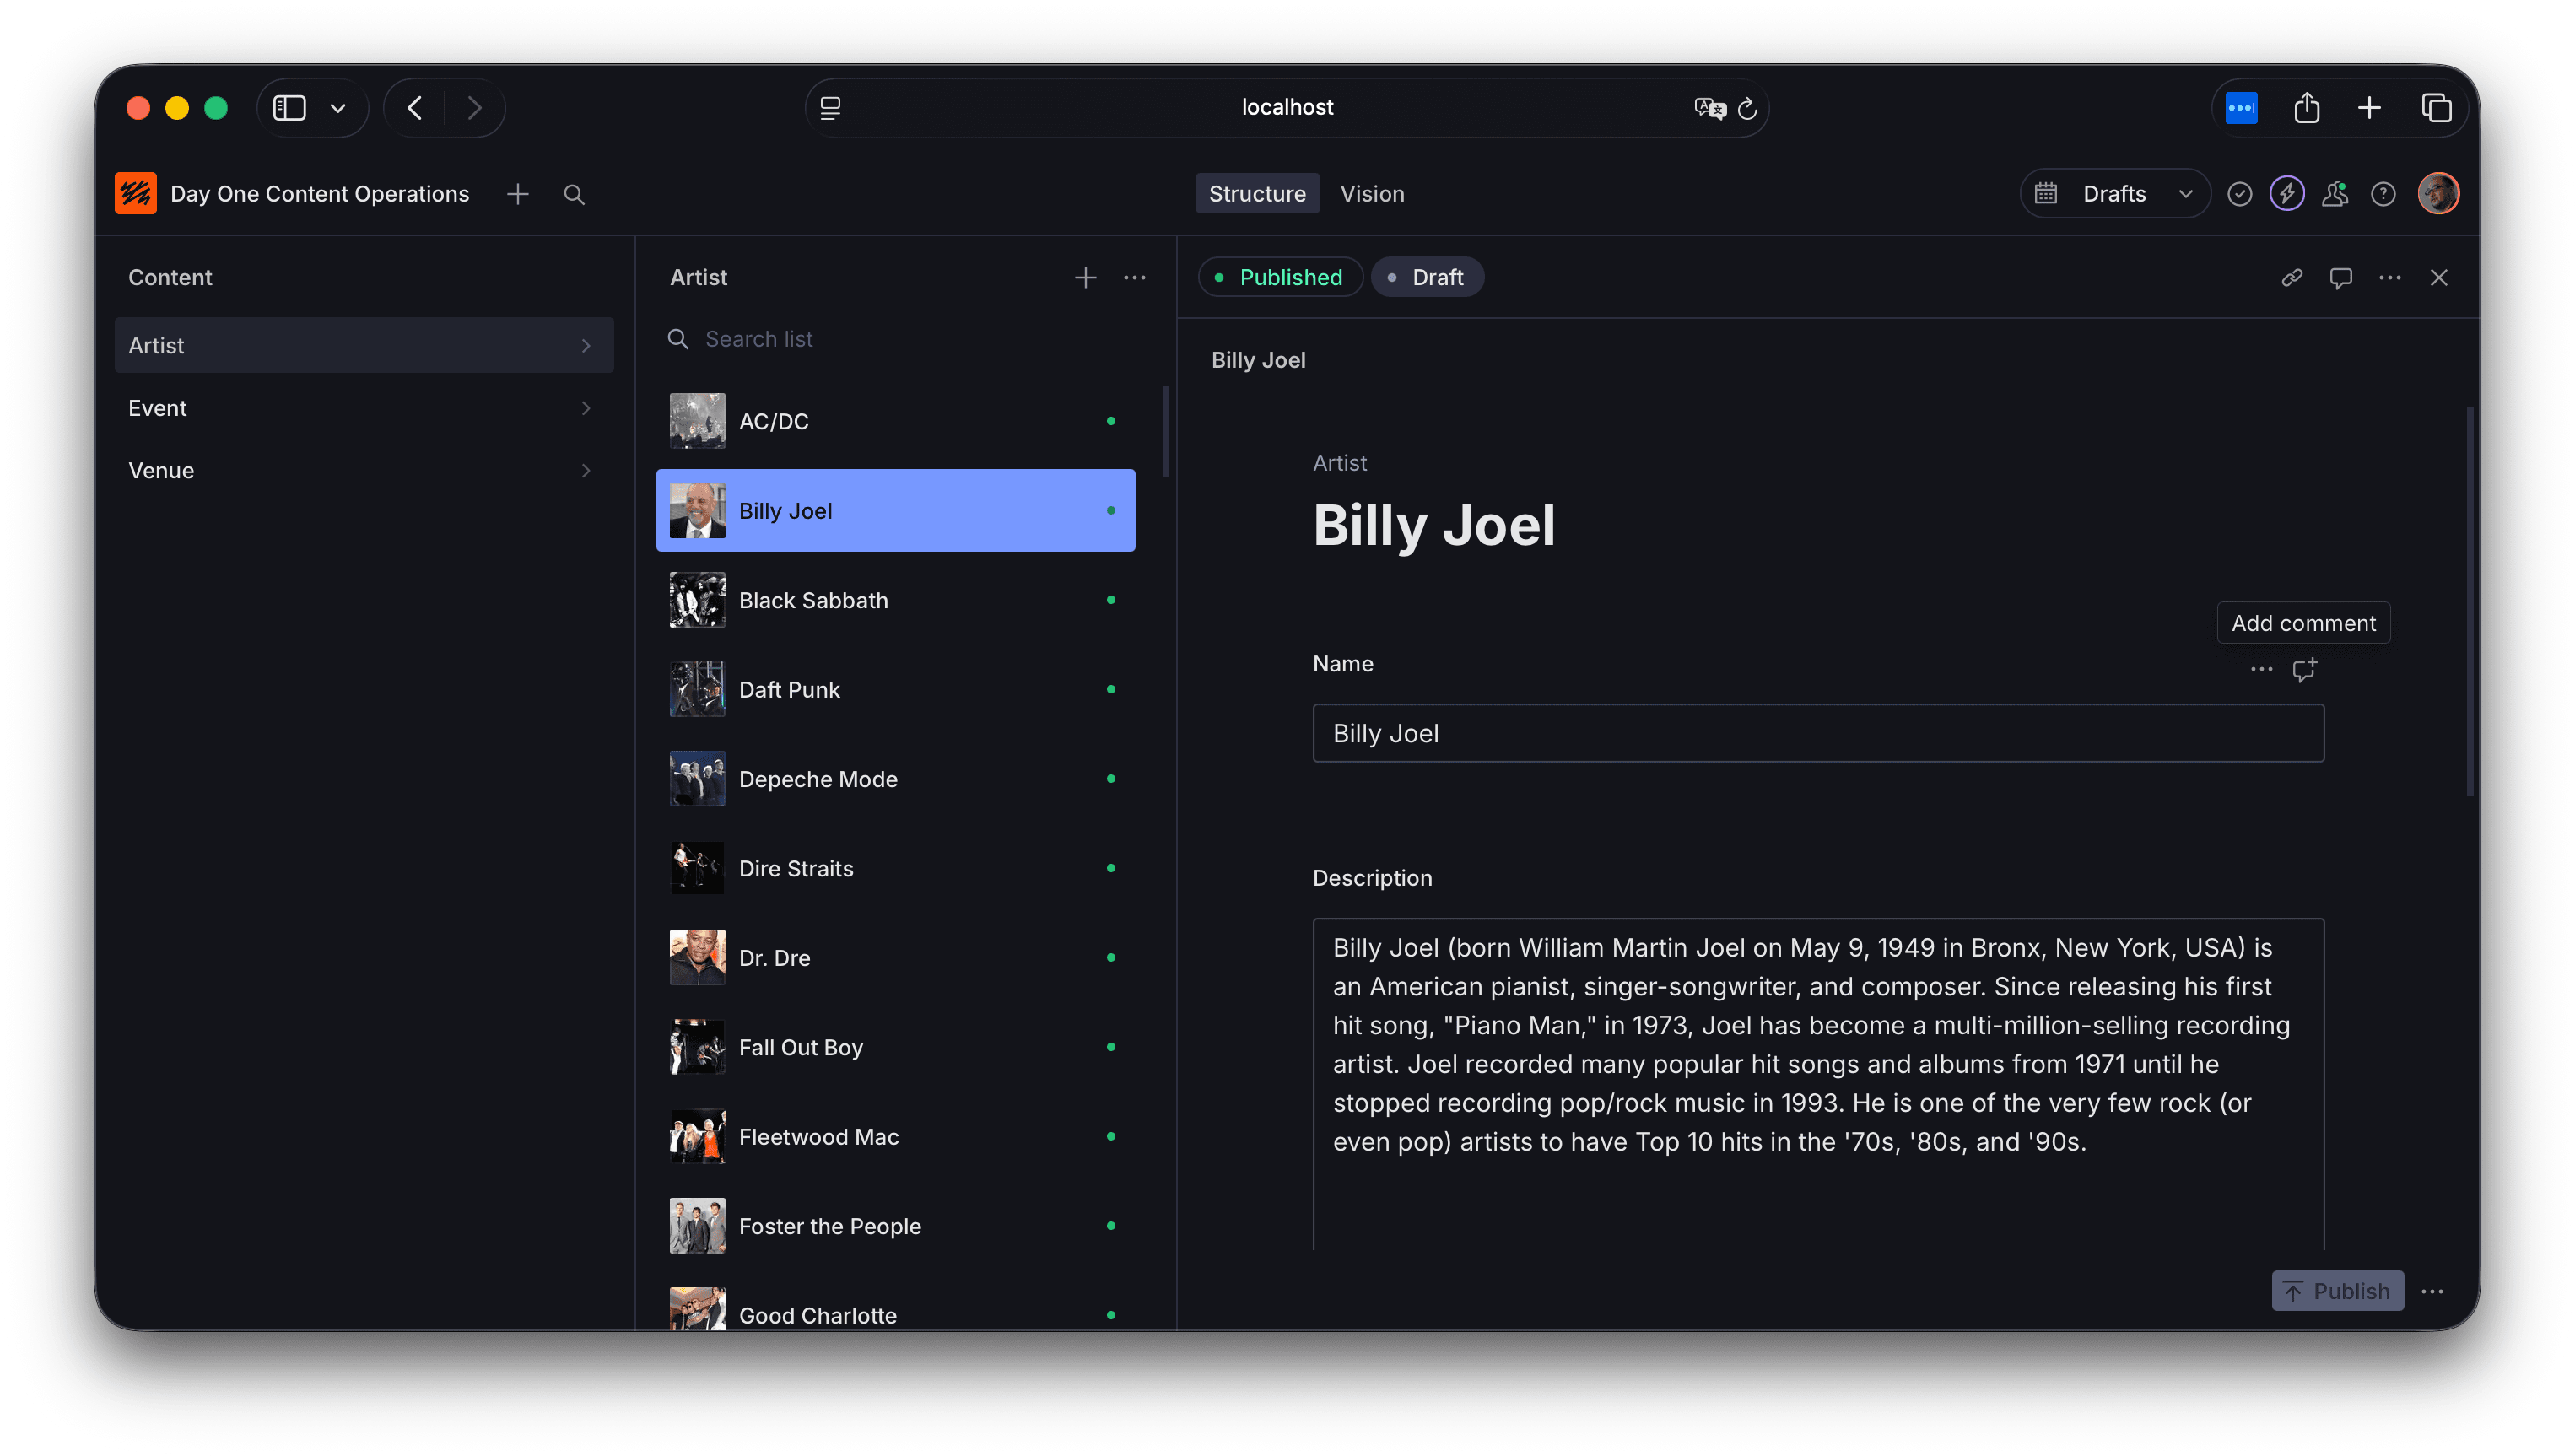
The server is now ready for content editing.
To avoid having to select the host name every time you deploy in the future, add the host name to the sanity.cli.ts file along with the studioHost line.
apps/studio/sanity.cli.ts
Now, you can automatically deploy Studio by simply executing the command.
Summary
This time, we introduced how to start Sanity Studio. For a more detailed step-by-step explanation, please refer to the official guide.
The code up to this point is available in the following repository/branch.
