When you want to provide various personalized experiences with Sitecore Personalize, you may encounter personalization scenarios beyond the standard templates. This document introduces the steps to create a custom template while checking the operation of the code created with the template.
Creating a Custom Experience
2024-11-15
Creating a New Template
Assume that a new Experience is already prepared and the Variant is blank. Click the Create variant button to display the template list as shown below.
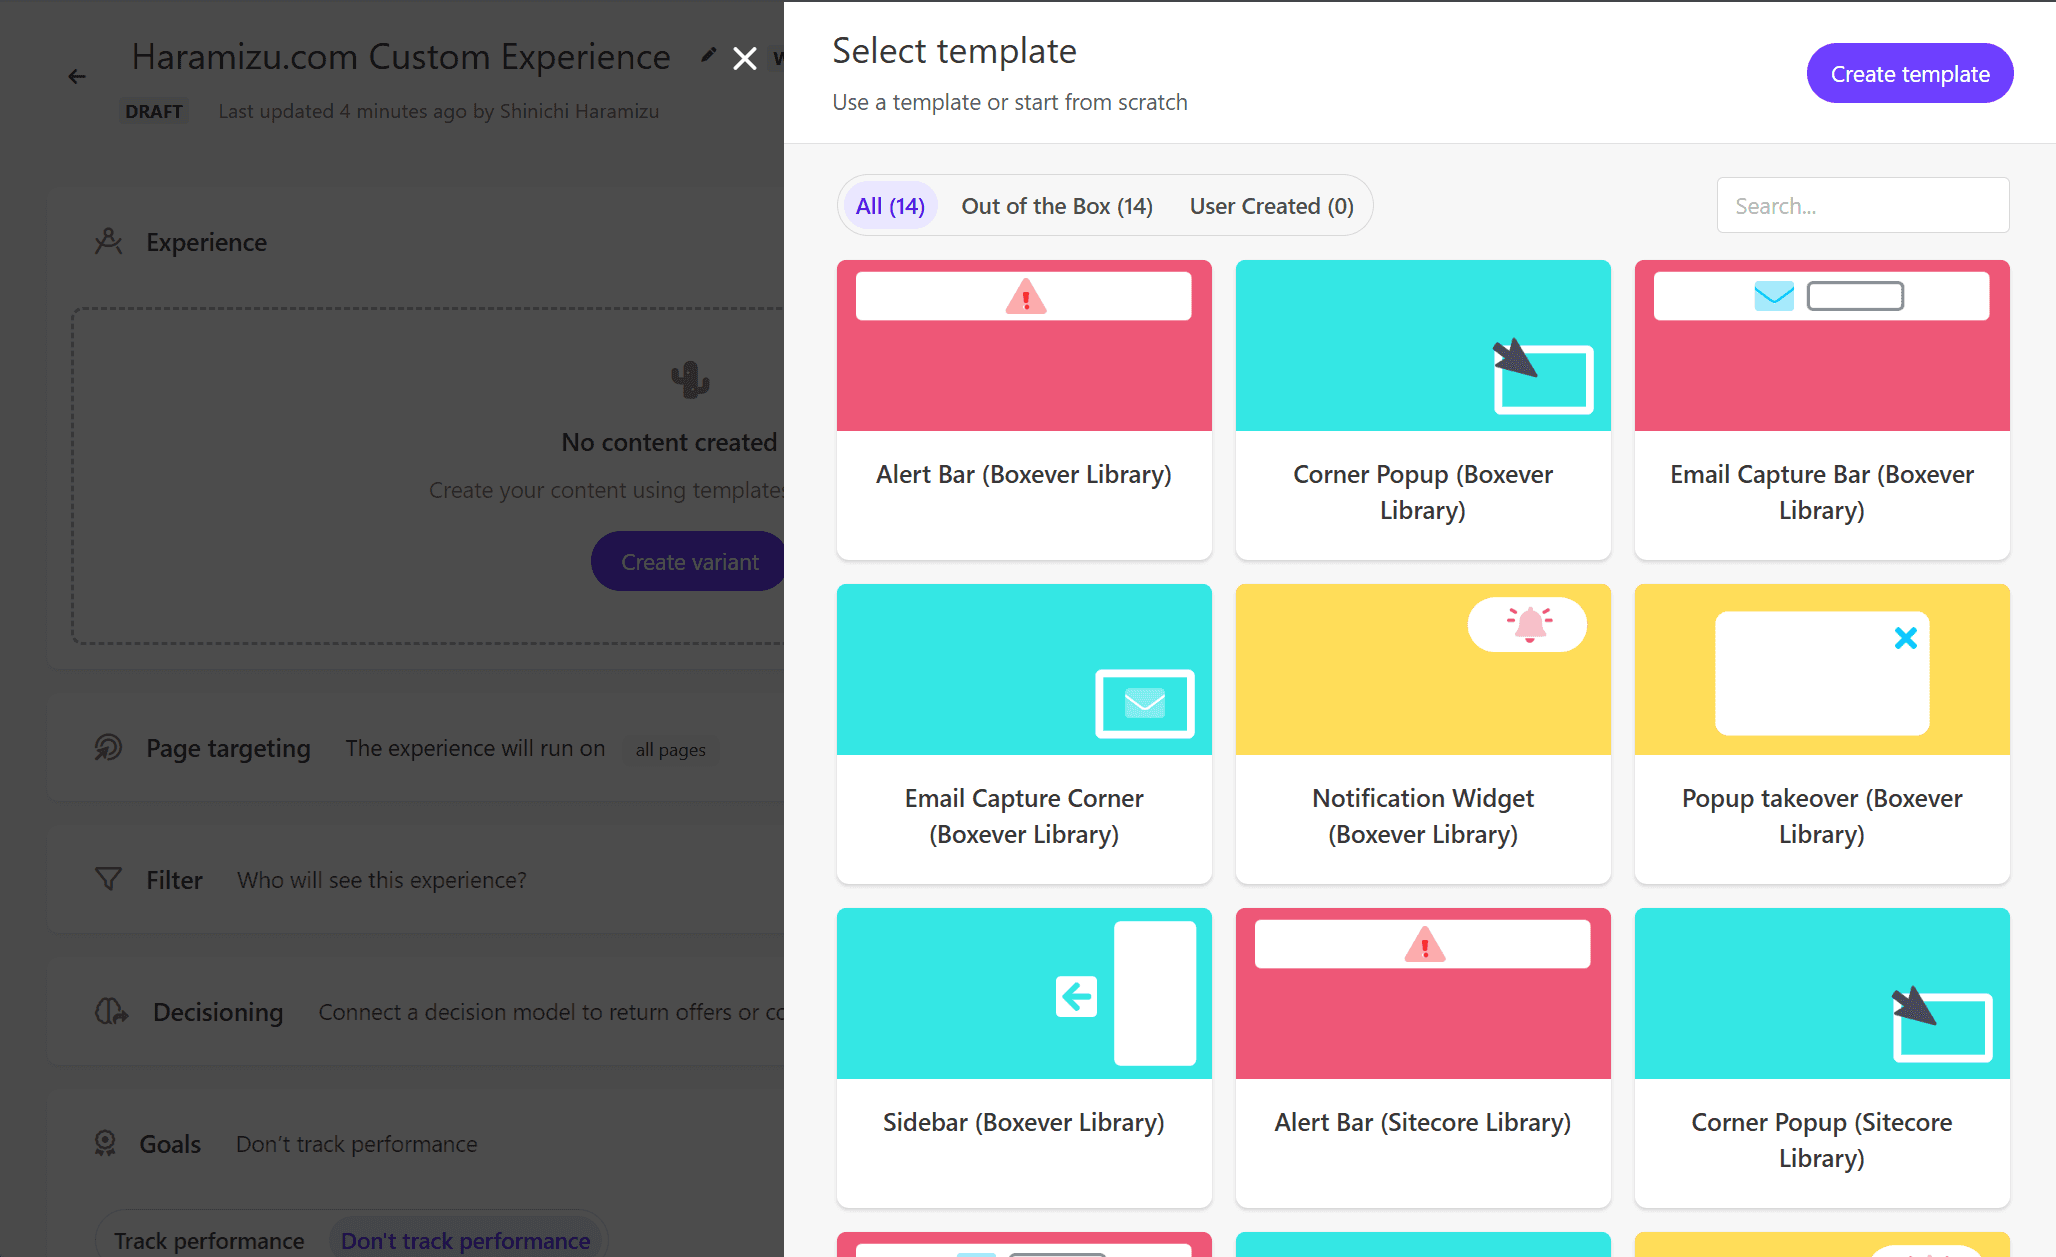
Click the Custom template button at the top right of the screen. This will create an empty Variant.
Since we will be writing code, click the Advanced Edit button displayed on the screen to refer to each code. The following code is set by default when newly created.
html
css
javascript
javascript
Replacing Content
First, we will implement a pattern to replace content. The above JavaScript code includes the replaceHTML('#myPageId') method, which is used to replace HTML.
To specify the location to replace, use the browser’s developer tools to select the target content’s code, choose Copy selector, and specify the location to change.
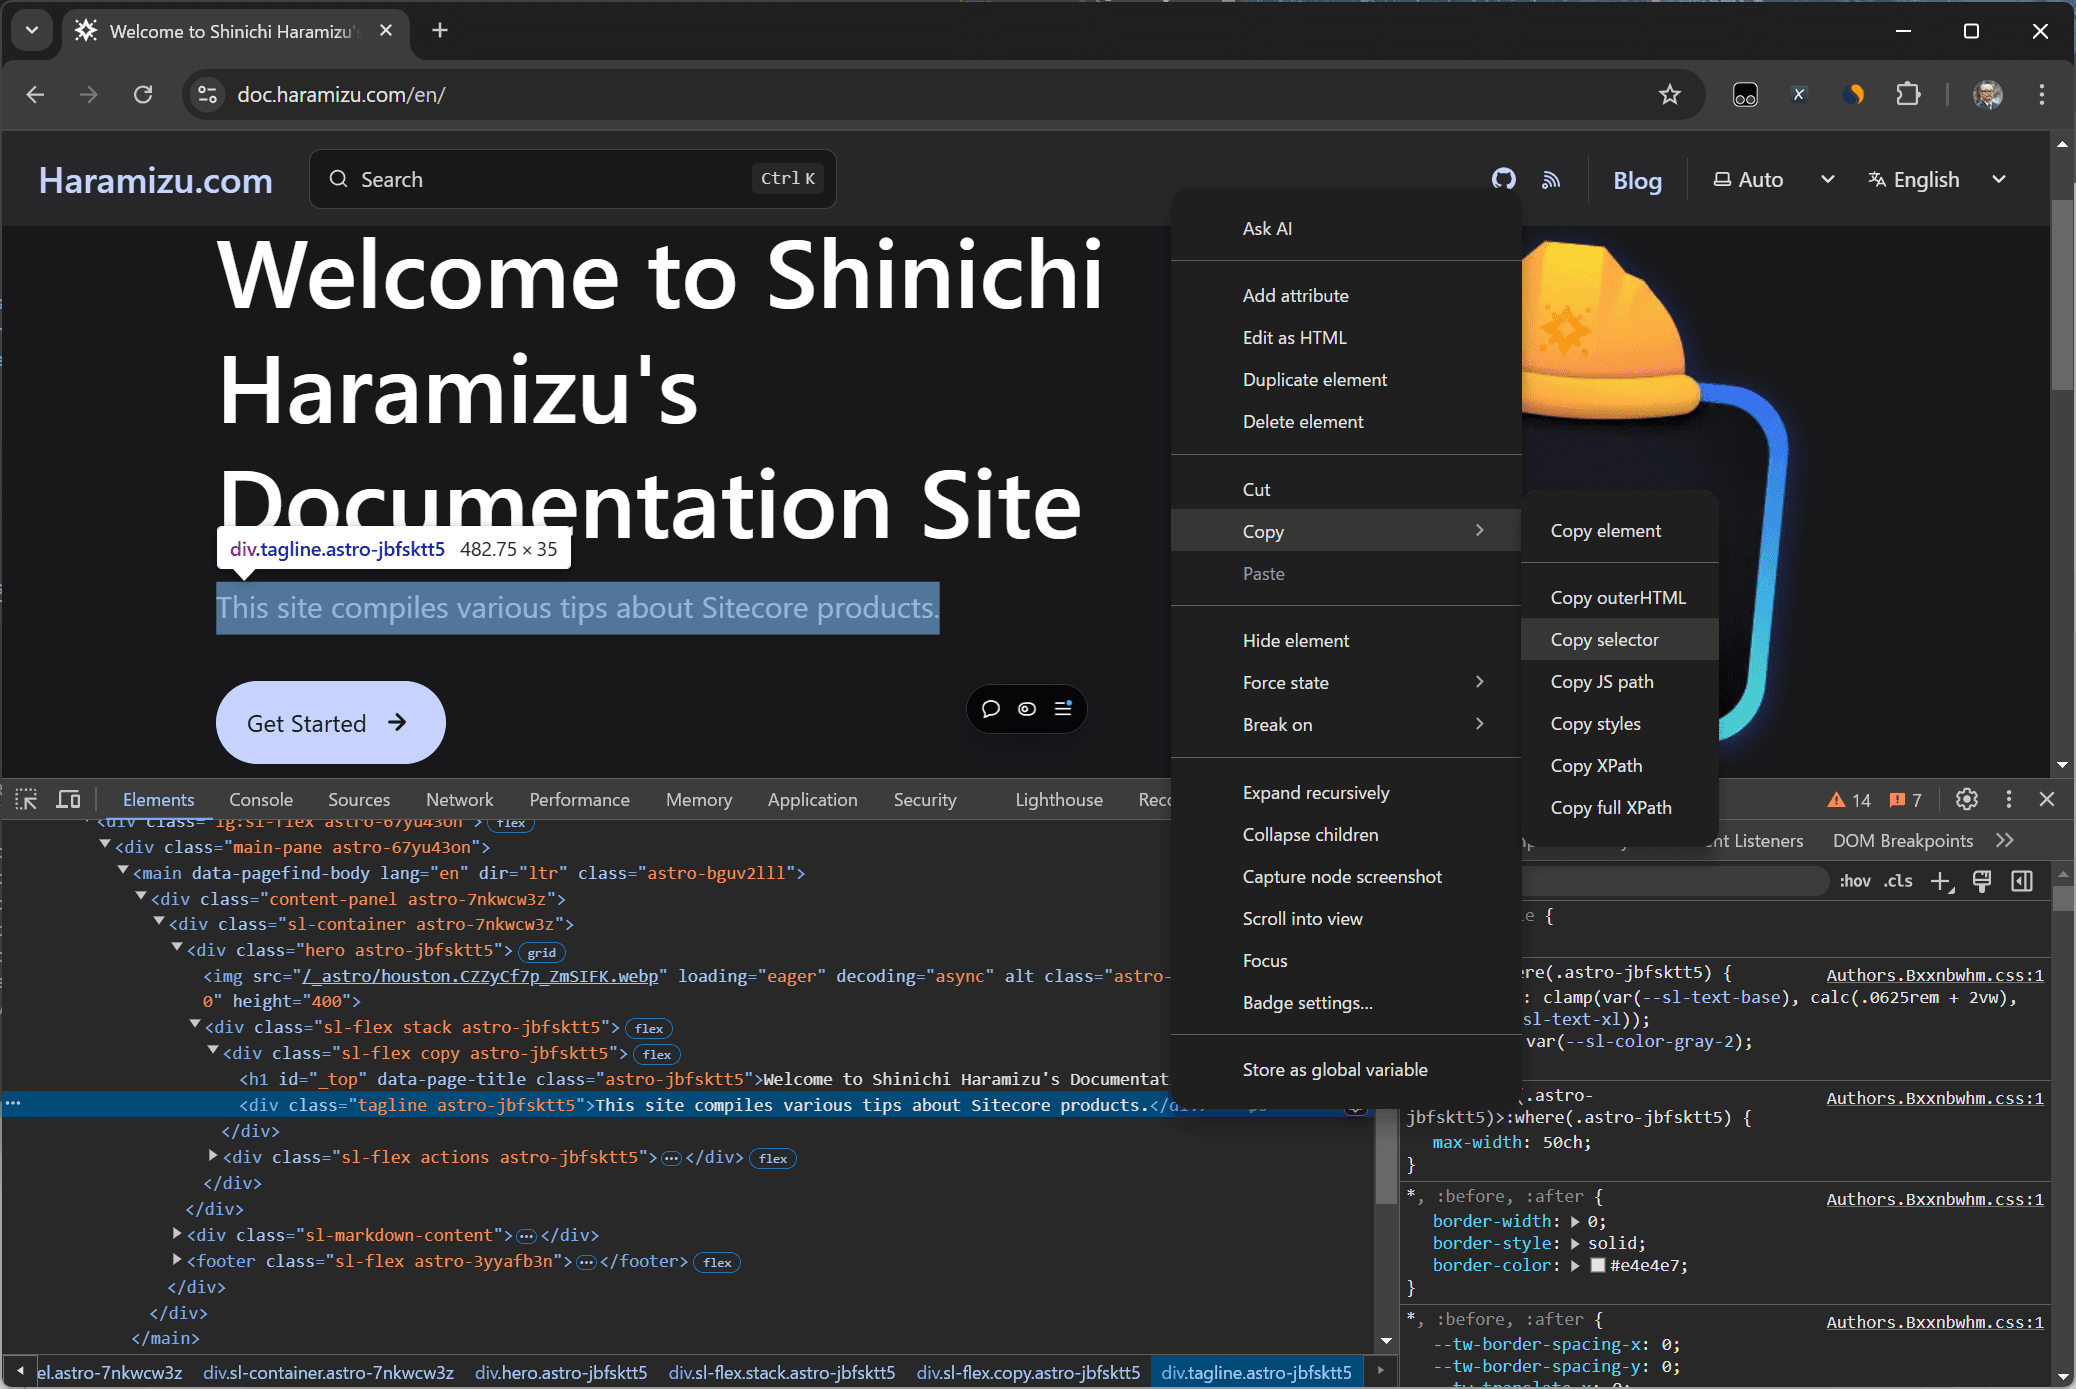
The following value will be copied to the clipboard.
text
Add the following line of code to the JavaScript.
javascript
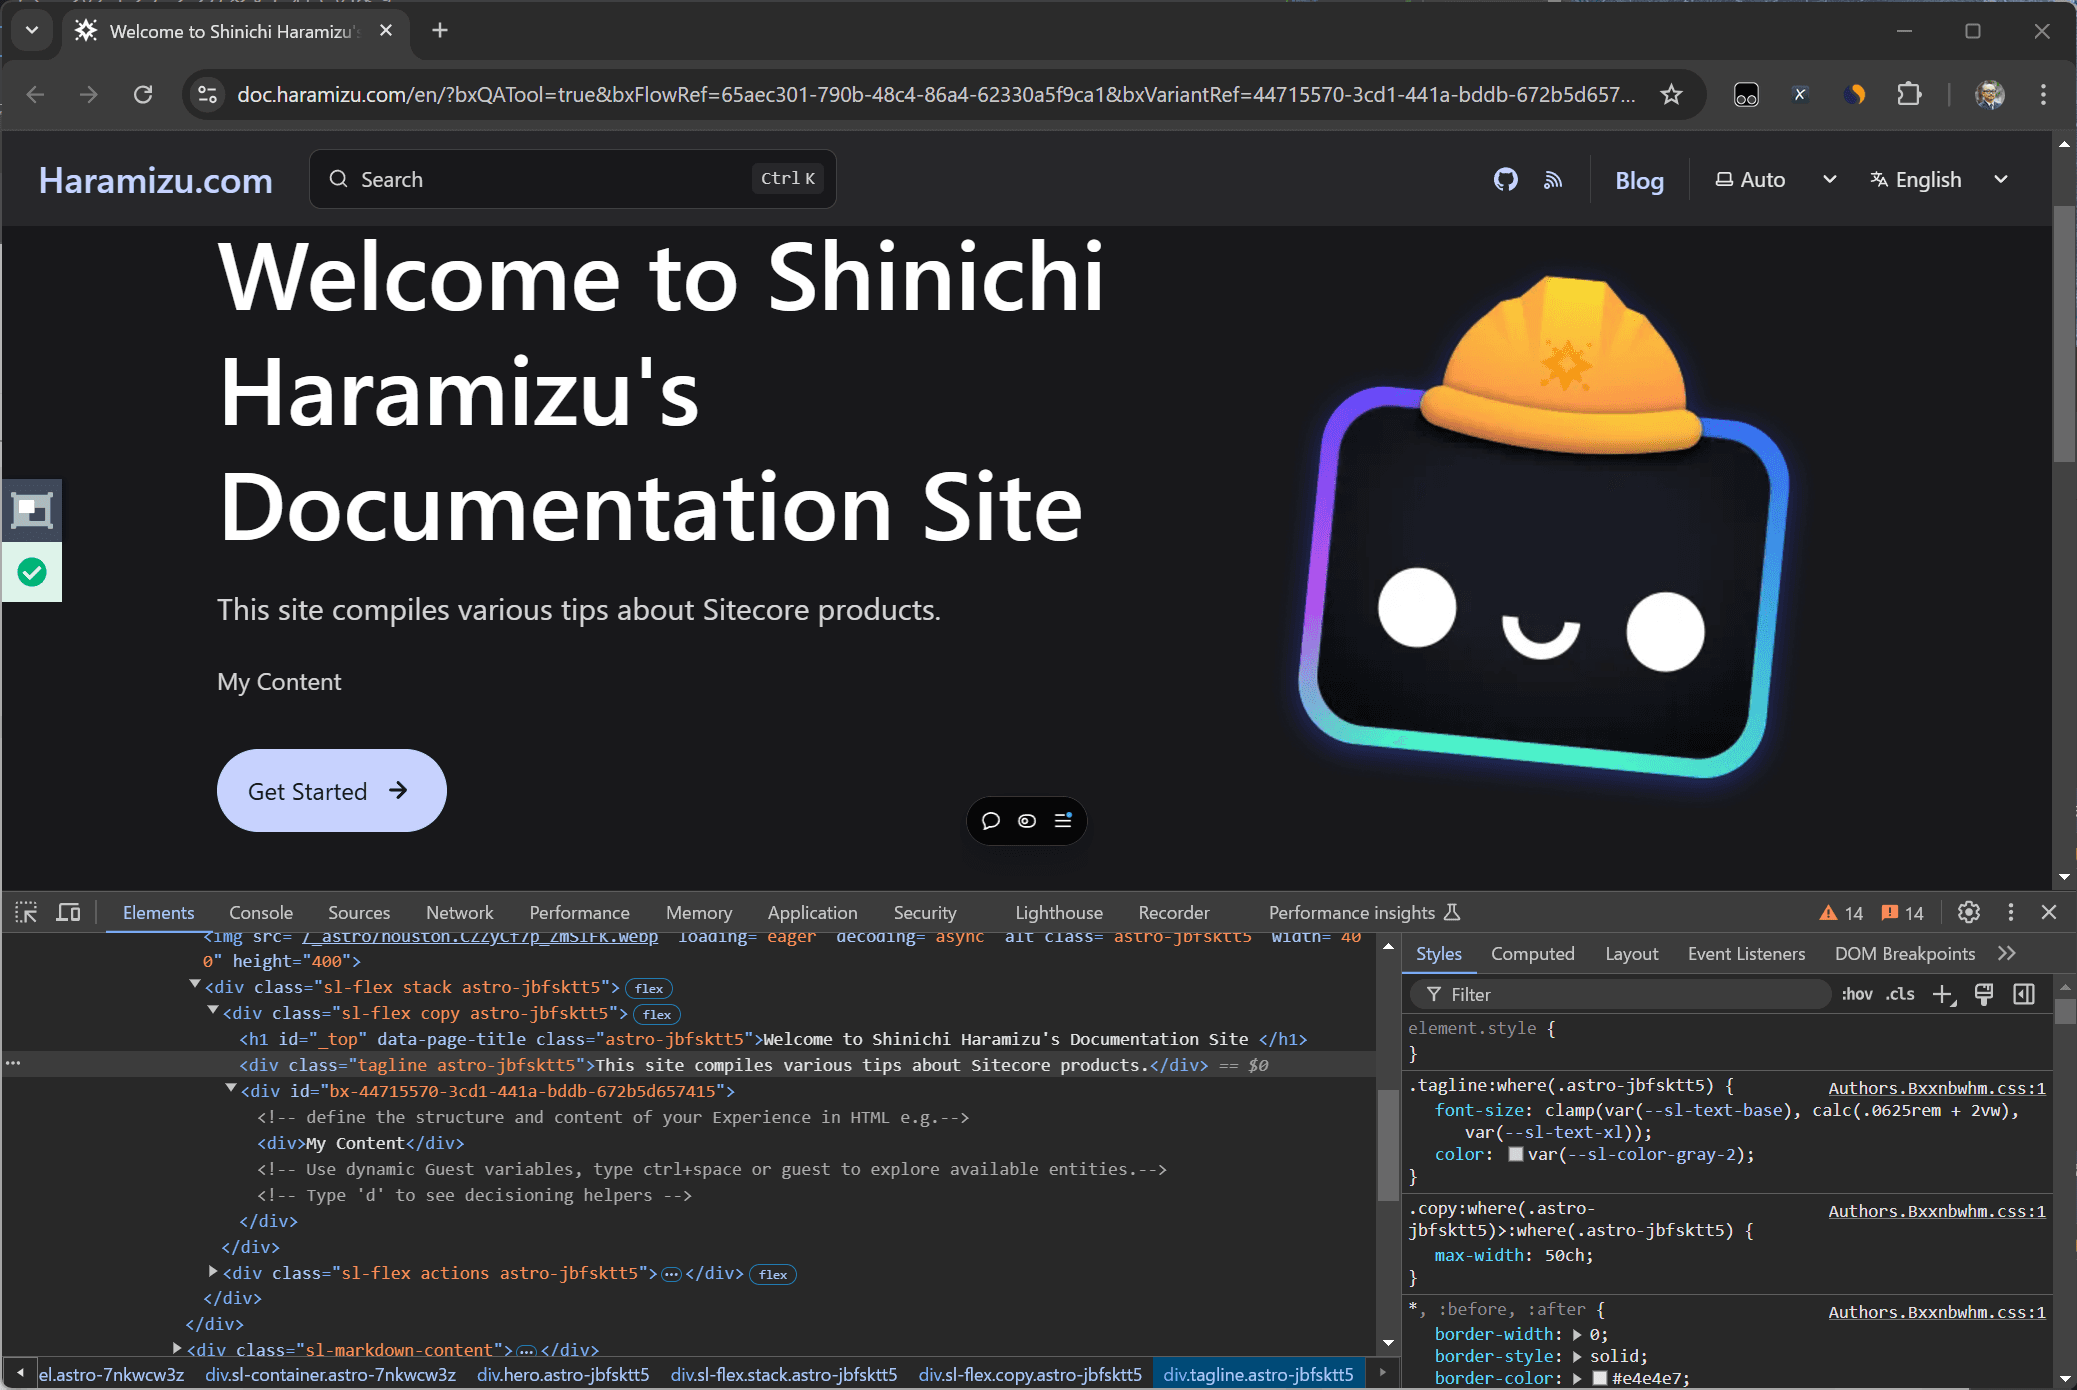
After setting this, click the Preview button to check the result of the personalization.

In the preview screen, you can confirm the following points:
- The page content has been changed.
- The Variant HTML is displayed as is when referring to the developer tools code.
- The QA Tool is working without issues, indicated by the green color.
This confirms the method to replace the specified range of HTML with code.
Adding Content
In the above sample, we simply replaced HTML. We will now verify using the insertHTMLAfter() and insertHTMLBefore() methods introduced in the initial JavaScript code.
Change the function in the above code and remove the last div since it is not an element replacement. First, change to insertHTMLAfter().
javascript
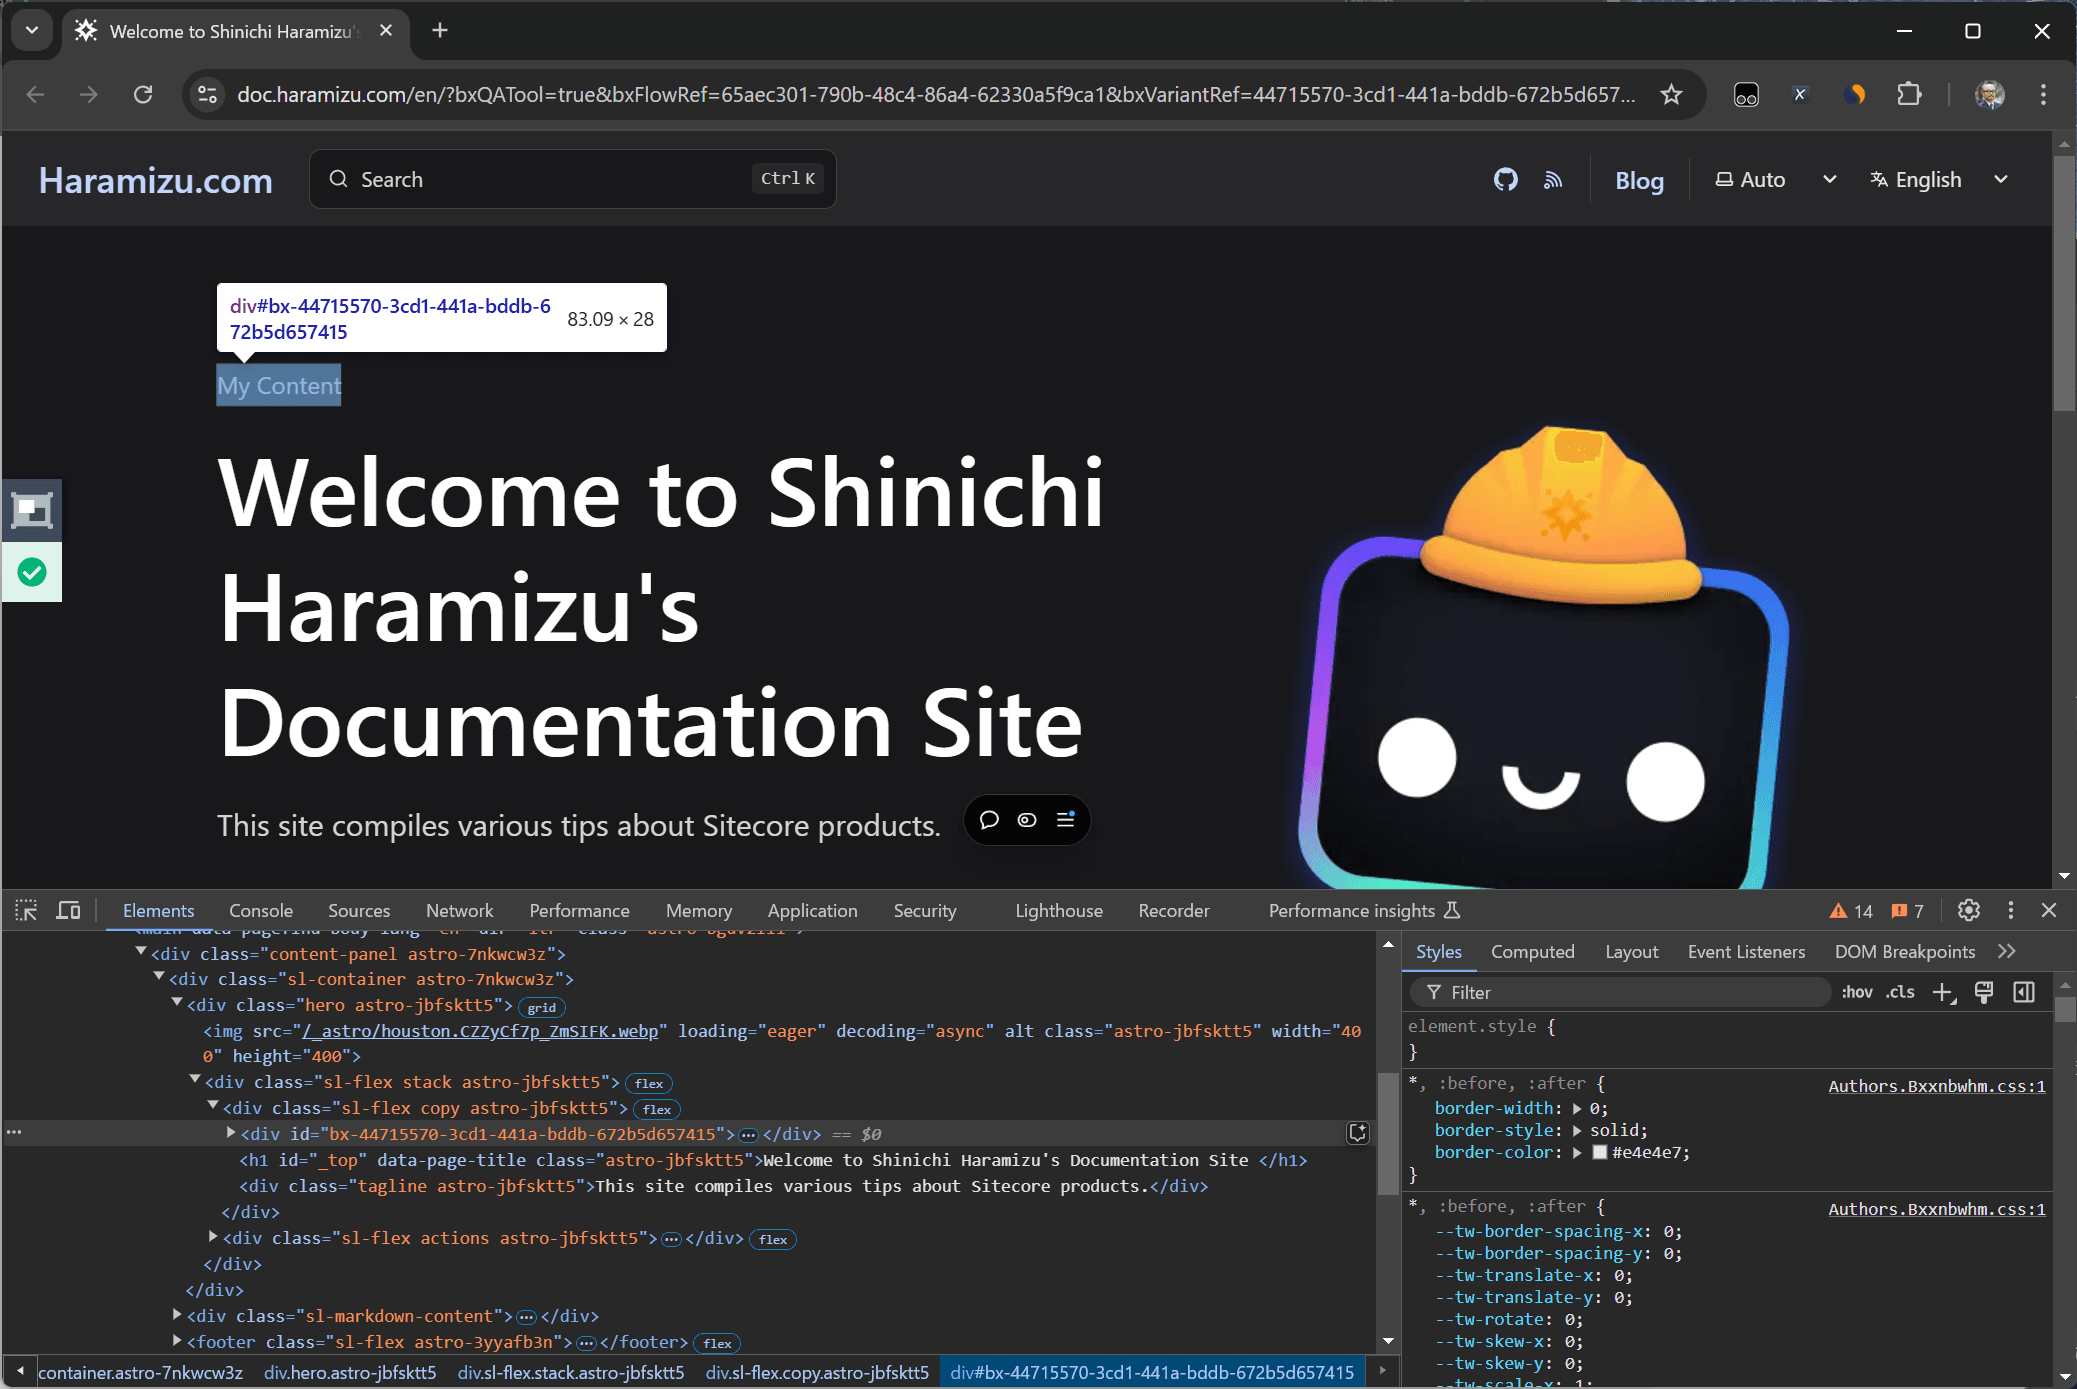
After changing the code, save it and check again in Preview to see the changes.
You can confirm that the HTML prepared in this Variant has been inserted below the target content. Next, change the method while keeping the same selector.
javascript
Convert the code, save it, and check again in Preview to see that it is displayed above the specified location.
This confirms that it is possible to insert the HTML specified in the Variant at the desired position using these methods.
Controlling HTML
At this stage, the code inserted into the HTML is simply replaced or inserted by JavaScript. The standard components provided allow you to change the strings inside by specifying the component. To make it more user-friendly, we will add additional work to the HTML.
Specifying as Text
First, let’s review the initial code, which is simply a div tag with a string.
html
We want to make this My Content part changeable through a dialog. The description method is fixed, so change it as follows.
tsx
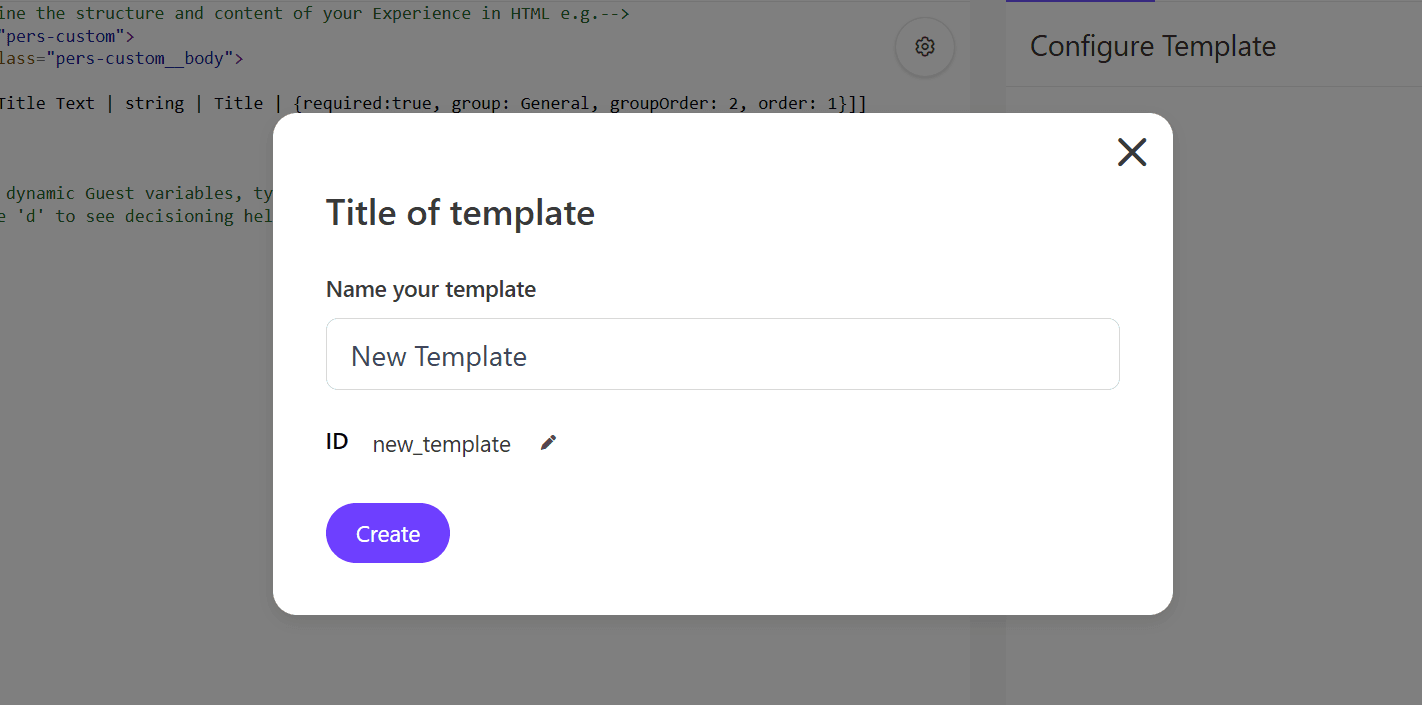
When you save this change, the screen will update, and Title will be added under Configure Template.
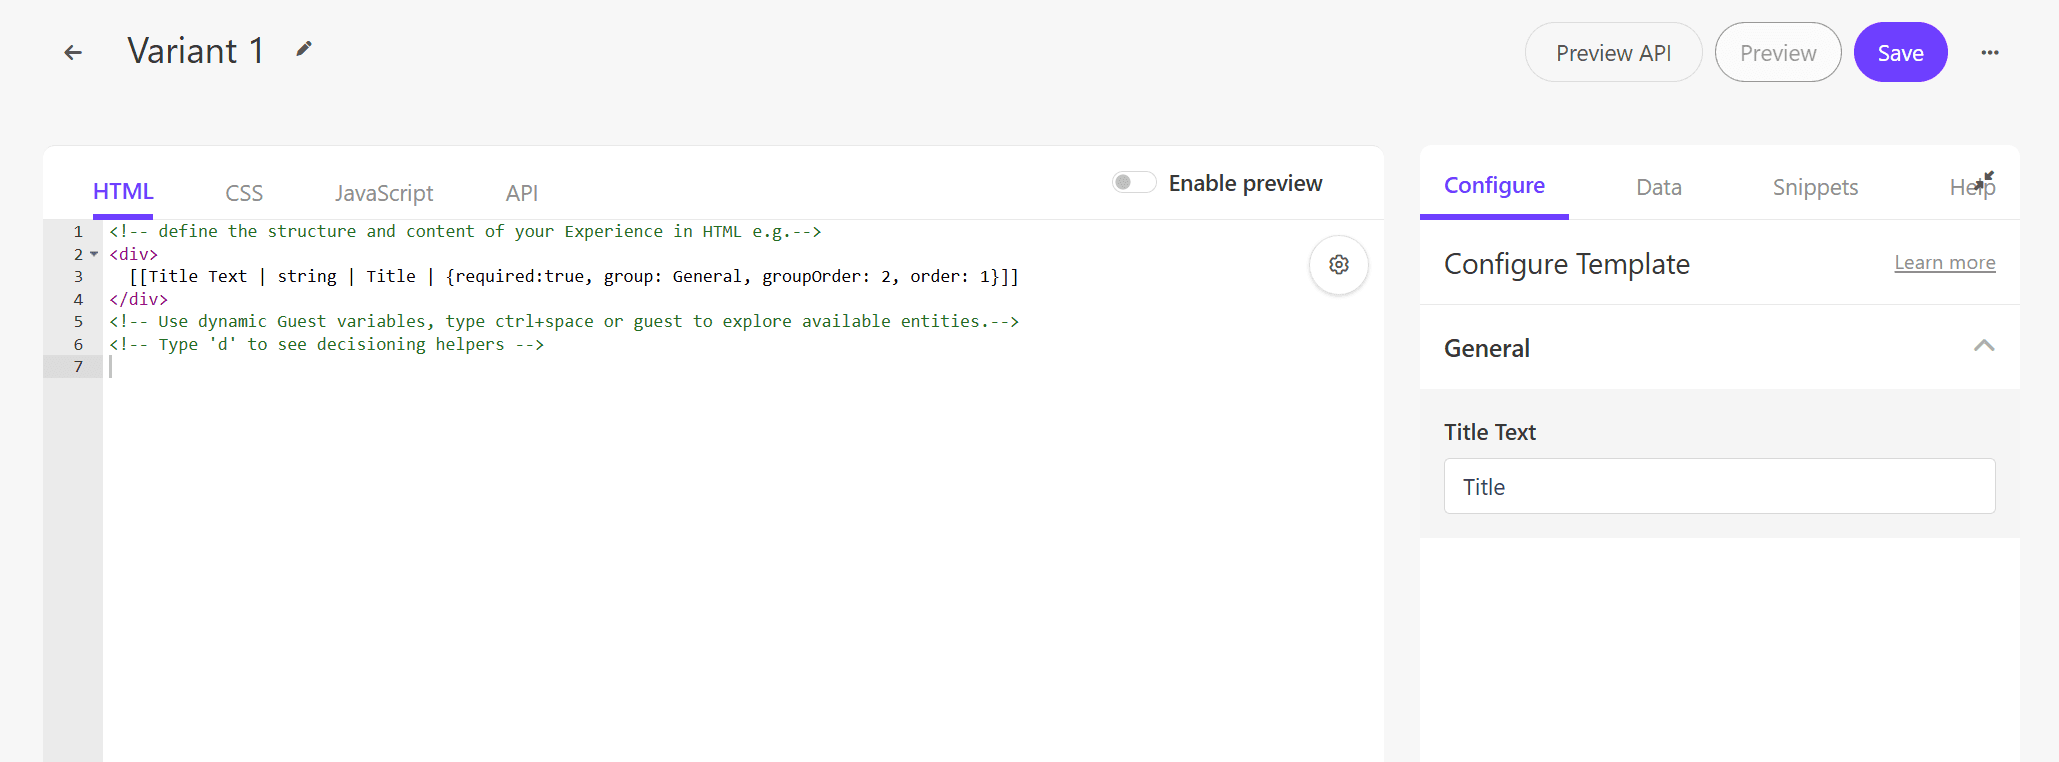
Enter the text “Sitecore Personalize” in the added Title Text textbox and execute Preview.

The specified text is now displayed. This allows you to specify parts of the text to change, similar to the already implemented templates.
Specifying Styles
Next, we will control the CSS. The standard templates always execute the following code in the JavaScript.
javascript
To check what variant.assets.css retrieves, add the following line and execute.
javascript
The console output shows the following line.

This code displays the data defined in the CSS.
css
This part of the system works by compiling the CSS of the variable variant and applying it to a specific style tag.It then retrieves the style tag with the ID specified by document.getElementById('style-' + variant.ref) and applies the compiled CSS to the retrieved style tag.
This time the HTML displaying the specified title has been rewritten as follows.
html
Next, rewrite the stylesheet as follows.
css
The role of ref in the above code is to assign a unique identifier to specific elements or components, allowing them to be distinguished from others. This is used to apply different styles or dynamically manipulate them with JavaScript for each variation or instance.
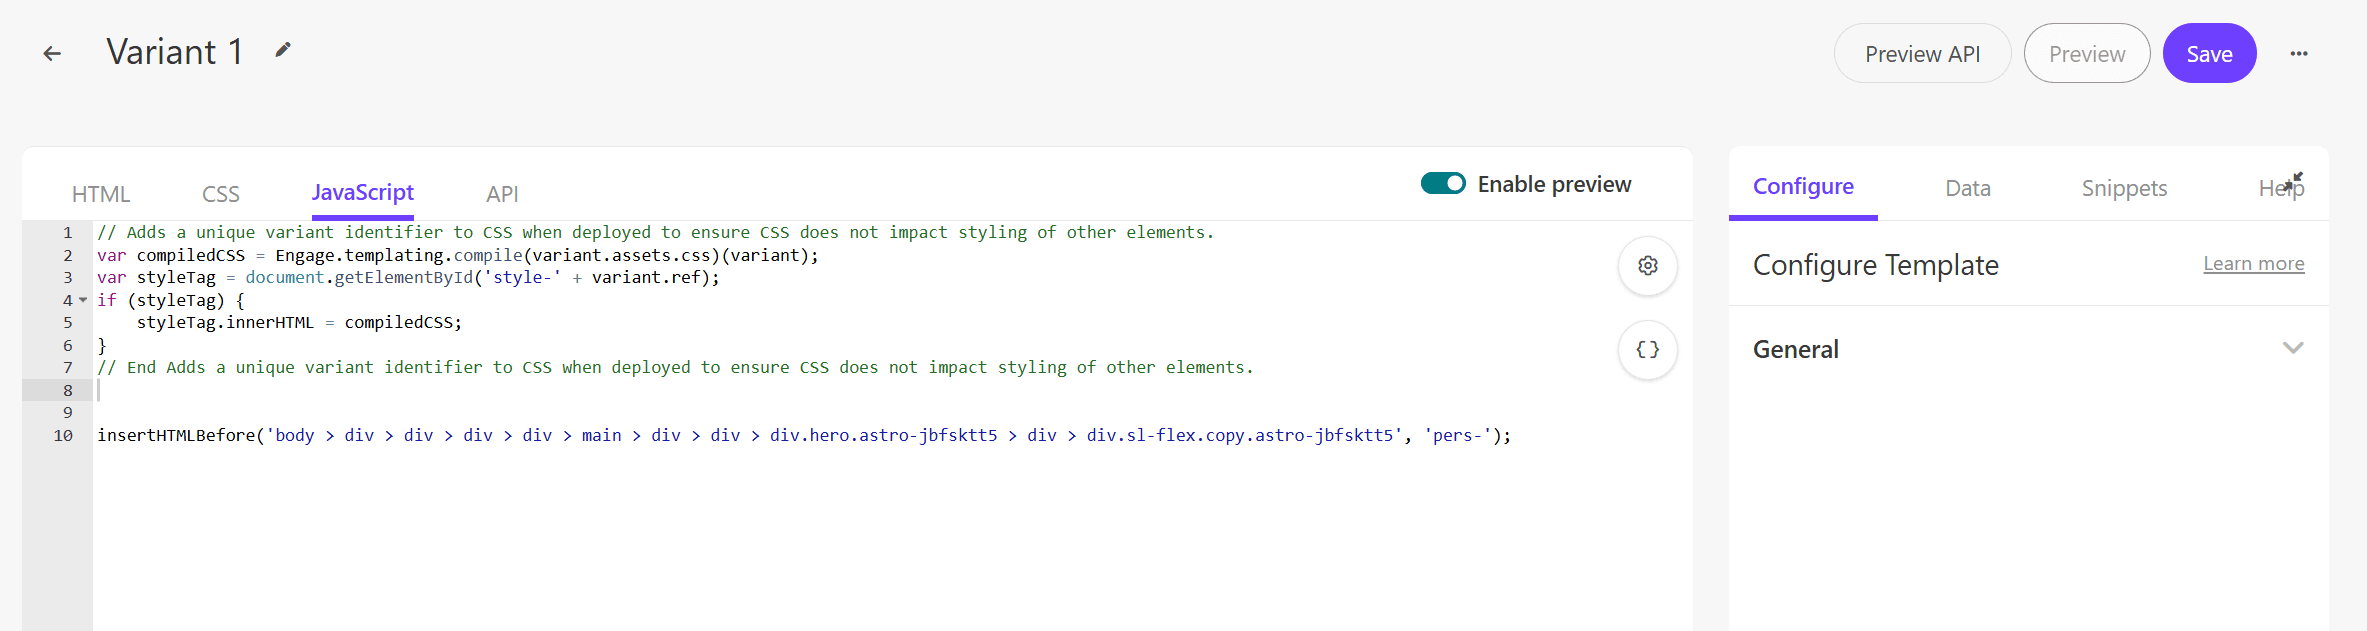
Finally, add the second variable pers- to the insertHTMLBefore call in JavaScript.
javascript
Now the setup is complete. When you check in Preview, you can see that the stylesheet is applied.
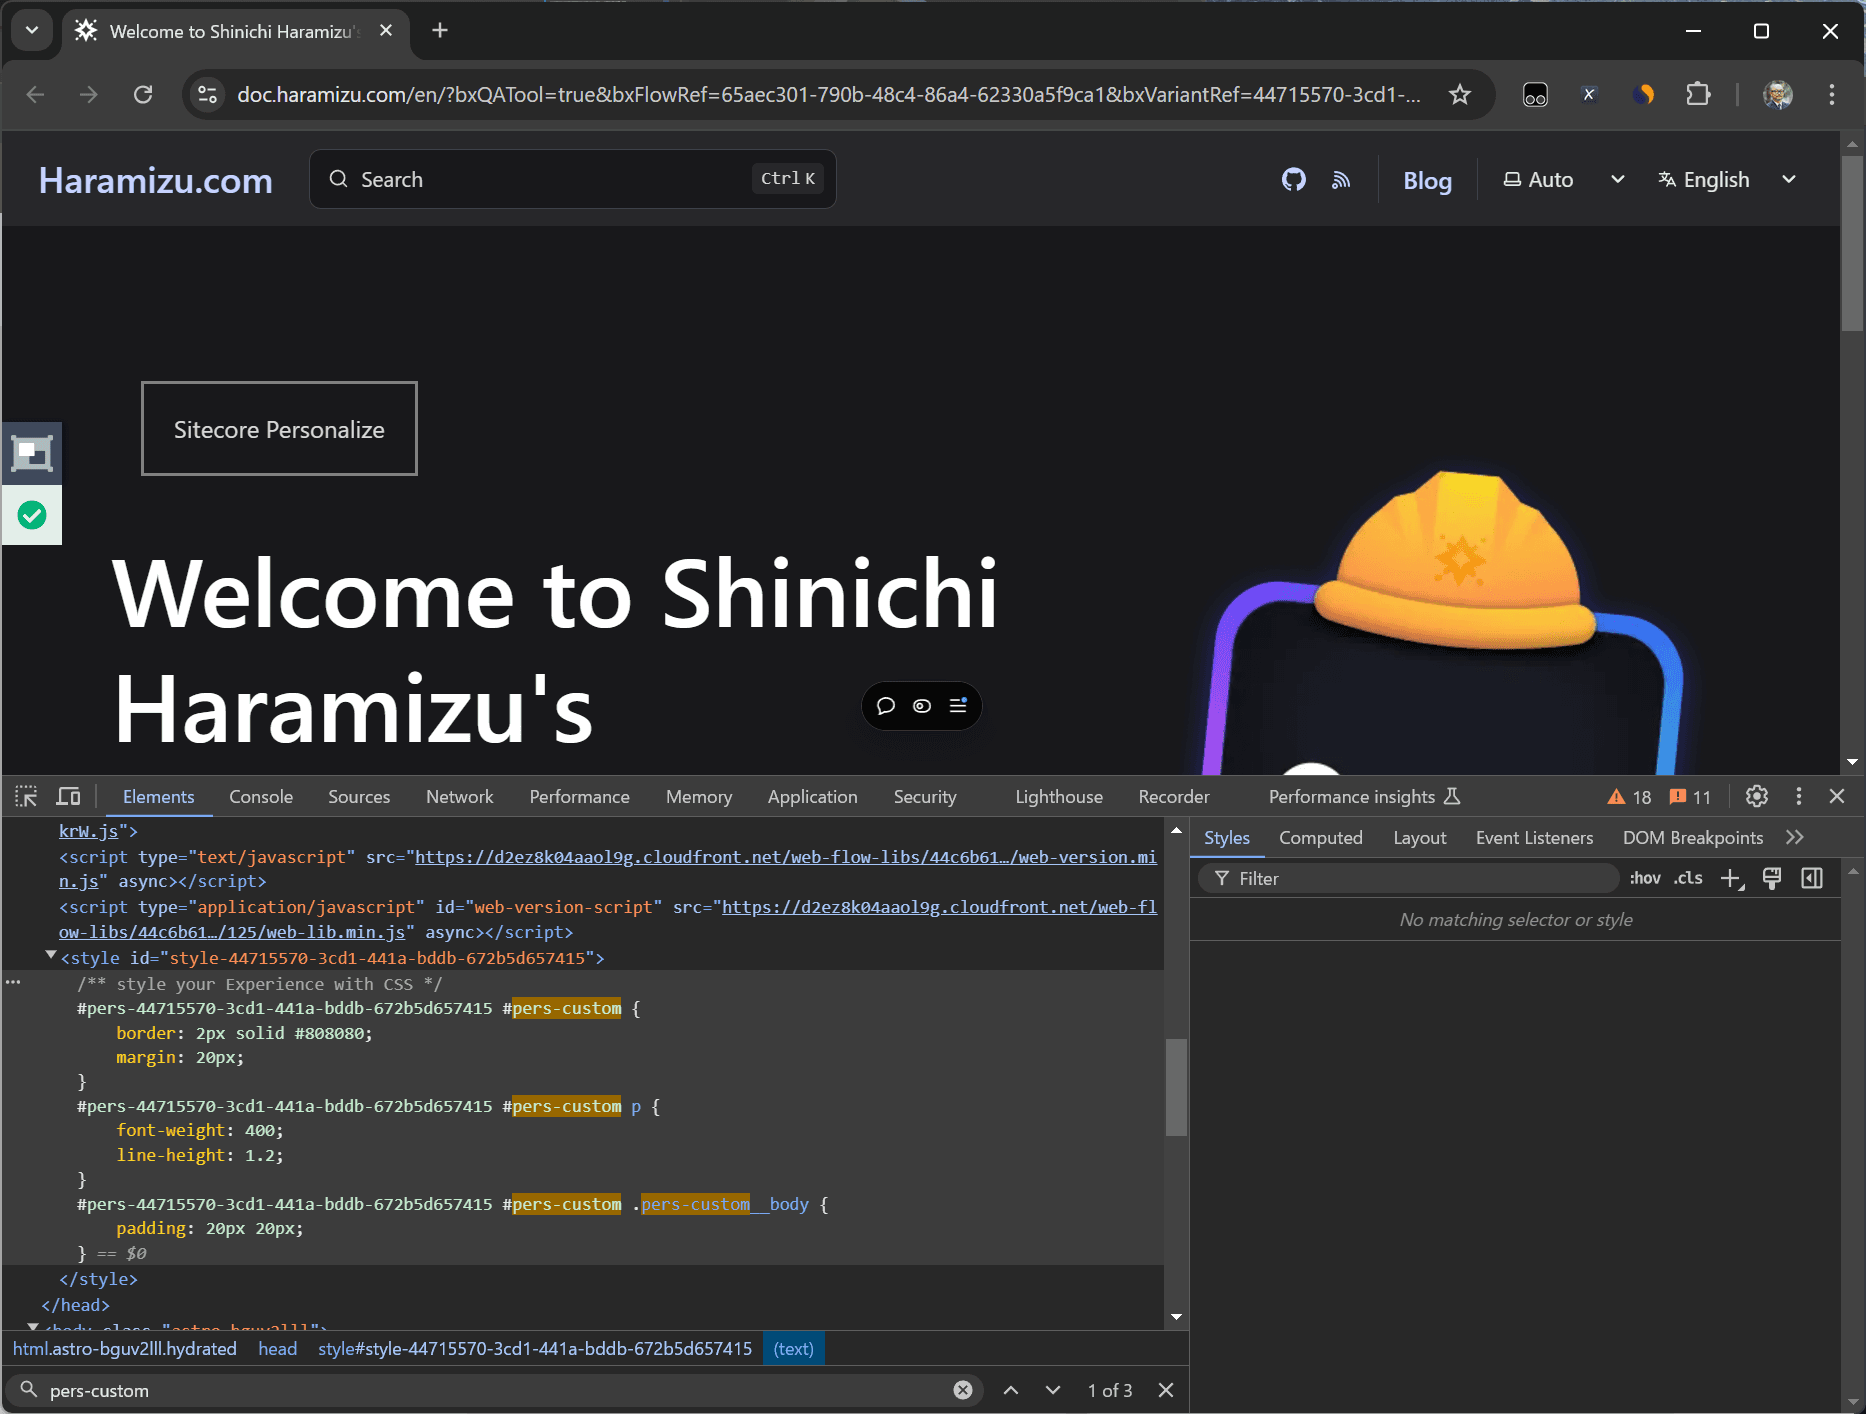
When you check the source code through the browser’s developer tools, the stylesheet is also inserted.
Enabling Preview
After completing the three settings, enable the preview of the created Variant. Click the Enable preview button displayed in Advanced Edit mode.
You can now preview the created Variant.
Saving as a Template
To save the created Variant as a template, click the button at the top right in Advanced Edit mode to display the Save as Template button.

Click this to specify the template name and save it.
If you plan to reuse it, you can save the custom Variant as a template for effective use.