This document introduces how to test JavaScript code implementation using a browser extension on websites that have not yet embedded Sitecore Personalize tags. By using this method, it becomes easier to verify personalization on development sites and non-production environments.
Using Tampermonkey
2024-11-15
About Tampermonkey
Tampermonkey is a browser extension for managing and executing user scripts. This allows users to customize or automate the behavior of web pages. Below are the main features of Tampermonkey.
Supported Browsers
Tampermonkey is available on the following major browsers:
- Google Chrome
- Microsoft Edge
- Firefox
- Safari
- Opera
Installation Method
Installing Tampermonkey is very simple. Download and install the version corresponding to your browser from the following link.
In this document, we will proceed with installing and verifying the extension on Google Chrome or Microsoft Edge.
Enabling Developer Mode
Simply installing the extension does not allow you to use Tampermonkey’s features. To use it as an extension, you need to enable the browser’s developer mode. If a warning is displayed after installing the extension, follow the necessary steps.
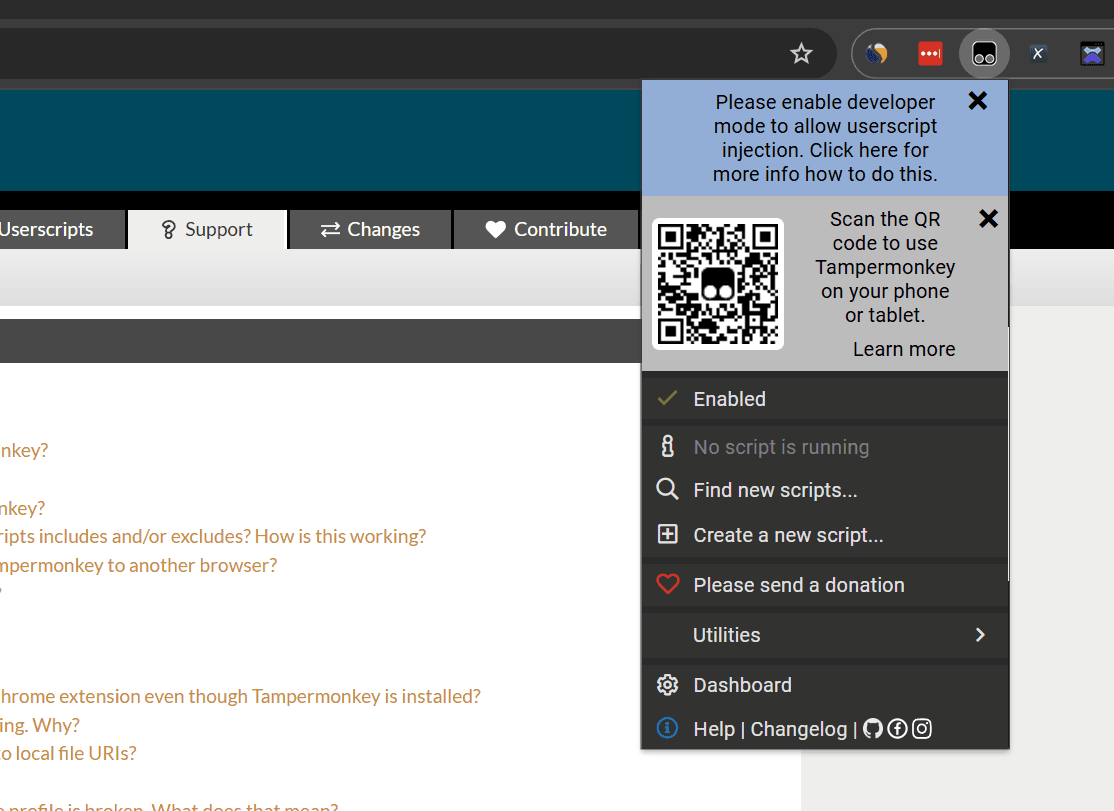
This procedure is introduced on the following pages.
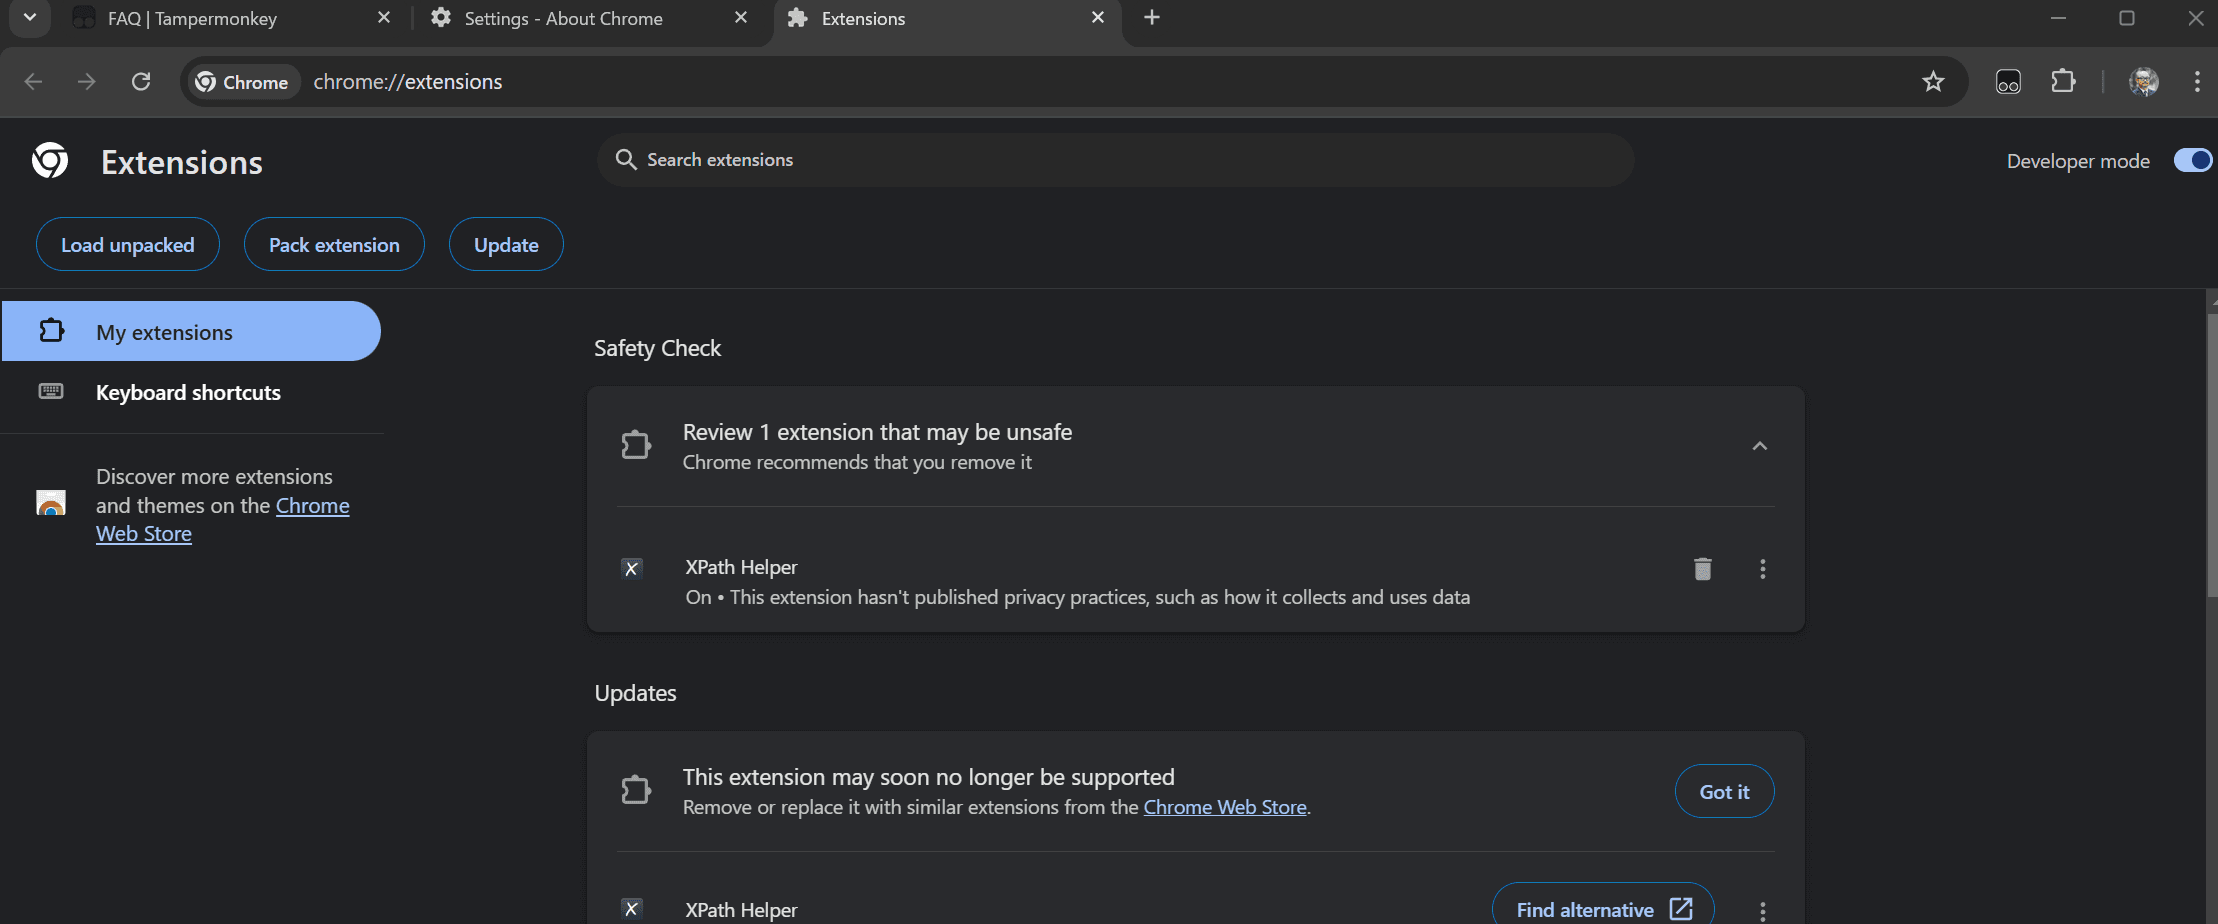
Let’s check the steps and enable developer mode. First, click Extensions - Manage Extensions from the menu to refer to the extension settings.
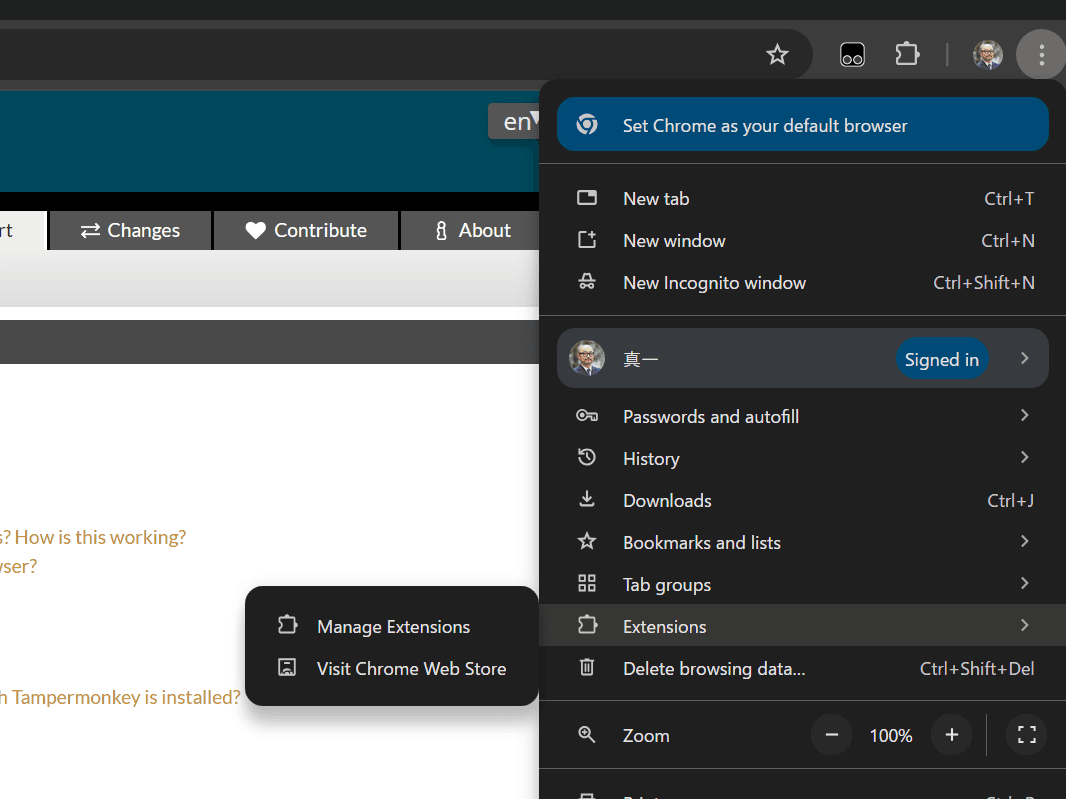
When you open the screen, a toggle for developer mode is displayed. By checking this, developer mode will be enabled.
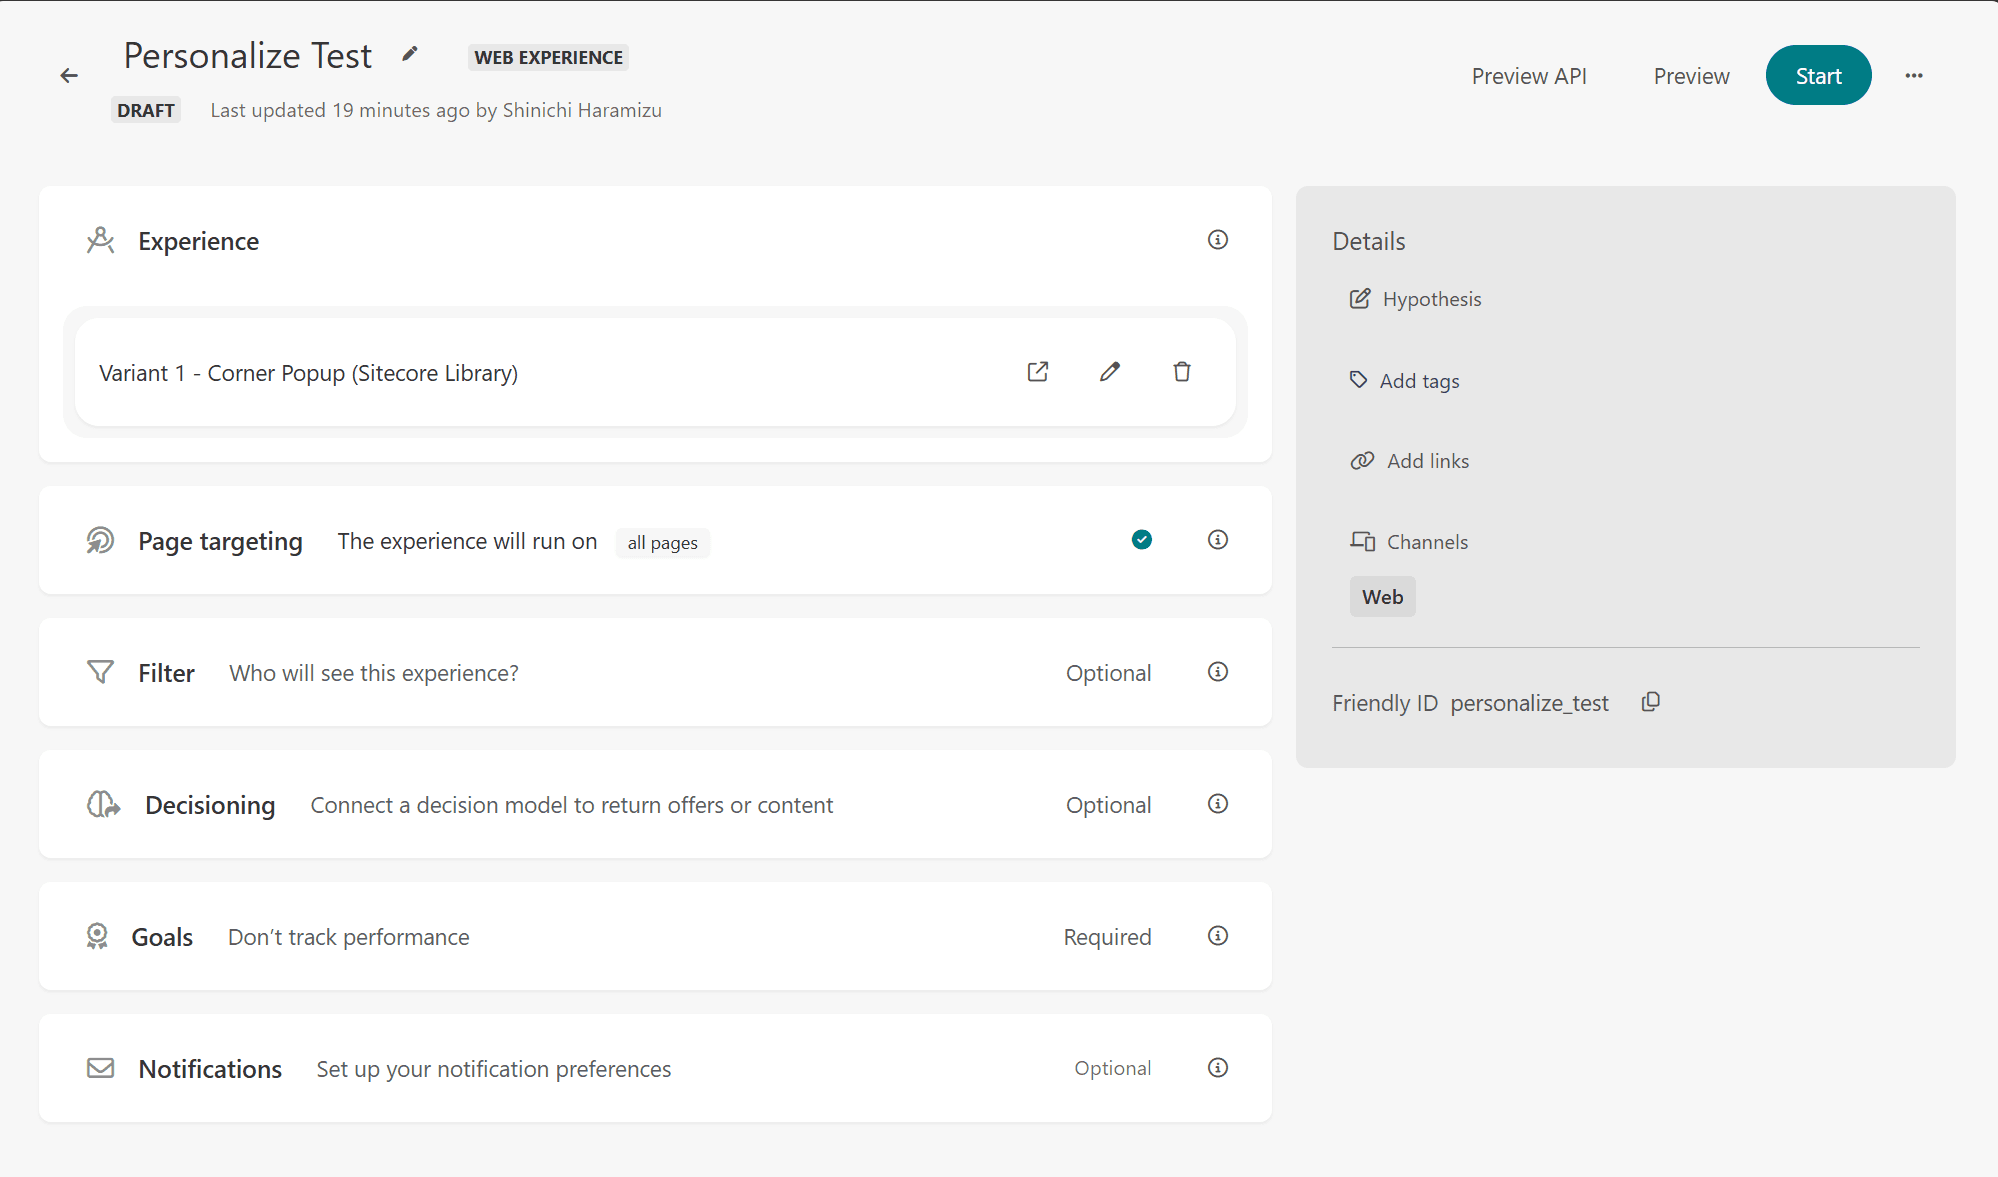
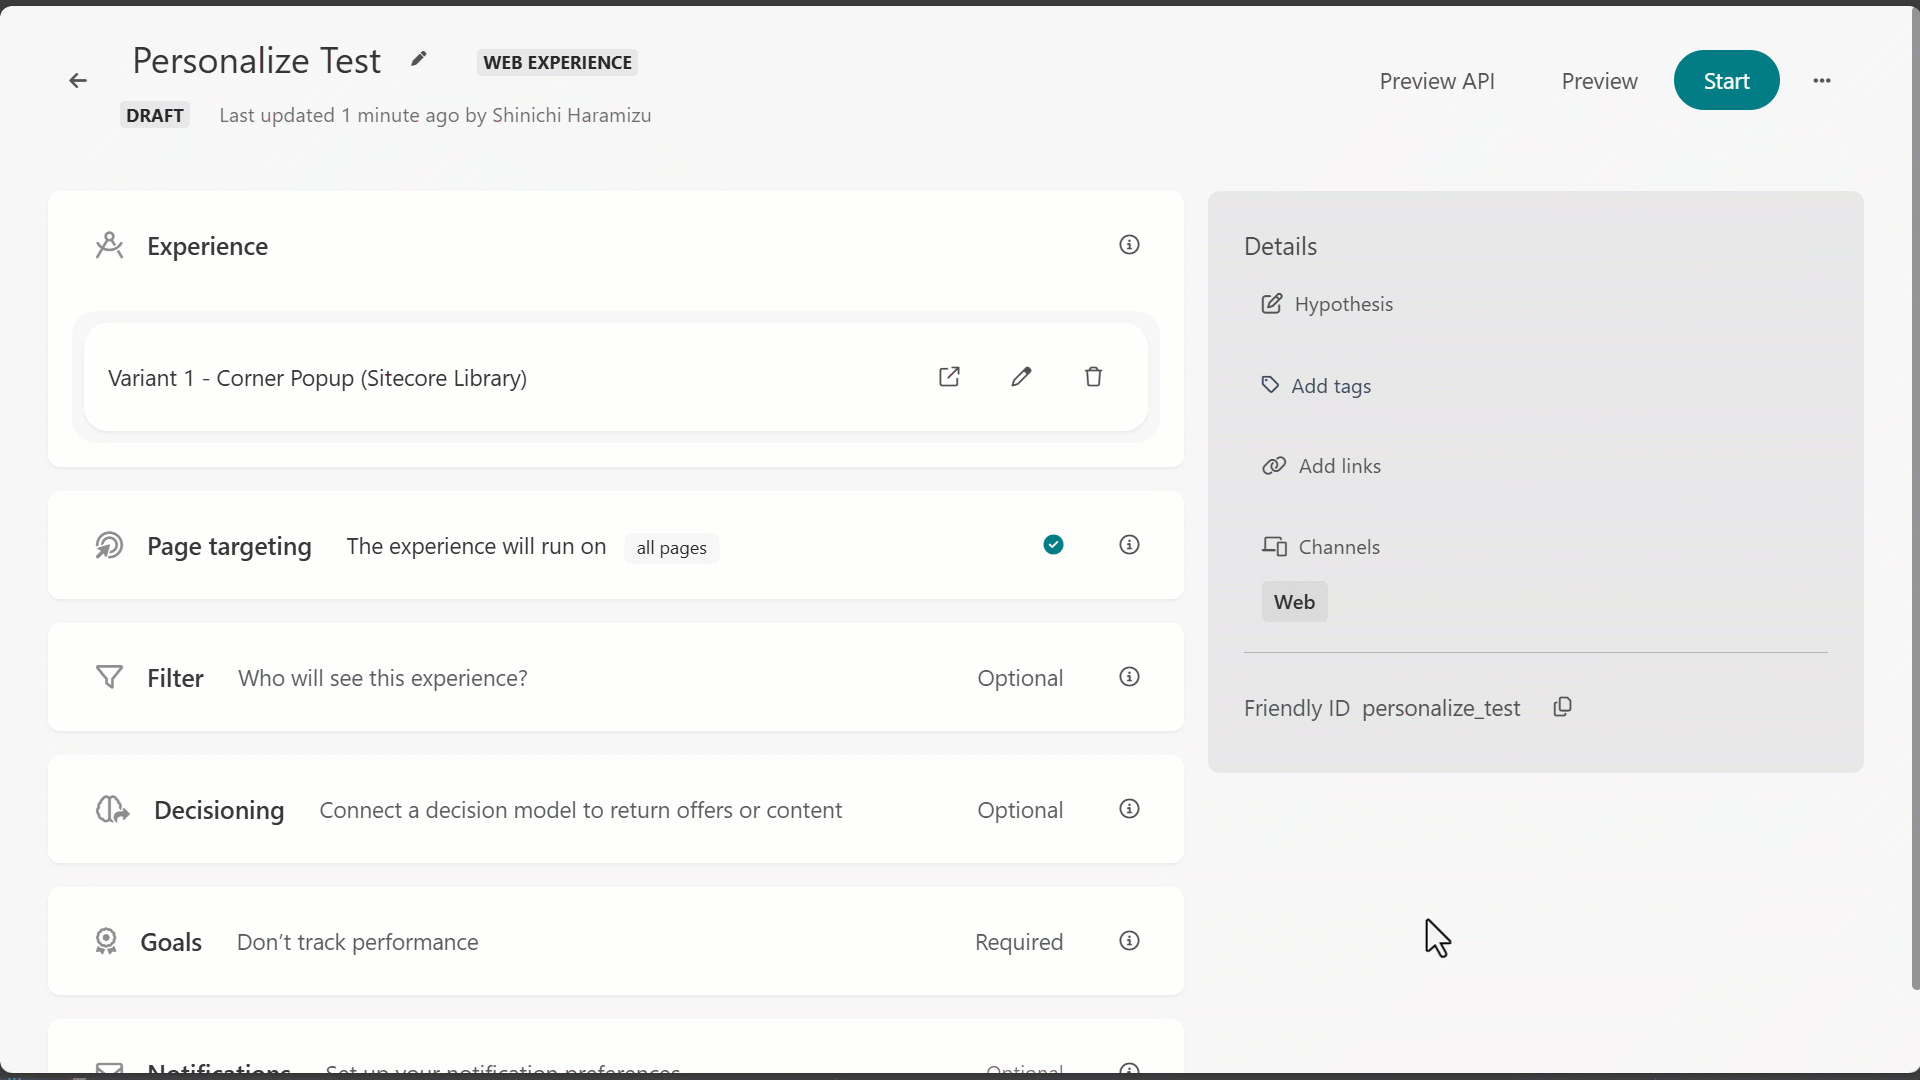
Creating an Experience
This time, we will use a template to display a popup for testing. First, create a test on the Sitecore Personalize screen.
- Move to the Experience list page
- Click the Create button to create a Web Experience
- Create an Experience named Personalize Test
- Set the created Experience as follows:
- Goal: Set to Don't track performance
- Page Targeting: Standard all pages
- Click Create variant
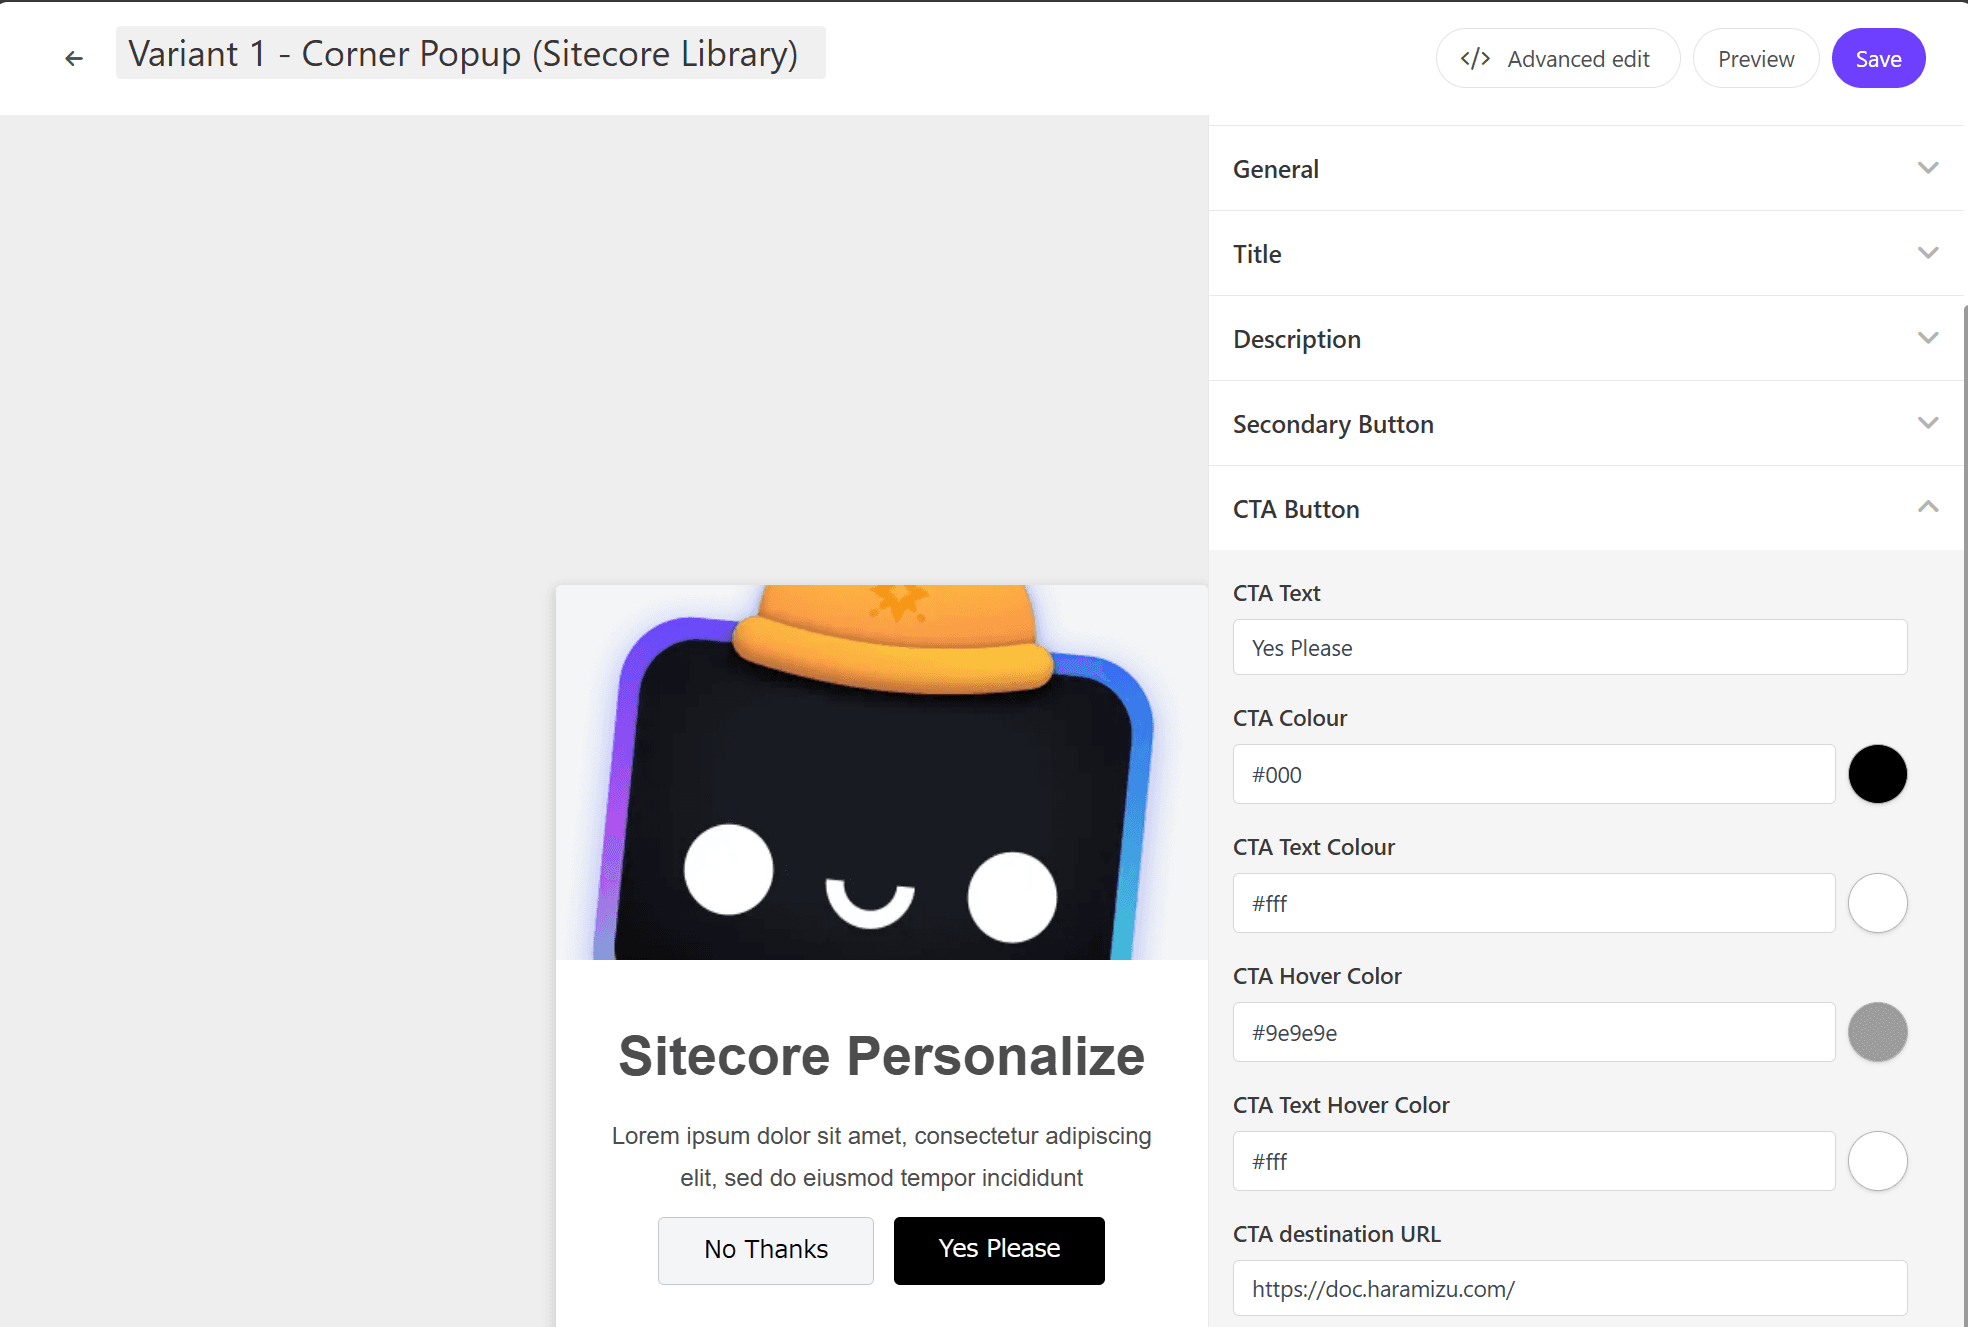
- Select Corner Popup (Sitecore Library)
The settings for the Corner Popup are as follows:
- General - Image URL: https://doc.haramizu.com/_astro/houston.CZZyCf7p_ZmSIFK.webp
- Title - Title: Sitecore Personalize
- CTA Button - CTA destination URL: https://doc.haramizu.com/
The Experience for testing is completed as shown below.
Running Tests with Tampermonkey
The Experience for testing is completed. This time, we will use Tampermonkey to run the Experience on the Sitecore documentation site.
With the extension already installed, access the above site and click the Tampermonkey icon to display the following menu. First, click Dashboard.
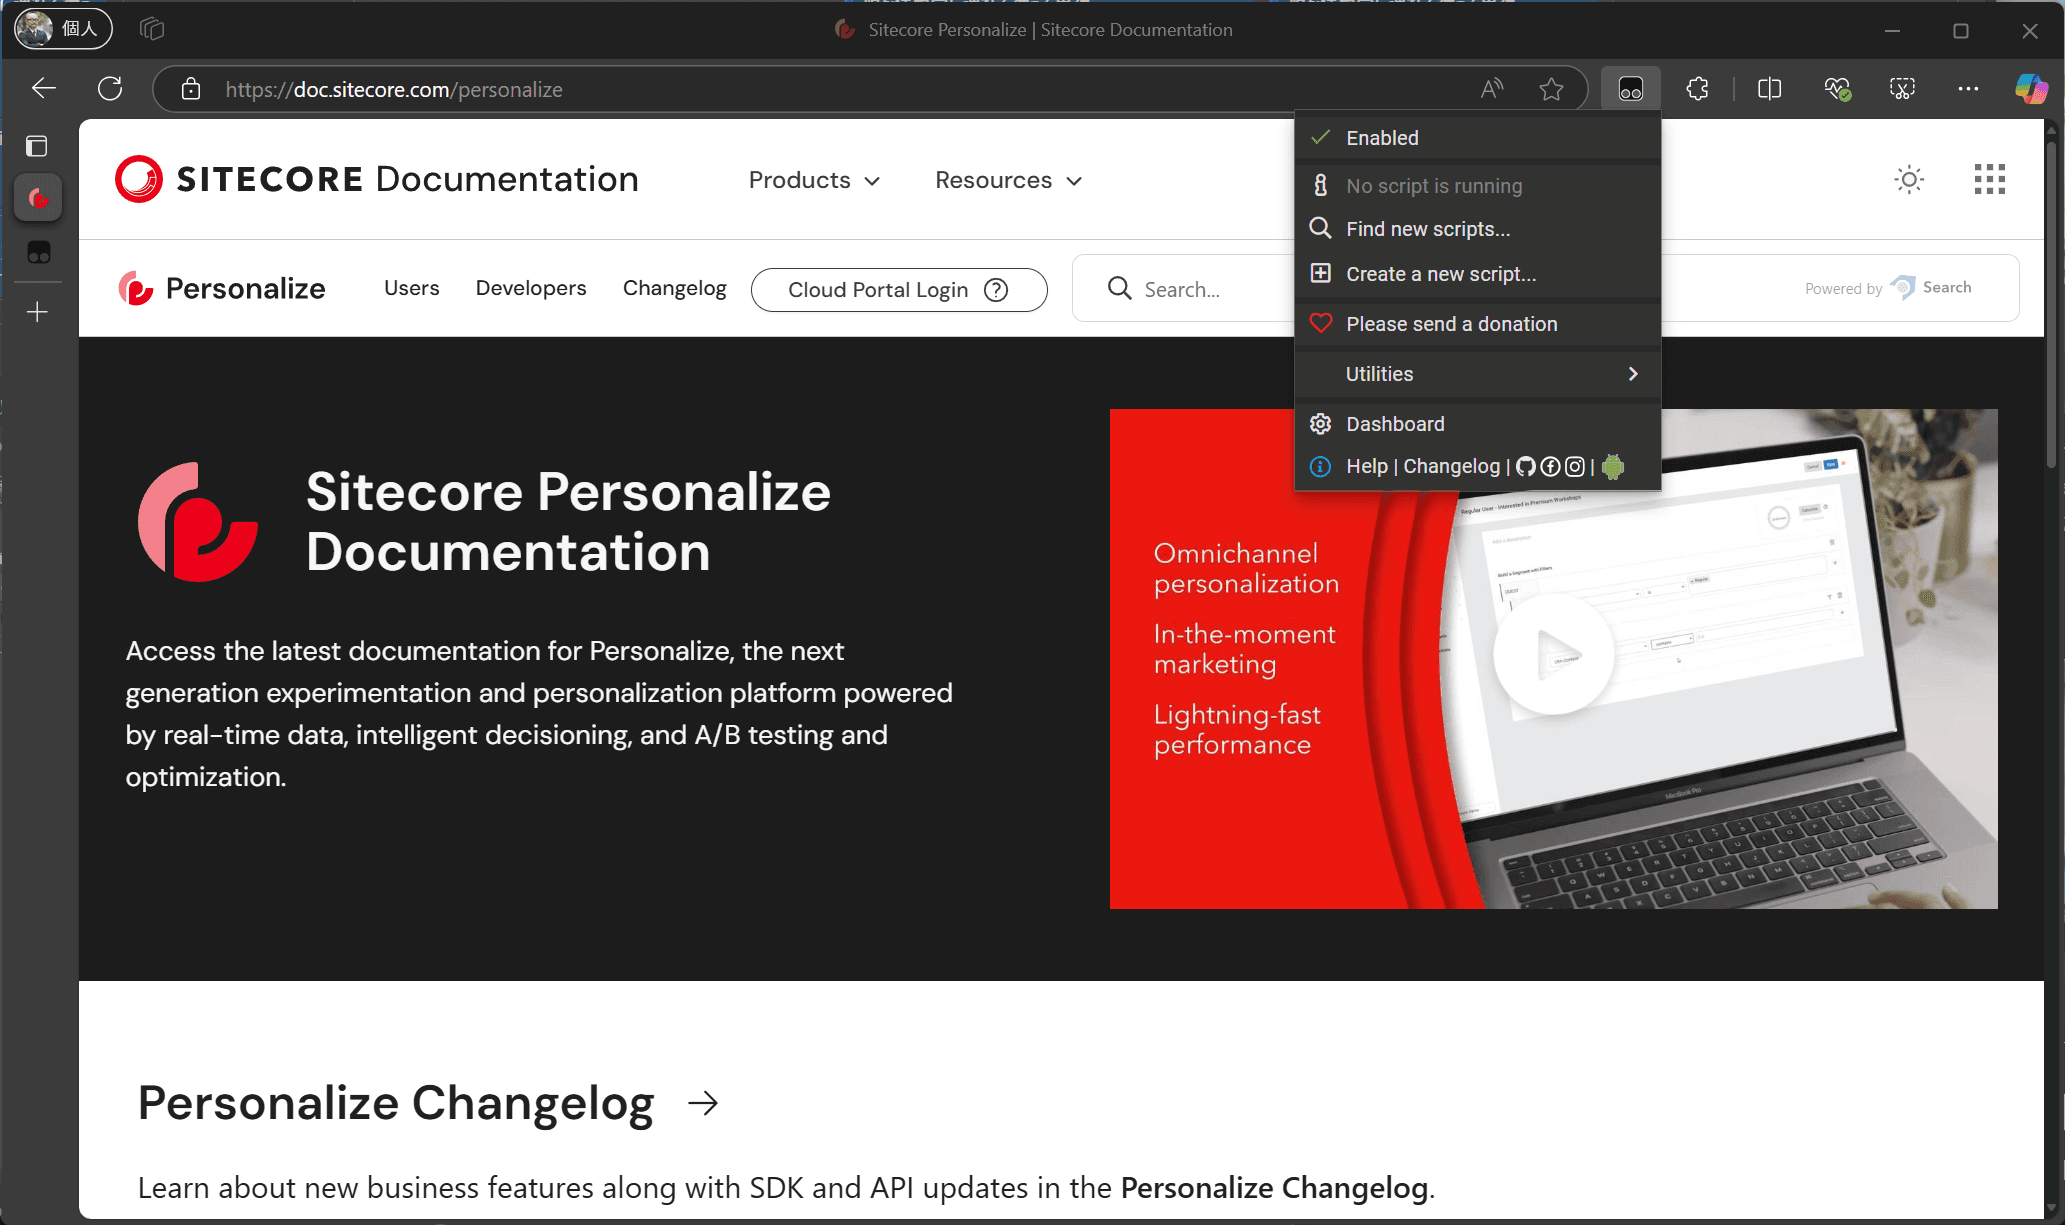
Since this is a new environment, no scripts are set.
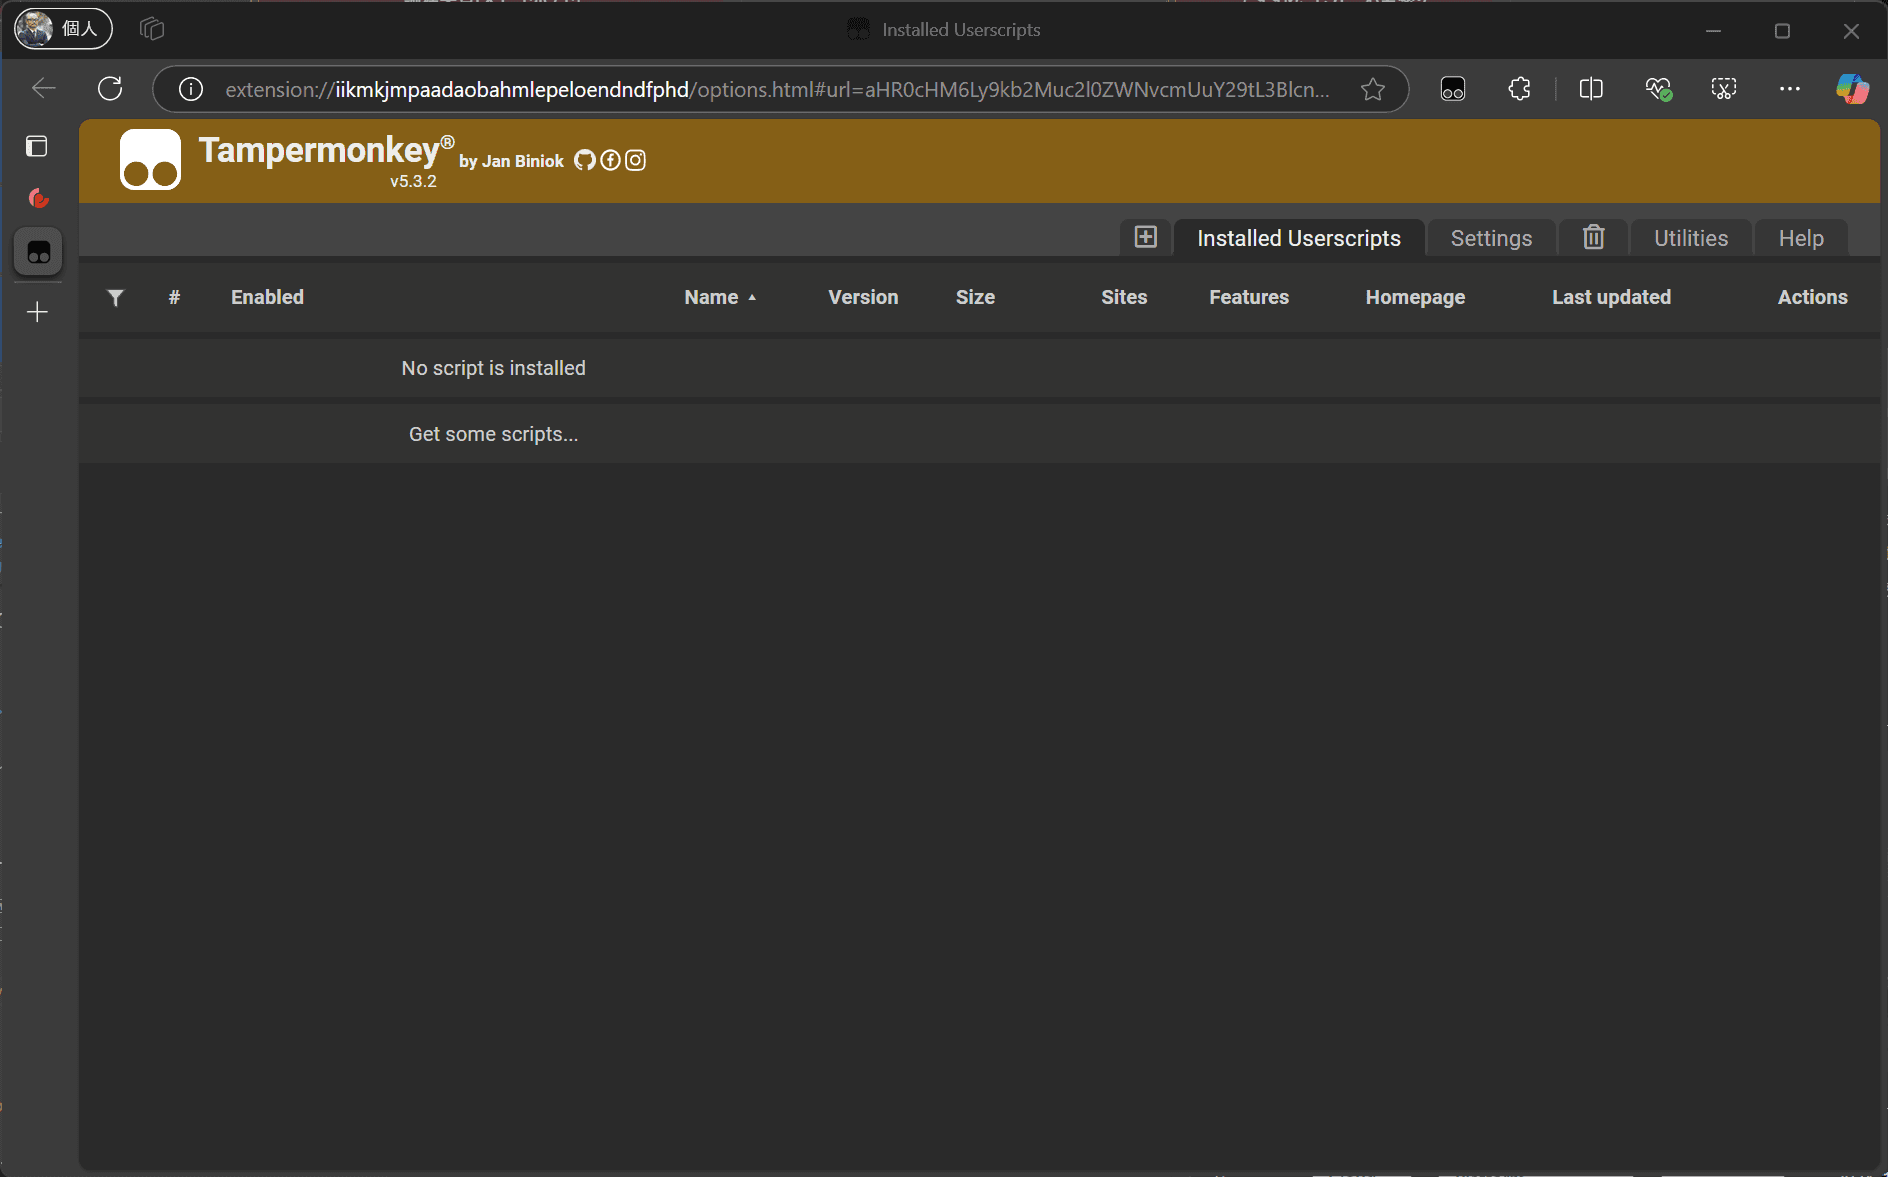
Currently, the Installed Userscripts tab is open. Click the + button on the left to create a new script.
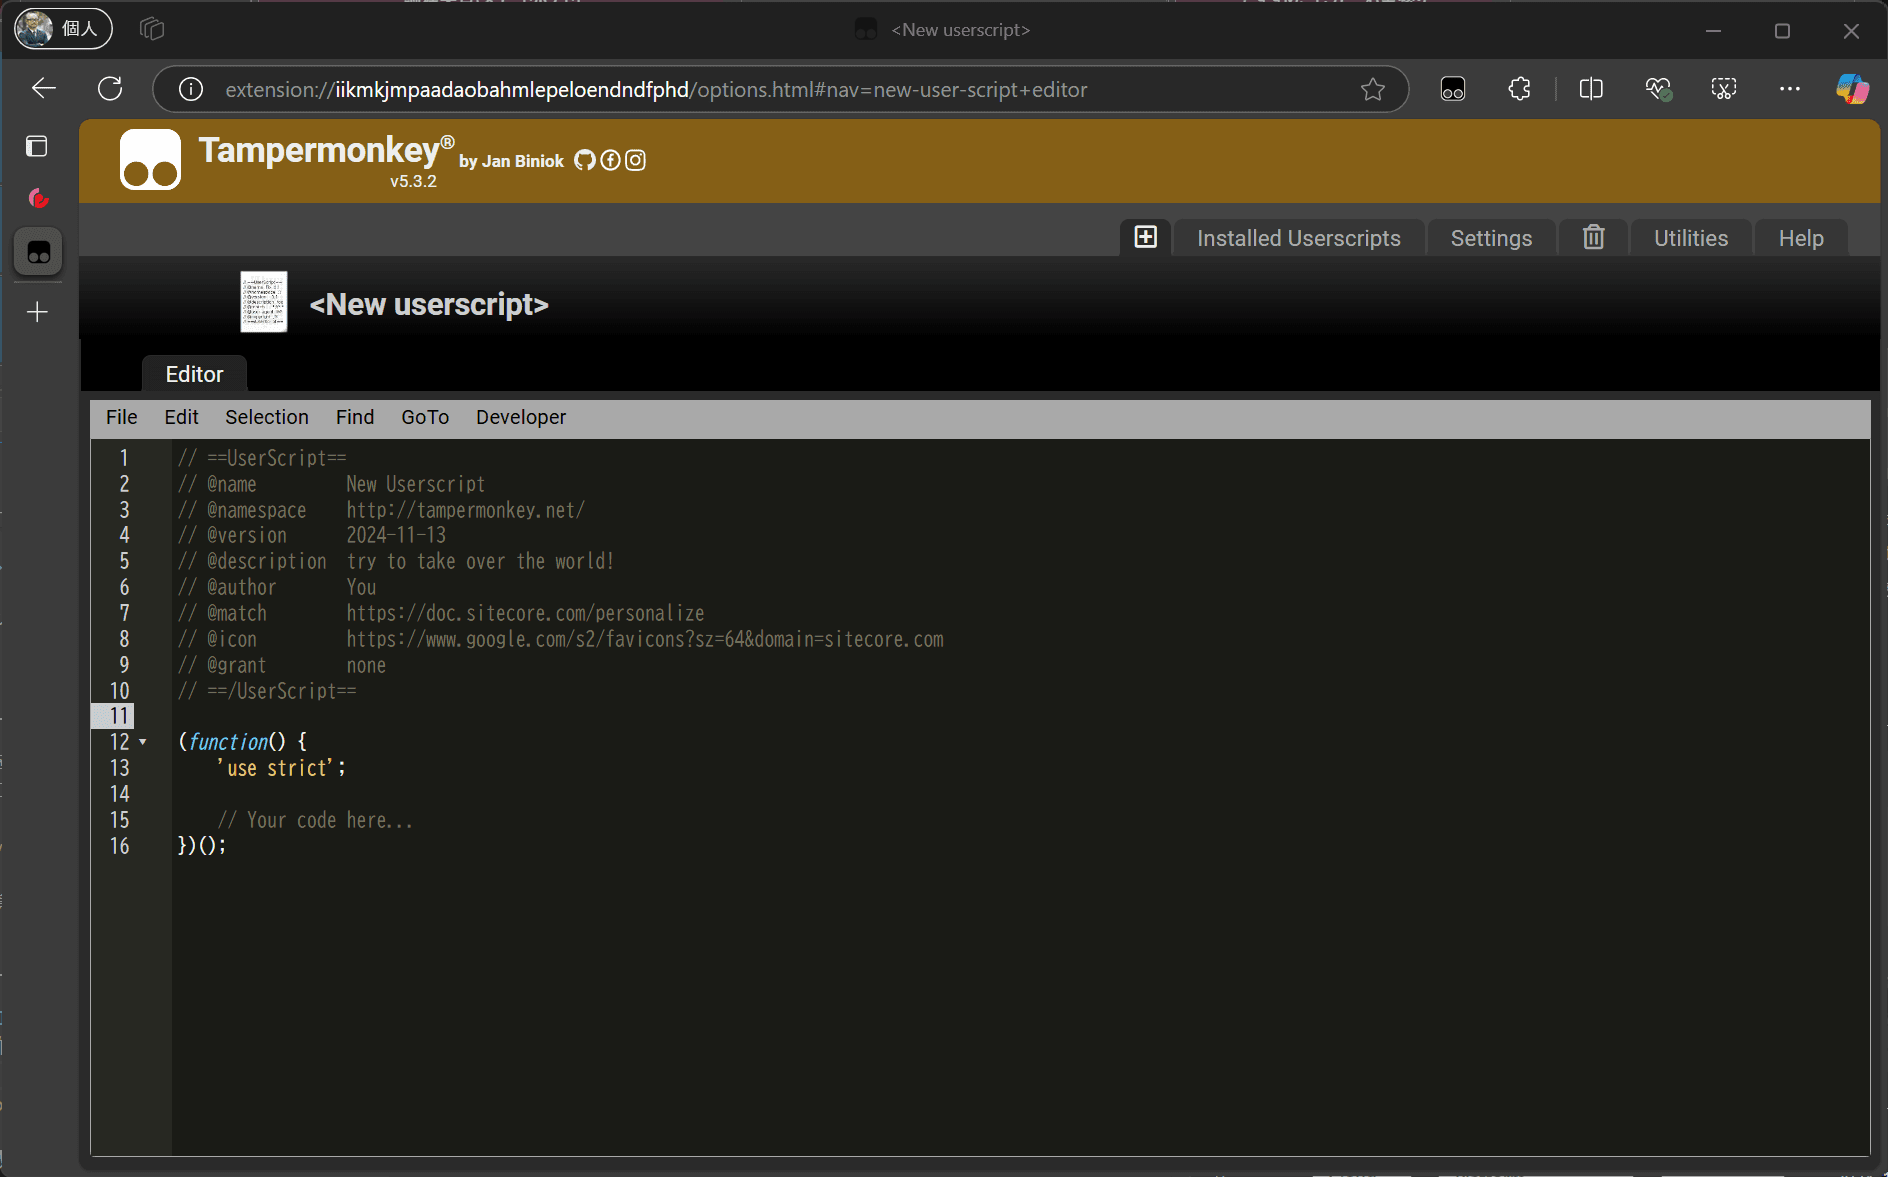
The default generated script is displayed. Let’s modify the code slightly.
| Name | Description |
|---|---|
| name | Script name |
| match | Conditions for the script to be active, * can be used |
| icon | Icon used in the list |
The prepared code is as follows:
javascript
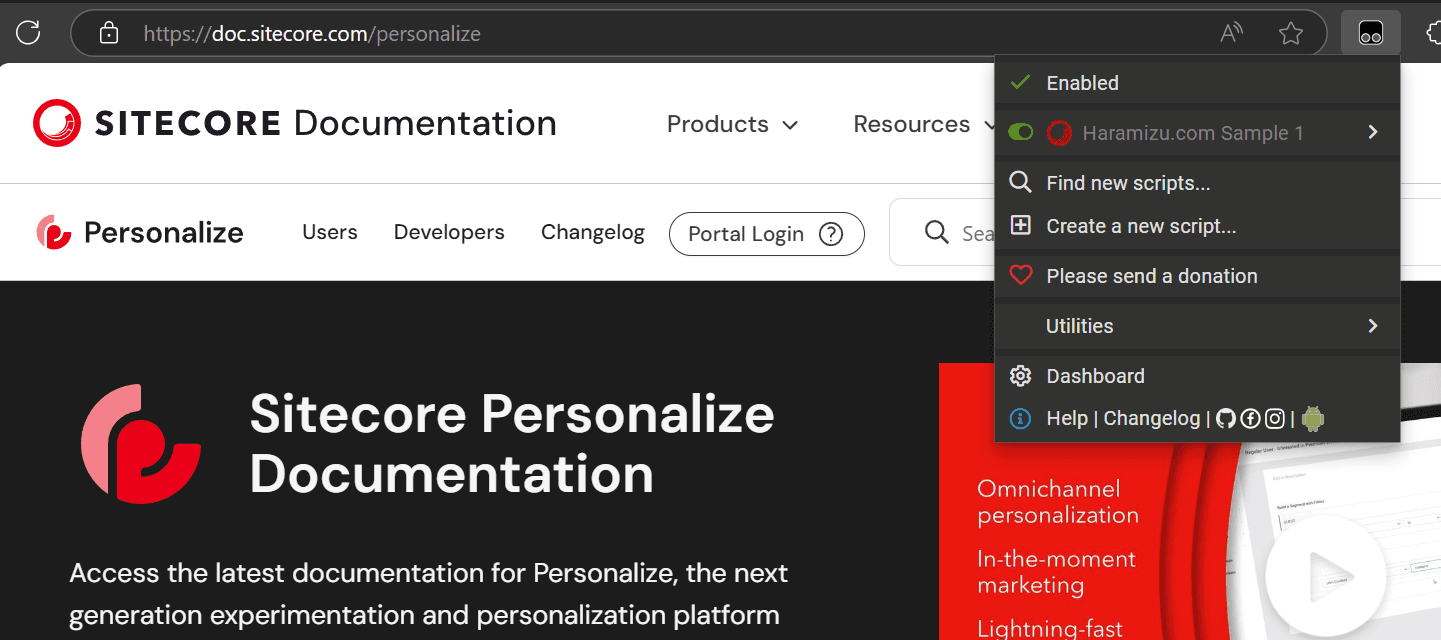
After saving the above settings, revisit the site to see that it is enabled as shown below.
Adding Engage SDK Script
This time, we will use the Sitecore Engage SDK for verification. The code created earlier contains nothing, only checking if it is enabled in Tampermonkey. Therefore, we will add standard JavaScript code. Below is the complete code.
javascript
You need to add the settings for Sitecore Personalize to the above code.
Connecting with Sitecore Personalize
The above sample uses the endpoint of the AP Region. If you use other data centers, obtain the necessary endpoint URL from the following page and change it.
Caution For data centers without Japan, settingwebPersonalizationtotruewill work. If you want to user Japan Region Instance, please change webPersonalization value to following.
javascript
Next, you need to obtain the values for YOUR-CLIENT-KEY and YOUR-POINT-OF-SALE from the Sitecore Personalize management screen.
YOUR-CLIENT-KEY is the key displayed at the bottom of the Company Information screen in Sitecore Personalize.
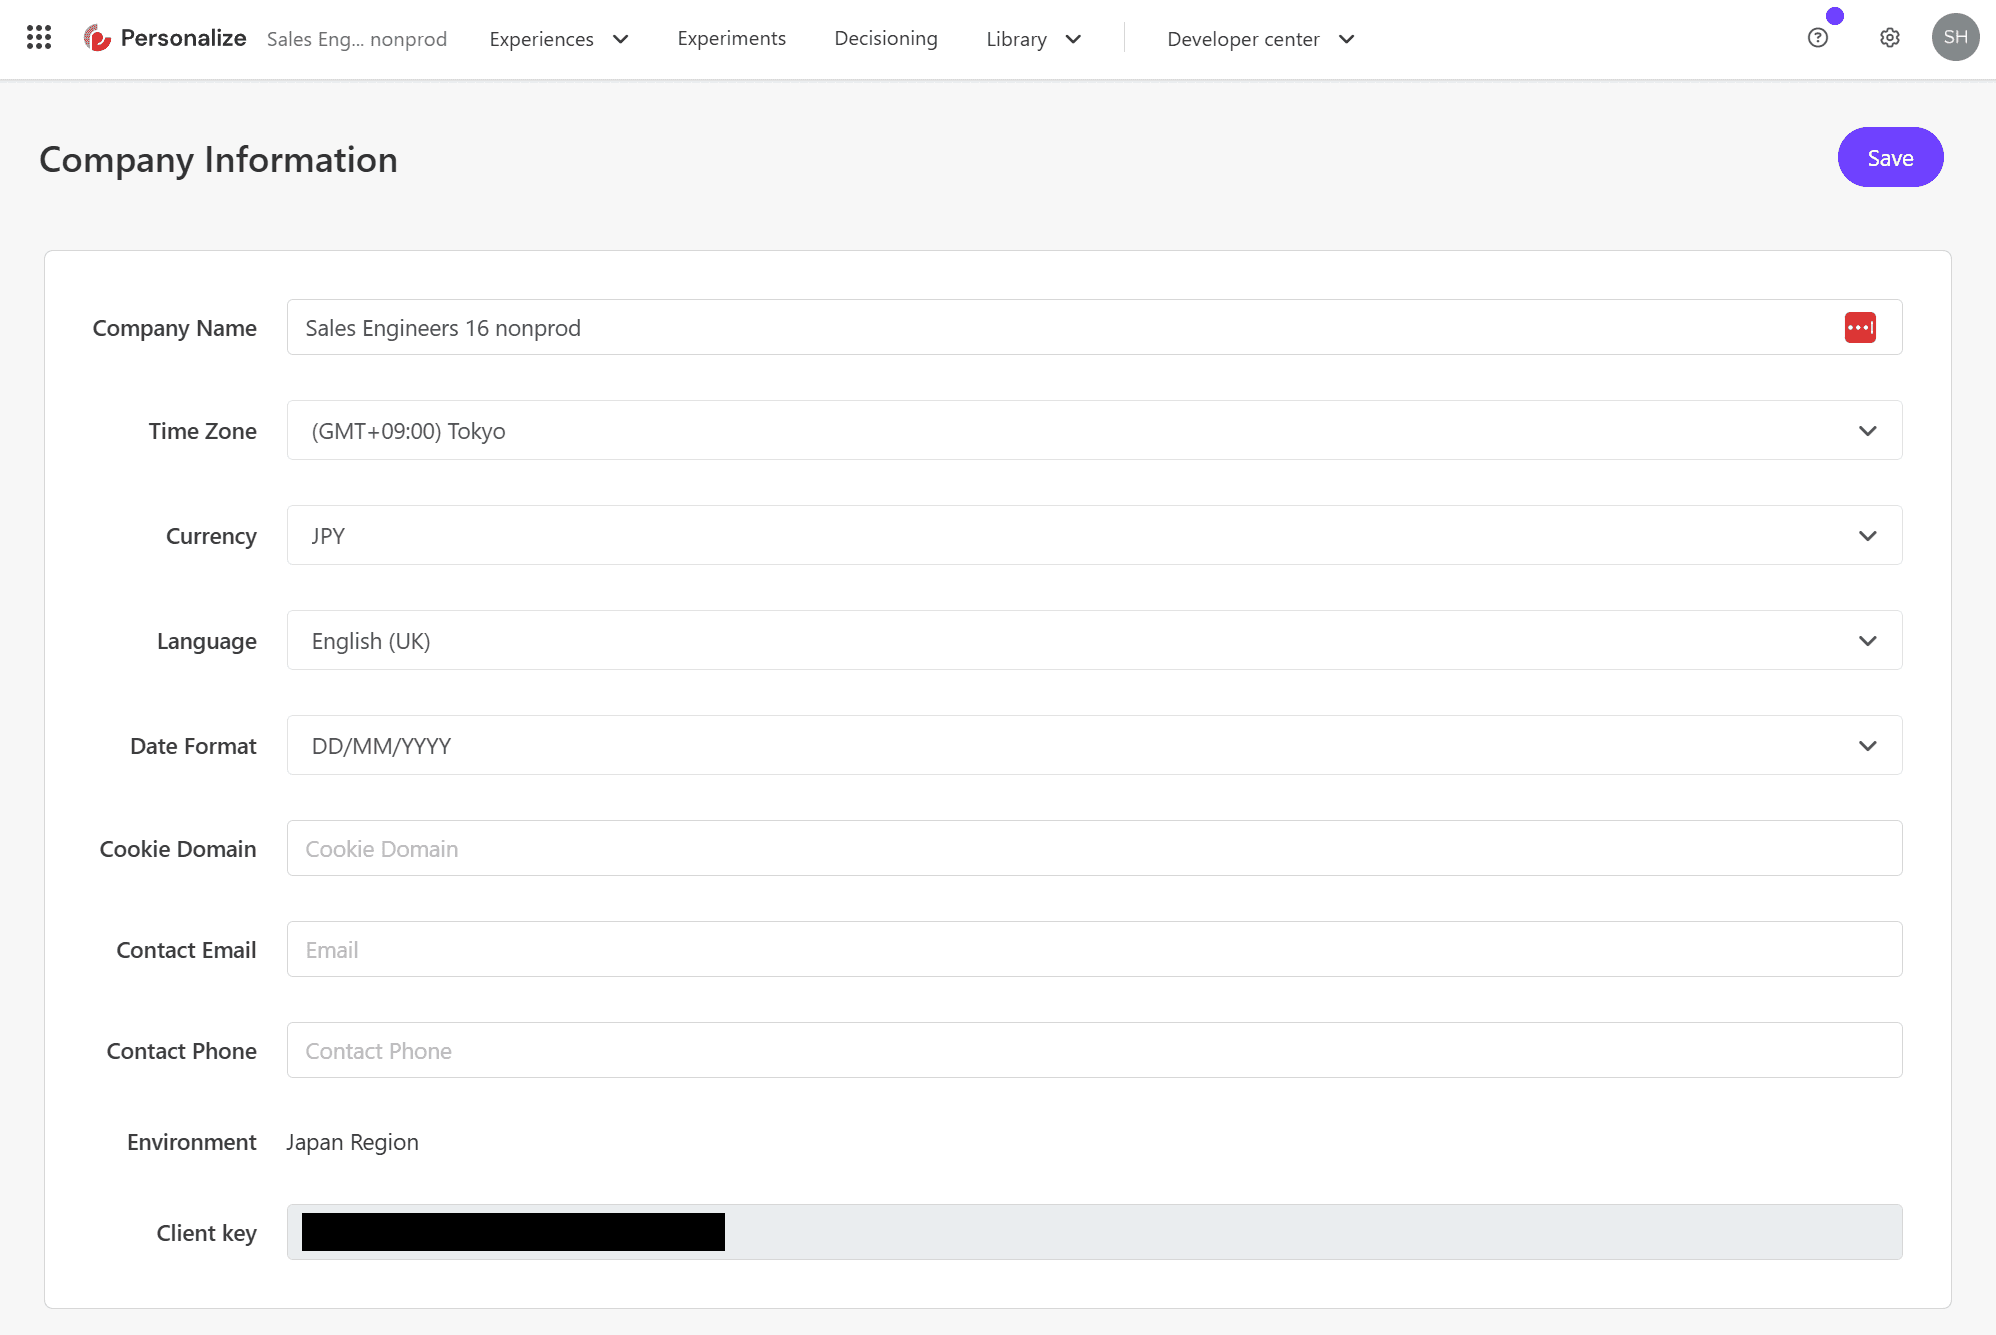
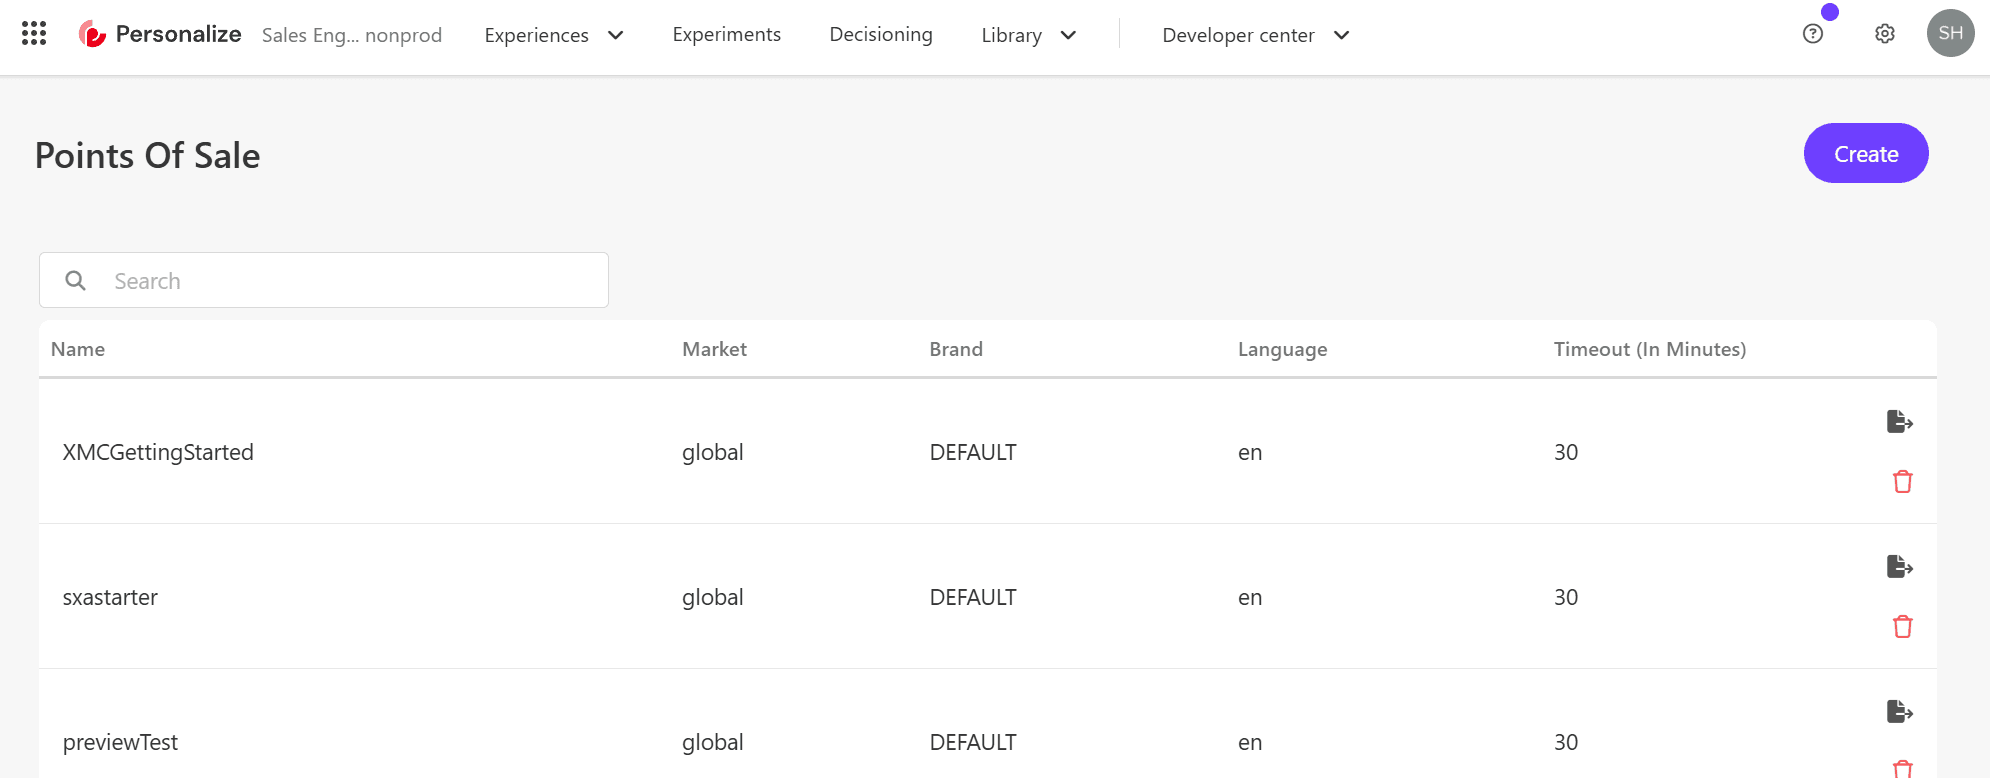
For YOUR-POINT-OF-SALE, select the point of sale to use from the list.
This completes the settings on the Tampermonkey side.
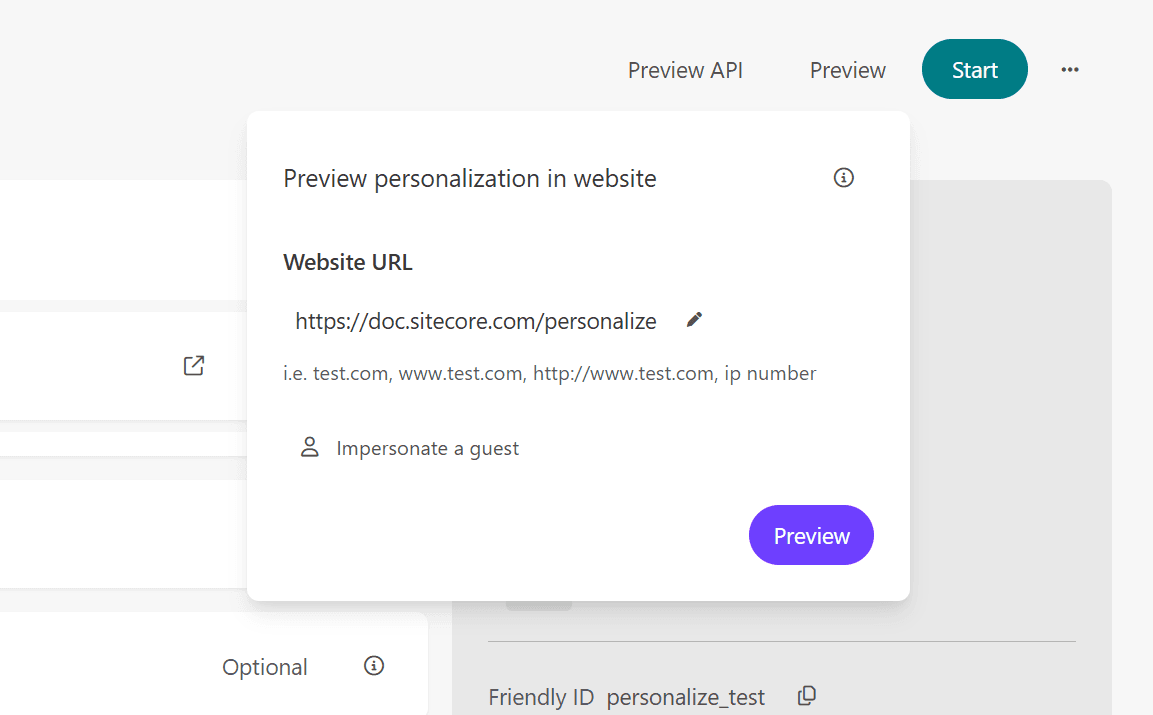
Preview in Sitecore Personalize
Move to the Sitecore Personalize screen again and open the test Experience created earlier.
In the upper right menu, there is a Preview button. Click this and specify the URL https://doc.sitecore.com/personalize.
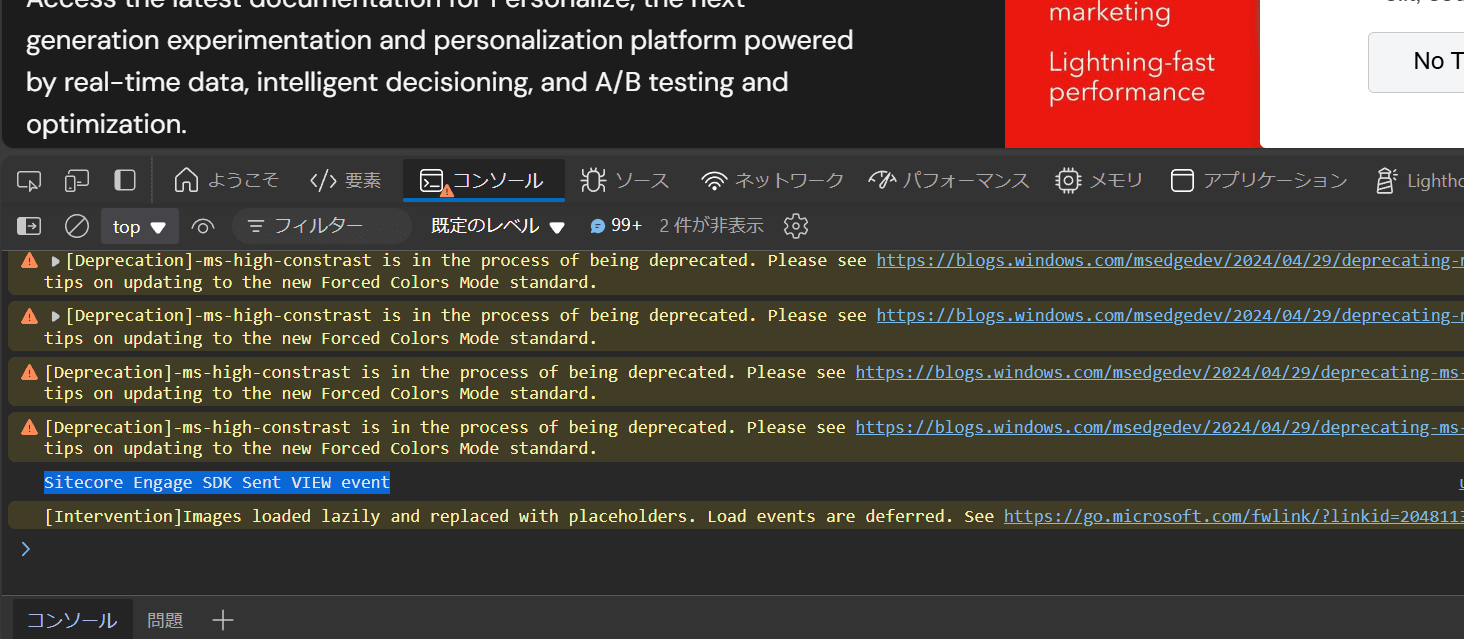
Clicking the Preview button confirms that a popup appears from the bottom right.
Opening the developer tools confirms that the Sitecore Engage SDK Sent VIEW event has occurred.
When using the Preview in Sitecore Personalize, a QA Tool button is prepared. Opening this tool allows you to check if it is working correctly.

Summary
This time, we used Tampermonkey to verify if personalization can be executed using browser-side scripts. After confirming that it works with Tampermonkey, it will proceed smoothly to apply it to the website.